Yacón (Smallanthus sonchifolius)

Description

Yacón, Smallanthus sonchifolius, is a sweet, crispy, and tasty perennial root crop. Despite its status as a perennial, yacón is typically treated like an annual, dug up once a year and replanted. Yacón grows to heights of six to eight feet tall and forms as a clumping herb. The storage roots are the most sought-after product. However, the main stem may also be eaten as a cooked vegetable. The storage roots are high in fructooligosaccharides (commonly used as a sugar alternative) and contain very few calories. Yacón is a very beautiful and productive plant!

Propagation

Yacón is propagated by offsets produced at ground level near the top of the crown. It may also be grown from stem cuttings.

Harvest when stems die back

Clean and separate larger storage roots from offsets

Plant offsets below soil surface

Care

Yacón likes loose soil, and prefers full sun or light shade. Once planted and weeded a few times, the plant will take care of itself. You may harvest within the first year, or leave the plant to grow multiple seasons for a much larger harvest.

Eating

Yacón is harvested once the stems die back and energy is transferred to the storage roots, usually six months to one year after planting. Storage roots are left out in the sun for a few days or weeks to sweeten up. Once the skin has slightly wrinkled, it can be peeled off and the roots consumed. Yacón is usually eaten raw, but is sometimes boiled or baked, made into a drink, or made into a sugar substitute (yacón syrup). Storage roots stored in a cool place will last a few months before deteriorating.

Where to obtain planting materials

I’ve seen yacón for sale at a few plant sales and quite a few individuals on island grow it. Ask someone growing it for some offsets for propagation.

My Garden

I’ve been growing yacón for over two years now. The initial places I planted it were too shady and the soil was too shallow. The plants would develop but not grow to their full potential, leaving me with a tiny harvest. I learned I needed to give them more sun and a larger root area. This year, I decided to dig up just two plants and allow the rest to go another year before harvest, in hopes that I will get a larger crop next season. The two plants gave me a small harvest but lots of propagation material; I will plant those out in more fluffed soil and fertilize more in order to gain larger harvests. I got my propagation materials from a friend’s farm in Kohala where they grow huge yacón plants with massive yields, so it does have the potential to be a highly productive crop. It just needs a little more cultivation on my end. Ever learning as I go along!

Happy Gardening!

Clove Basil (Ocimum gratissimum)

Description

Clove basil or bush basil, Ocimum gratissimum, is a large-statured, potent, perennial basil. This plant grows up to eight feet tall and wide and lives for multiple years. The leaves, flowers and seeds are edible, and are used medicinally to aid in digestion, soothing sore throats and skin irritants, as well as to relieve headaches, fever and common sicknesses. The leaves are used as insect repellent and natural disinfectant, and are commonly made into an essential oil.

Clove Basil. Ocimum gratissimum Leaves and FlowersClove Basil. Ocimum gratissimum Leaves and flowers 2

Propagation

Clove basil is usually propagated from woody cuttings. Seeds can be sown, but germination rate may be very low.

Clove Basil. Ocimum gratissimum Woody Stem

Woody trunk

Care

This plant is pretty much carefree and will grow in light shade or full sun.

Eating

Leaves are used in soups and stews; they are typically added during cooking, and again at the end of preparation, lightly cooked for garnish. Hand tearing the leaves, instead of cutting with a knife, allows the leaves to retain their color and not turn brown. Leaves are also used as a tea. Flavor is almost exactly like the spice, clove.

Where to obtain planting materials

Ask a friend growing clove basil for some cuttings.

My Garden

I’m always on the lookout for new-to-me herbs, spices and vegetables. Clove basil came to me while visiting some friends’ farms on the northern end of the island. I get really excited when I find large, strong, and fast-growing plants to add to my repertoire. These plants play an important role in covering soils and aiding in complexity within ecosystems. At this point, I really enjoy mixing clove basil, coleus, cassava and Plectranthus barbatus together with trees in a nice perennial polyculture. All of these plants can be cut back at any point for mulching to feed the tree and all provide numerous beneficial activities. Multi-diverse, multi-strata systems follow nature as closely as possible; it seems logical to follow her example!

Clove basil grown with: cassava, sweet potato, taro, pigeon pea, sugarcane, roselle, coleus, ti, kava, turmeric, Plectranthus barbatus, banana, cocona, comfrey, edible hibiscus, Xanthosoma brasiliense, and kukui

Happy Gardening!

Cosmos (Cosmos caudatus)

Description

Cosmos, wild cosmos or Ulam Raja, Cosmos caudatus, is an incredibly productive edible/medicinal plant. This plant is an annual, but can be regularly managed as a short-lived perennial. The leaves are eaten for their high mineral and antioxidant content, which is believed to contribute to increased blood circulation, bone strength and general good health. Wild cosmos creates a lot of biomass and can reach up to nine feet tall by about four feet wide. The plant starts off slowly, growing to a height of about two feet in the first few weeks, and then takes off to become the giant it wants to be. They usually don’t start flowering until they are four to five feet tall and flower continually until their death.

 Propagation

Wild cosmos is grown from its prolific seeds. Seeds are sown at the soil surface. However, they will sprout through fine textured mulch as well.

Care

This plant is carefree. Sprinkle around seeds, wait and watch them grow. Their lifecycle seems to be about nine months if left unchecked. To prolong their life, I usually allow them to seed heavily for a little while, collect all the seeds and then cut the plant back to waist height. This will spark them to regrow vigorously, again; this process can be done continuously.

Eating

The tender young leaves and stems are commonly eaten raw. Eat from a plant that has not yet flowered as the flavor becomes more intense after flowering. If managed by regularly pruning off flower stalks, the plant will continue to grow leafy material suitable for consumption.

Where to obtain planting materials

Ask a friend for some seeds. I’ve never seen this plant for sale, and I only recently discovered that it’s edible, and what its scientific name is.

My Garden

Wild cosmos is one of my staple biomass-creating plants in my systems. I typically create successional cover crop mixes creating a continuous blanket of biomass to protect soils and to create living mulch to cut and feed to my other cropped plants. Where I have it growing as a hedge, it helps with weed suppression, by shading and preventing germination of less desirable seedlings. Cosmos flowers attract lots of bees and other pollinators!

Happy Gardening!


Shallots (Allium cepa var. aggregatum)

Description

Shallots, Allium cepa var. aggregatum, are tasty perennial clumping bulbs that resemble garlic and/or onion. Shallots grow one to two feet tall. Bulbs, leaves and flowers are edible and may be eaten cooked or raw. Shallots have a very interesting growth habit; they grow from a single small bulb that grows larger before creating multiple small bulbs that spread out from the original, forming a clump.

Bulb harvest from 4 plants

Propagation

Individual bulbs are planted just under the soil surface six inches apart. I haven’t found solid evidence on seed production and am currently running experiments to see if they will set seed. Rumor has it that true shallots do not set seed, but onion-like shallots do produce seed. Somewhat confusing.

Purchased Shallots separated and ready to plant

Plant with rootlets down and just below soil surface

Care

Shallots prefer full sun, a fairly weed free zone and good drainage. Growing in polyculture works well as they will fill a small tight niche while other plants may grow taller or wider nearby.

Eating

Shallot bulbs are delicious! Green leaves may be eaten exactly like green onions. If harvesting for leaves, remove a few from multiple plants to obtain a harvest rather than take all from one plant, which may set back or damage that individual.

Where to obtain planting materials

Shallot bulbs may be purchased from the farmers market or grocery store, found near the onions or garlic. Although sold for consumption, you may plant them to grow and produce more.

My Garden

Onions and garlic have always been two of my favorite and most used staple ingredients throughout my life. When I moved to Hawaii, I realized I could no longer grow those plants, as we do not quite have the right conditions (cold) for them to grow effortlessly. In my search for a replacement for those two, I came across the shallot, which I’ve decided is the tastiest replacement! This is the first time I’ve grown shallots and I’m super excited as I watch them grow. I stuck some bulbs into the ground about two months ago and now they are clumping out and starting to flower! How exciting!

Shallots with: Thai Basil, Catnip, Amorphophallus konjac, Squash, Tithonia rotundifolia, Ginger, Boesenbergia rotunda, Sesbania javanica, Pigeon Pea, ele ele banana, Broadleaf Papaya, Cosmos, Sugar Cane, Kava, Kalo, Jobs Tears, Cassava, Alternanthera dentata

Happy Gardening!

Awapuhi/Shampoo Ginger (Zingiber zerumbet)

Description

Zingiber zerumbet, ‘Awapuhi or Shampoo Ginger, is a perennial multipurpose herbaceous plant. The shoots, rhizomes and inflorescence liquid are all consumable. The rhizome has traditionally been used in medicinal applications as an anti-inflammatory, anti-diarrheal, de-wormer, and for various types of pain management. The liquid from the inflorescence is drinkable. Perhaps the most well known use for ‘awapuhi is the inflorescence liquid as shampoo or conditioner for the hair and skin, as it provides a soothing, shiny and smoothing effect. This ginger relative grows to heights of about two to four feet. Like some other gingers, ‘awapuhi dies back annually to store its energy in its roots/rhizomes. From these rhizomes, the plant re-sprouts in spring, when the weather is ideal for them. ‘Awaphui can form dense thickets, so allow them to have a lot of space, or plan to manage them annually. Despite its tendency to spread, it has not been included on any invasive species lists and has been on the islands for over 1,000 years (i.e.: it’s generally not a problematic plant).

To utilize the liquid from the inflorescence: use a cup or jar and hand-squeeze the inflorescence until the juice comes out. Milking may be done repeatedly if left on the plant. If using as shampoo, you may or may not decide to rinse out the liquid dependent upon your desires.

Hand squeeze to milk inflorescence

Propagation

‘Awapuhi does not produce seed and is only propagated by division. Dig up rhizomes when dormant; divide and replant for plant replication in a separate area. Rhizomes spread on their own naturally.

Rhizomes sprouting

Care

This plant is very carefree. Plant it, let it grow and watch the flowers emerge. This plant will thrive in heavy shade and waterlogged soils. In other words, it can be planted in places where most plants will not live.

Eating

Shoots are spicy and consist of the still folded leaves as they emerge. Mature rhizomes are intensely bitter; young rhizomes are not as powerful.

Where to obtain planting materials

Ask a friend growing the plant for some rhizomes! I’ve seen this plant for sale at local nurseries, too. ‘Awapuhi is pretty easy to find, as it was a canoe plant, an ancient Polynesian introduction into Hawaii.

My Garden

When I first started my garden, I was really interested in finding all the Polynesian canoe plants. It took me awhile before I found my first ‘awapuhi plant. But finally, I got a small bit of rhizome from a neighbor that slowly established itself. A few months later, another friend gave me a bunch of his harvested “edible ginger” (Zingiber officinale). I went to eat some of the ginger and it was so intense! I used too much of it and made my meal unpalatable. For a few months, I was confused about that whole situation until I allowed some of the rhizomes he gave me to grow out. As soon as the flower came out, I knew what had happened! I accidently ate ‘awapuhi! At least I obtained some amazing medicinal benefits from that experience. Two years later, I was able to dig up that original clump and spread it around to create many more plants, some of which I planted in a waterway where not many other plants want to grow. Now I get it watch it thrive and utilize the many flowers it creates!!

Happy Gardening!

Bamboo (Multiple Species)

Description

Bamboos (multiple genus and species) are huge perennial multi-purpose grasses. They may reach heights from 10-150 feet dependent on species. Bamboos are typically divided into two types: the runners and the clumpers. Runners grow from spreading rhizomes that sprout and continually ‘run’ from the original planting location, which could spread indefinitely, creating major invasive potential. New growth on clumpers gradually radiates out from the original planting in a relatively predictable pattern. Clumpers are generally more desirable as they are not as aggressive and do not readily spread into unanticipated locations. I only recommend planting clumpers as they can be more easily maintained.

Bamboos may be utilized in numerous ways. The tender new shoots may be eaten and the older, more mature stalks, or culms, may be used for building or as containers. There are many uses for bamboo and a lot of information on bamboos.

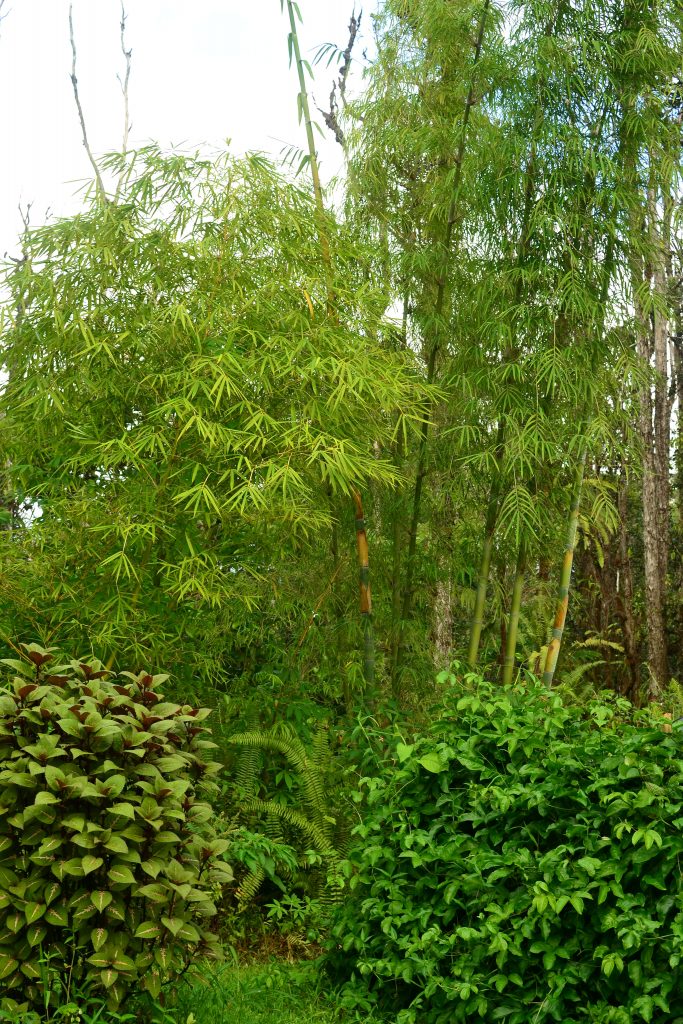
Bambusa ventricosa and Nastus elatus

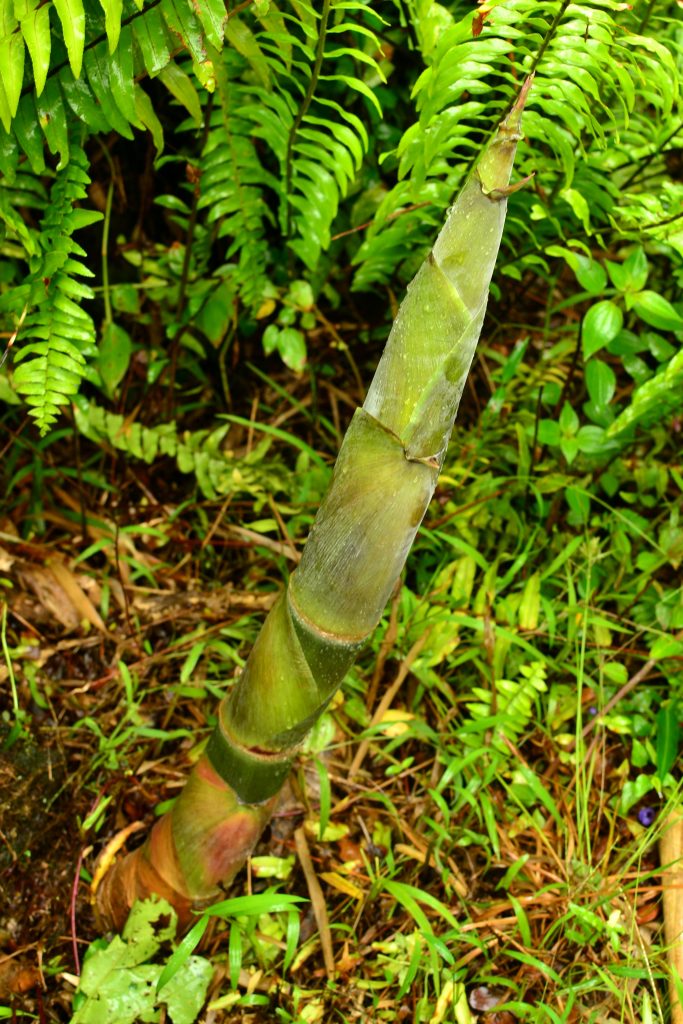
Nastus elatus – new shoots edible raw
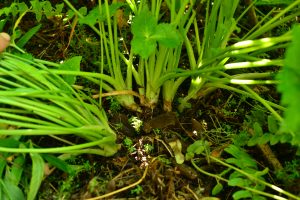
Propagation

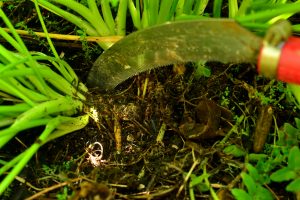
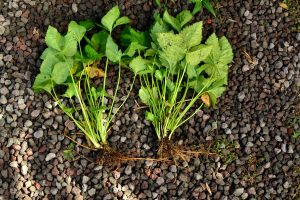
Propagation is from division, as seed is not typically produced. Dividing a clump may be done in numerous ways, being species dependent. The easiest way I’ve found for propagation is to take a mature culm, cut it off the parent plant, strip off leaves and cut the culm into segments of at least four nodes. Dig a narrow trench to allow the culm segment to fit horizontally into the trench fully below the soil surface. At this point you allow the culm to do its thing for a few months (four to six months, usually) and they will send up new shoots when ready. Once you notice the new shoots, you may dig up the originally planted culm and with a handsaw, divide dependent upon how many shoots emerged. Pot them up individually and you now have a clone, or multiple clones from the parent clump.

Care

When young, plan to weed regularly; bamboos start slowly and have the potential to be overtaken by other vegetation. It seems there are two “seasons” for bamboo: the above ground growing season and the below ground growing season. So, this means that you only see visual growth six months of the year. You may think they are dormant or not growing, but they are in fact getting ready for their intense above ground growing season by working underground. Once they get going, regular fertilizing will enhance growth.

As clumps age, regular maintenance will be necessary. Remove any dead/fallen over stalks. Dependent upon on how you decide to utilize the clump, that will determine how it should be managed. Culms can be selected out for straight growth (timber applications), or thinned for an easier bamboo shoot harvest. Regular pruning of lower branches creates a trouble-free working space and allows the bamboo to look “cleaner.” All bamboos have different growth patterns; be sure to research what to expect before selecting species. I prefer bamboos with minimal to no lower branches as they are easier to work and walk around.

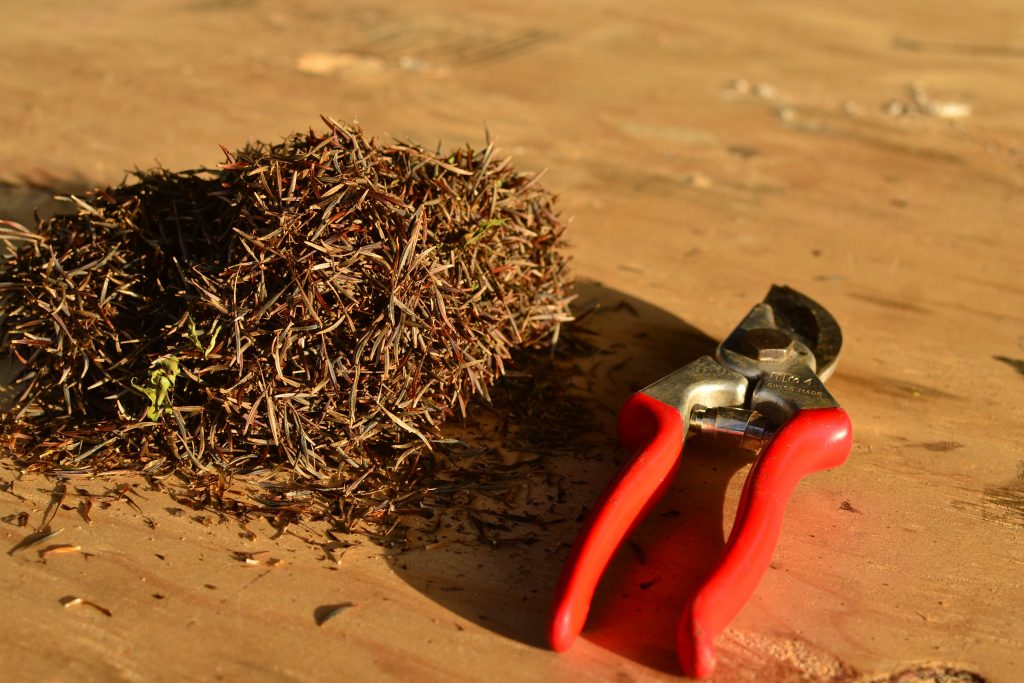
Quick tips for mature culm management: Get yourself a nice bamboo specific handsaw – this will allow for nice quick detachment from the parent plant; always cut bamboo at the nodes. If using bamboo for building, use a ring of tape around the culm above your cut line to prevent the bamboo pole from splitting during cutting. Curing may or may not be useful for specific bamboo purposes. Look into the multiple methods for curing. I’ve had uncured culms last two years or more without any decomposition issues.

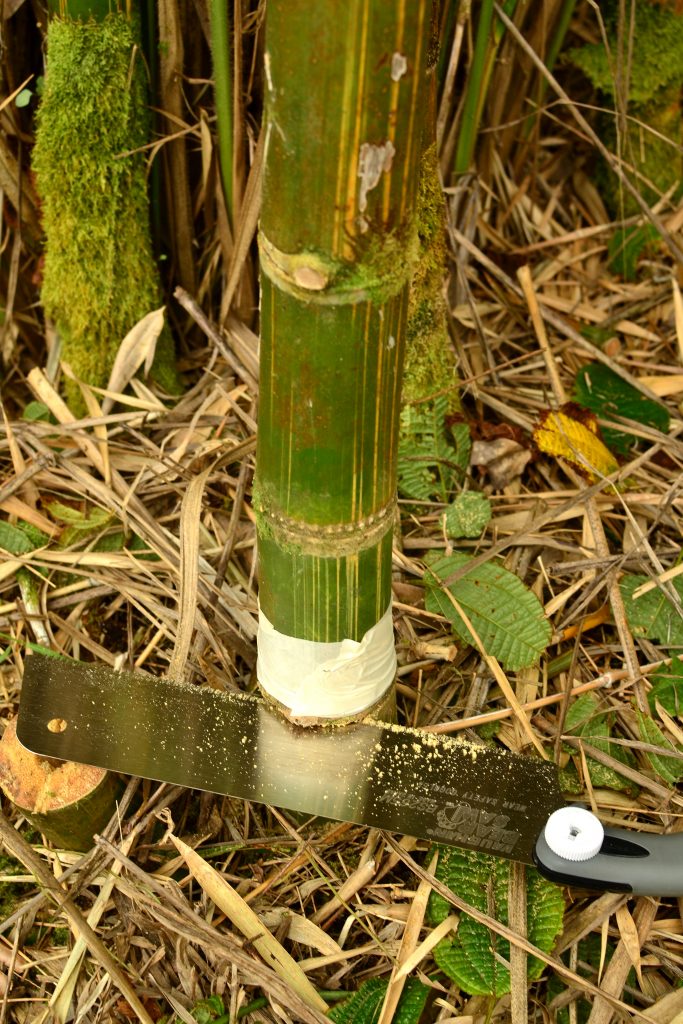
Use bamboo specific handsaw for timber management. On thin walled bamboos it may be ideal to use a tape ring to prevent bamboo from splitting when cutting

Eating

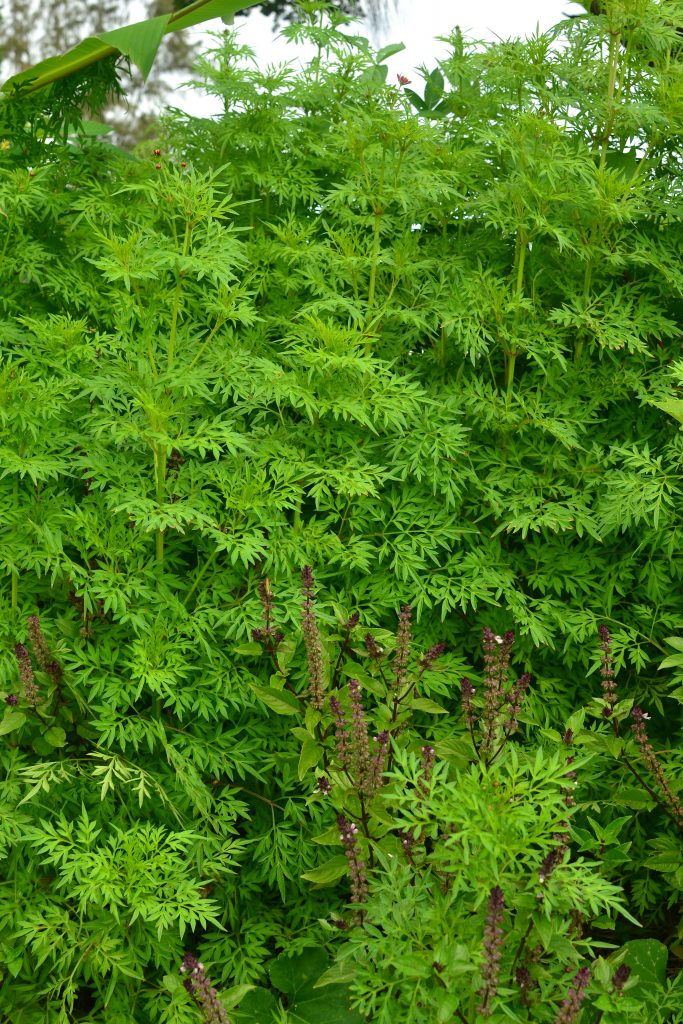
Bamboo shoots are delicious! Careful selection of species allows for selection of desirable traits. My most recommended species is Nastus elatus as this plant plays nicely with others; it has an upright habit with minimal to no lower branching. This plant also produces new shoots that are edible when raw. (Not all bamboos are edible raw, and many contain higher levels of cyanogenic glycosides that needs to be cooked for a while before it becomes edible.)

When new culms appear, they start off and sprout quickly and grow a few inches before stalling. During this period, they are gathering energy for the rest of the growth of that culm. This stall period is when you want to harvest shoots for consumption. Simply cut off new shoot as low as you can. Peel off outer sheaths to reveal a tender – usually white – inner core. That is what gets eaten.

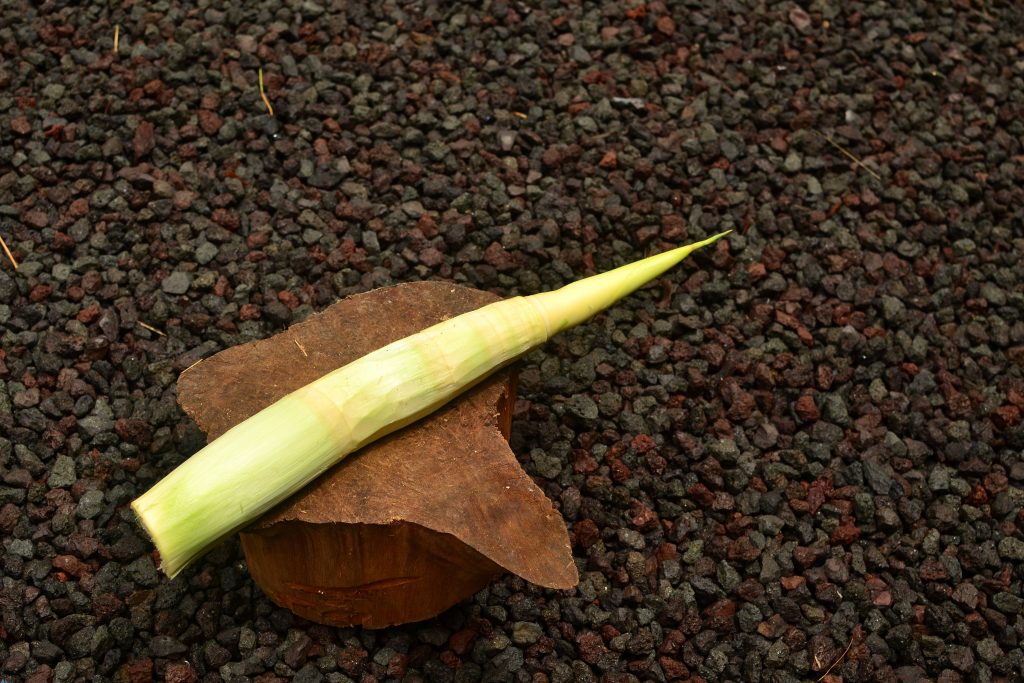
Edible shoot with outer sheaths removed – ready for consumption

Where to obtain planting materials

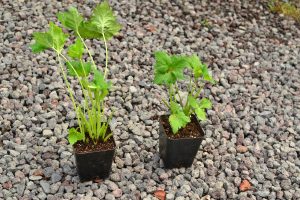
There are a handful of nurseries that sell potted plants (usually quite expensive). Or ask a friend with a clump mature enough to try to divide from. Try various methods for propagation to determine what works best, or do some solid research and figure out what other people suggest to propagate that specific species.
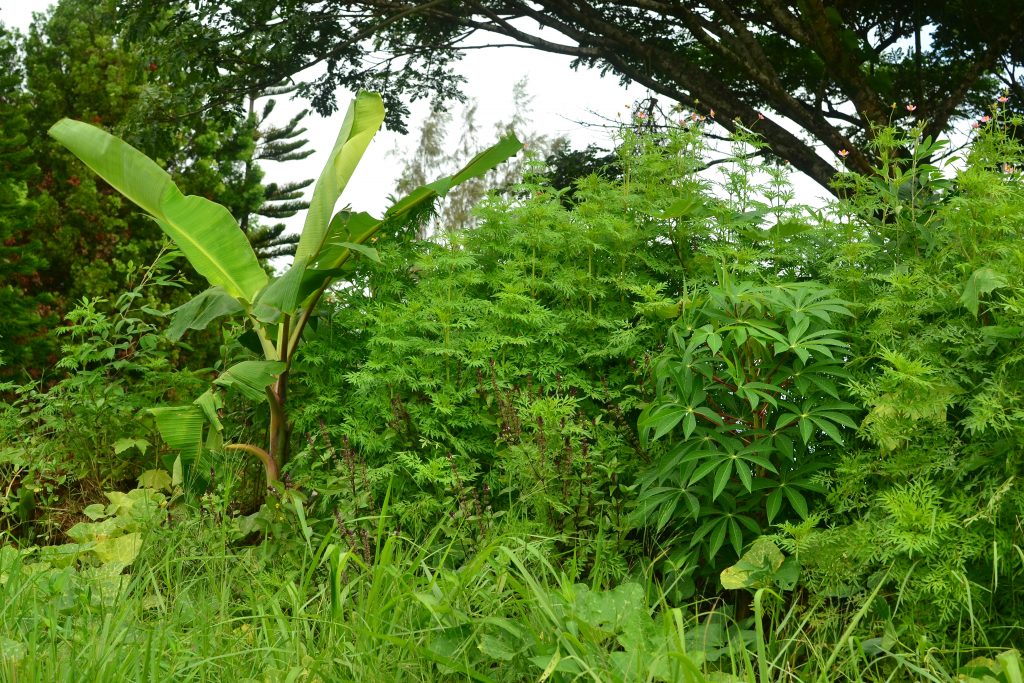
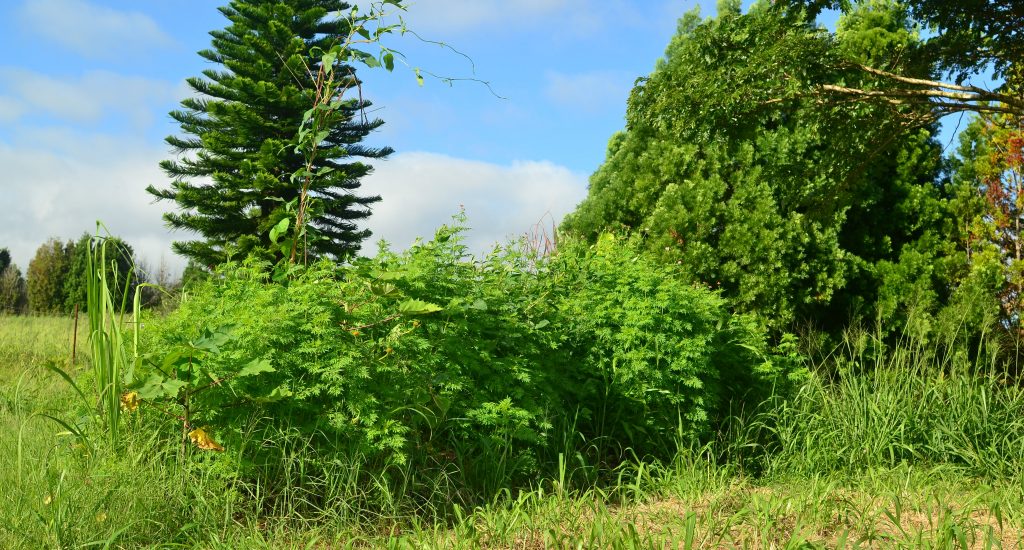
My Garden

I’ve been growing a handful of bamboos for a few years now. One of my clumps is old enough to be regularly producing new edible shoots, and due to me not planning out the best location for this bamboo, I need to regularly harvest it so it wont grow into my catchment. This means I get regular shoot harvests as I maintain that clump and slowly thin it out. You really should take the time to plan out the location for the height and spread of a bamboo clump. They are really quite prolific and dominating plants, yet their beauty and usefulness is enticing.

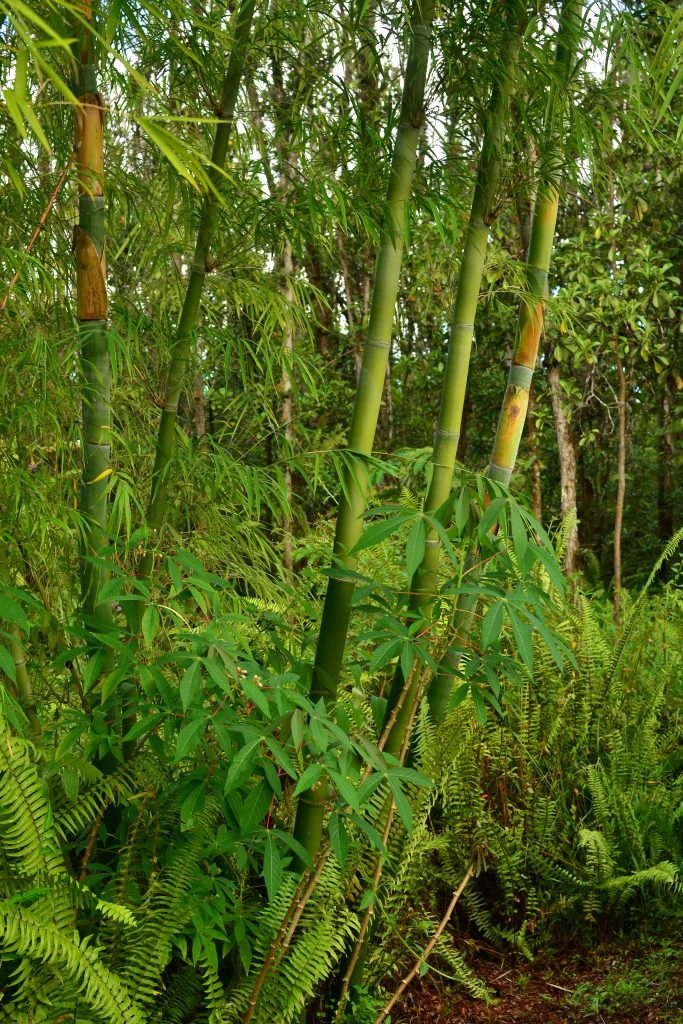
Nastus elatus branch-less habit

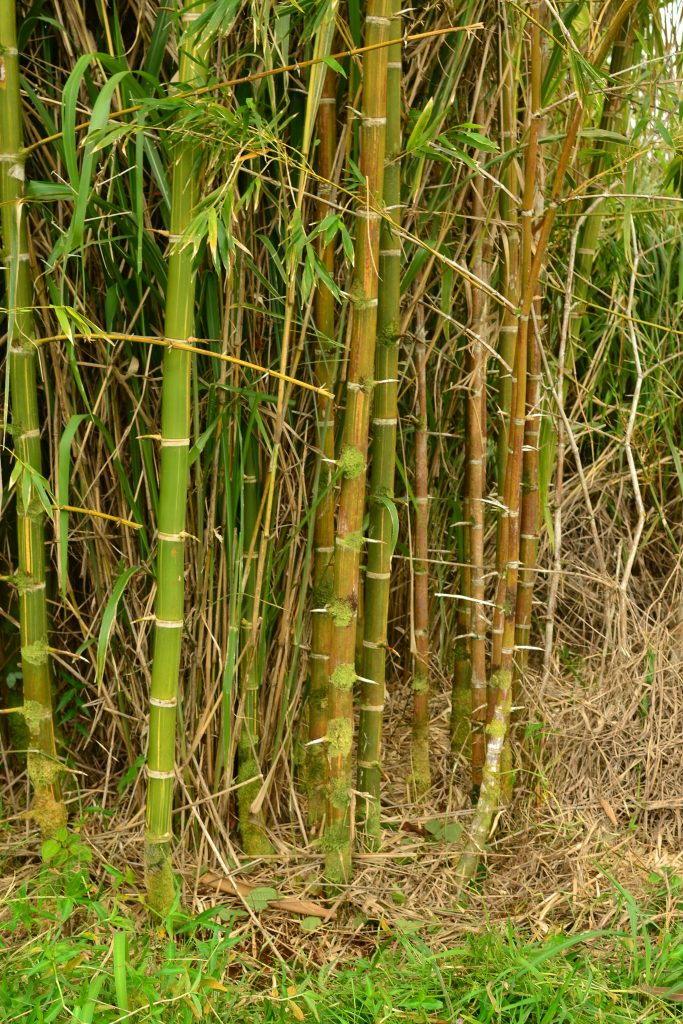
Guadua angustifolia – thorny/branched habit

Happy Gardening!

Spineless Chaya (Cnidoscolus chayamansa)

Description

Spineless chaya, Cnidoscolus chayamansa, is another highly nutritious perennial ‘tree spinach’ (not to be confused with the closely related spiny chaya, Cnidoscolus aconitifolius). This productive plant can reach heights of over 12 feet, is fairly fast growing and requires very little attention. The abundant leaf matter is high in protein, calcium, iron, and vitamins A and C. It is commonly consumed fresh/cooked, but can also be dried and stored for use as a dietary supplement for humans and animals. This plant thrives in dry tropical regions, but with a little care, can also be grown in very wet places.

Propagation

Spineless chaya is typically grown from cuttings. In its native habitat, it allegedly produces seeds. However, I have never heard of that happening here.

Take a slightly woody stem cutting and remove it from the parent plant. Remove all but the top leaves and allow the cutting to dry out a few days. The cut/sap will callous, and prevent it from rotting from the bottom of the stem. I’ve found it’s best not to remove the top part of the cutting and to only utilize cuttings with growing tips still attached. This prevents rotting from the top down. Once dried a few days, proceed to stick it into the ground!

Remove leaves but retain growing tip. Allow to dry/callous and proceed to plant!

Care

Spineless chaya can be grown in part shade or full sun. Plants grow slowly at first and begin to grow rapidly once the hottest months come around. This plant is basically pest and carefree.

Eating

Boiling or frying are the main cooking methods. Chaya leaves contain hydrocyanic glycosides; make sure to cook leaves for at least five minutes to remove toxins. While this specie can technically be eaten raw, toxin tolerance will vary depending on the individual. Therefore, it’s probably best to keep raw leaf consumption to a minimum. New shoots are also cooked and eaten as a vegetable.

Where to obtain planting materials

This plant is very easy to find within Big Island gardening communities. Ask a friend for a cutting!

My Garden

I’ve grown this plant for a few years now, but it’s taken me awhile to figure out the best way to propagate because of its tendency to rot out. With my newest technique described above, I’m finally starting to spread it around. I haven’t had the most productive plants grown here but I have a few friends in nearby places with huge chaya plants. It is persistent, but I haven’t seen its full growth potential at my site. It is a pretty plant, though!

Spineless Chaya grown with: ti, kalo, sissoo spinach, okinawan spinach, cosmos, edible hibiscus, kava, Cuban oregano, orange, and coconut

Happy Gardening!

Mitsuba (Cryptotaenia japonica)

Description

Mitsuba, Cryptotaenia japonica, or Japanese parsley/Japanese honeywort, is a perennial shade-loving herb. It has a taste somewhat reminiscent of parsley/celery. Mitsuba grows up to two feet tall, with a clumping habit formed by short rhizomes and thick roots. Most parts of the plant are edible: the leaves, stems, shoots and seeds. The leaves smell wonderful to brush against and have a beautiful appearance.

Propagation

Mitsuba grows from seed; however, I’ve never seen my plant produce flowers.

Plants may easily be divided as well.

Care

Mitsuba is carefree. Plant in part shade and watch it grow! Regular fertilizing will promote vegetative growth.

Eating

The leaves/stems are used fresh or blanched/parboiled and used in various dishes: pickles, soups, salads, stir fried, or fried. Leaves become somewhat bitter with too much cooking, so cook them quickly or add them as a garnish. The roots are typically fried.

Where to obtain planting materials

This one is a little bit more difficult than most. I’ve never seen the plant or seeds for sale on island. I got a small plant from a friend who got that from a friend. It is around, and I’ve seen it for sale on some seed catalog websites. From my readings, this plant is highly valued in Japanese cuisine; maybe tap into their community to find the plant.

My Garden

I’ve been growing this plant for a little while now and I always use it as a parsley replacement in recipes or when I want a similar flavor. My plant is just now vigorous enough to divide and create more plants. It’s nicely nestled into my herb garden where the leaves make me stop and stare whenever I see it. In the same bed, I’ve been letting my crotalaria spp. (rattlepod) grow like crazy to propagate and gather seeds; luckily for mitsuba, it loves living under the shade this provides!

Happy Gardening!

Bush Mint (Satureja viminea)

Description
Bush Mint, satureja viminea, or Jamaican tree mint, is a perennial tiny leaf mint relative with a large stature and a very potent spearmint flavor. Bush mint reaches heights of six to eight feet with a woody stem, and is delicious as a mint replacement. Apparently, this plant is used in a cool healing bath once processed lightly as well. It also produces abundant little white flowers seasonally. What a pretty plant!

Propagation
Bush mint grows from seeds and cuttings. It is a little difficult to propagate, so in anticipation of that, try to start a lot of plants at once.

Care
Bush mint is a carefree plant. Prune to desired shape and fertilize when needed. This plant grows better than all other mints I’ve tried. Prefers full sun or part shade.

Eating
I have switched from growing and eating other mints because this mint has upright leaves meaning it never comes in contact with the soil, I go for the higher leaves to prevent slug contact as well. I usually only eat tender new leaves as the plant produces so much leafy matter there’s no reason to go for older leaves. I use this mint in teas, soups, salads, and curries. Yum!

Where to obtain planting materials
This plant is a little bit more difficult to find. I’ve only seen it for sale a couple of times. However, quite a few people are growing it so if you come across them ask for a handful of cuttings to try and propagate.

My Garden
I discovered this plant about a year ago and I got a little keiki from a friend. This plant was only a few inches tall and now it’s over four feet. I constantly prune it as I harvest to keep it right around that height. It seems to just flush out and flush out; the plant flowered for about two months and now it’s back in grow mode. This plants habit works wonderfully in an herb spiral or an herb garden; a lot of other herbs are
lower ground growers and this one sprawls upward, creating different canopy layers within your mini garden. Canopy stratification is important for plants to grow well together; they can fill all available niches to prevent unwanted plants from growing. They also protect each other from winds, intense sunlight and heavy rainfall, which are all quite abundant here!

Herb Spiral: Bush Mint, Chives, Garlic Chives, Mitsuba, Vietnamese Coriander, Stevia, Society Garlic, Culantro, Tansy, Ko’oko’olau, Pineapple Sage, Plantain, Cosmos and Crotolaria

Happy Gardening!

Hawaiian Cocktail Pepper (Capsicum chinense)

Description

The Hawaiian Cocktail Pepper, Capsicum chinense, is a highly productive perennial sweet bell pepper. The peppers start green and turn to deep red (sometimes yellow) as they ripen. From my observations, this is a hot pepper that has been domesticated to no longer produce the heat; when you open a pepper you get that scent of heat but no bite when you eat them. These pepper plants can live about two years and grow 2-3’ tall and 3-4’ wide.

Flowers

Fruits

Growth Habit

Propagation

The Hawaiian Cocktail Pepper, like most peppers, is grown from seed. To harvest a pepper for seed, I allow some of the largest peppers on the plant to stay on the plant until the peppers have slightly shriveled. Then, I will open it up, eat it, and save the seeds for planting. Check out the seed propagation blog for more info on starting seeds.

Rumor has it that this pepper will grow from cuttings and can potentially be grafted onto other rootstocks. I do not have any experience with this, yet.

Care

These are very carefree pepper plants. Grow in some shade, full sun, out of the rain, or in full rain. Regularly harvest peppers for stimulation of the plant. Cut off dead branches and occasionally you can give it a heavy pruning, leaving just a couple of main branches.

Heavy prune: cut off woody branches and keep that bright green branch in the middle

Eating

Harvest at any stage of ripeness; I usually wait for a least a little color to appear on the skin, You can leave them on for quite a long time and they will slowly wrinkle; at this stage they are still edible. Just don’t allow them to go soft or you will miss your window to eat them.

Where to obtain planting materials

Get fruits from a friend growing this plant, or keep your eyes open at the farmers’ market; I see these peppers sold all the time. That’s where I got my original seeds.

My Garden

I’ve grown this pepper for a few years now; at this point most of my seeds are from my own plants, I did recently get some new genetics mixed in when I got a handful of peppers from a friend. You’ll always want to bring in new genetics periodically so your plants do not weaken. I also recently acquired a yellow variety of this same plant (very exciting)! During the eruption my little potted pepper plant was hiding in my sun-house. This plant did not get watered for five months and survived regular doses of sulfur in the air. This pepper plant continued to produce for part of the eruption and when I moved back into the property, the plant was here waiting for me full of flowers. This is the plant in all of my photos for this entry. The plant is loaded with peppers (for the second time since September) and continues to flower and keep on going. What an amazingly hardy little plant. I shall continue to collect and spread these genetics.

The pepper that survived the eruption

Happy Gardening!