Green Onion var. Koba (Allium fistulosum)

Description

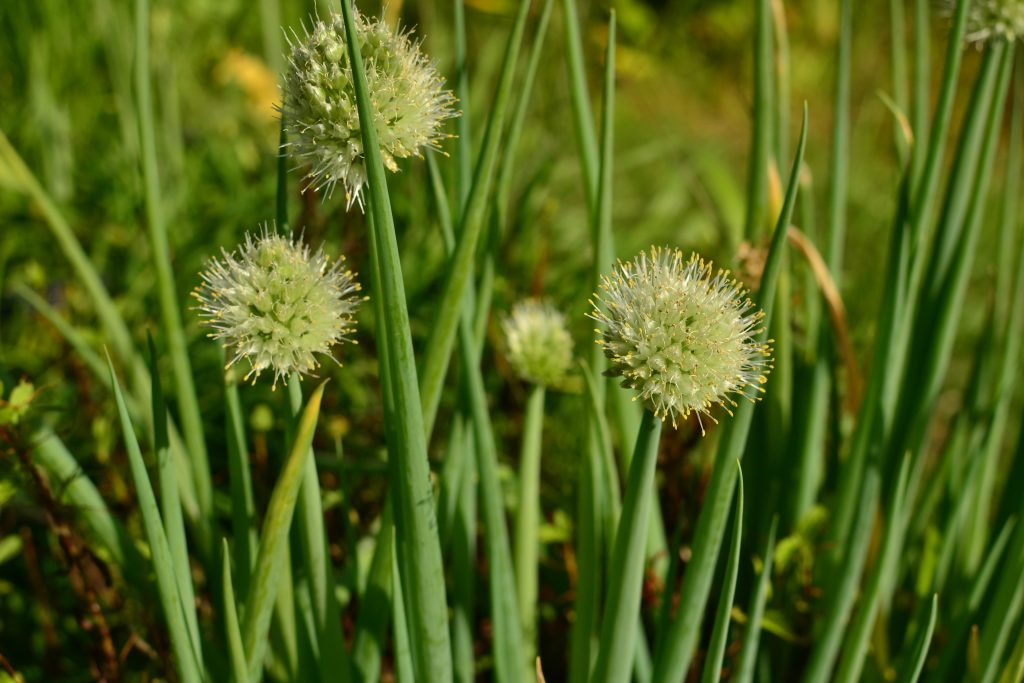
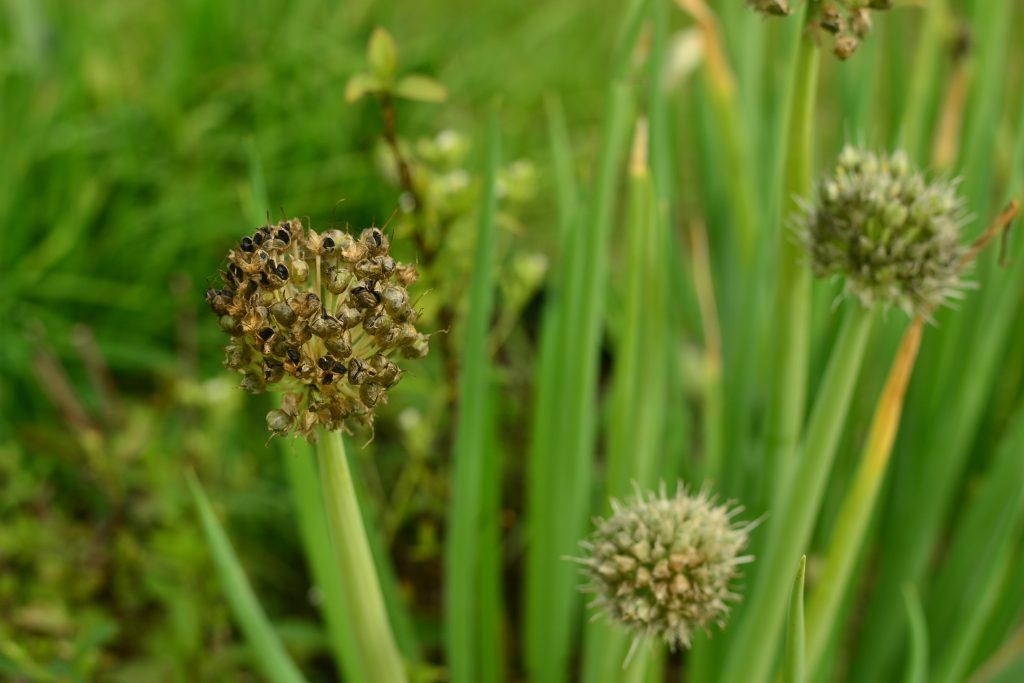
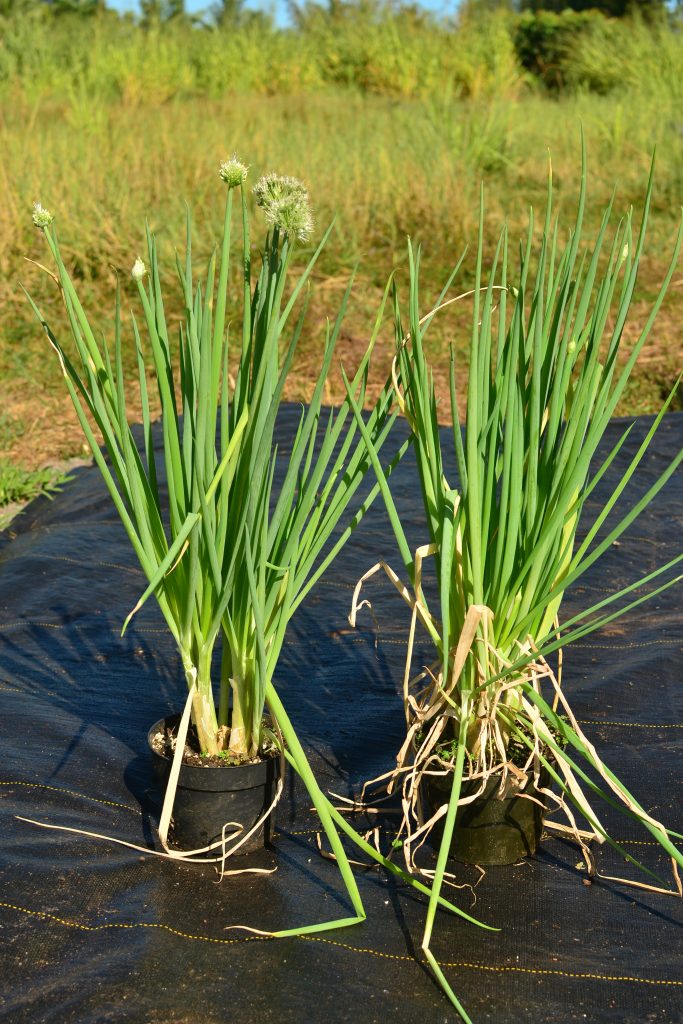
Green onions, Allium fistulosum, are a wonderful, perennial, clumping onion relative. This specific variety, known as “koba,” is a Hawaiian cultivar that is perfectly adapted to our climate. Koba is a short-day onion variety that produces numerous seeds during the winter. Planting in the spring (April-May) allows the plants to grow as long as possible before flowering is induced by changes in day length. This cultivar has thin leaves and grows to about 18 inches tall. The most interesting part of the plant is the way it produces a single, large, fat stem that eventually divides into multiple smaller stems. This onion can be harvested before division, when it is still fat and large, or after, to take advantage of more, albeit smaller, stems. This plant has a regular green onion flavor: mild in the leaves and more pungent towards the bulbs. This is the onion relative to grow; it is as abundant as it is delicious!

Ripe Seed

Propagation

Koba green onions can be propagated by seed, by division, or from bulb “scraps.”

Plant seeds ½ inch deep.

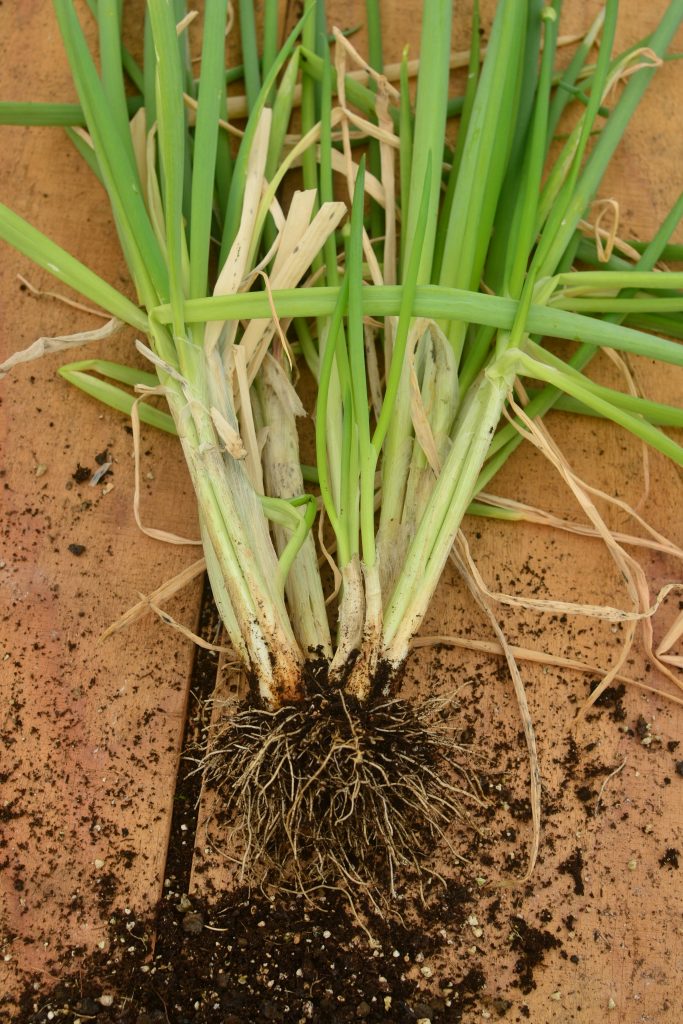
Divide clumps once they have multiplied.

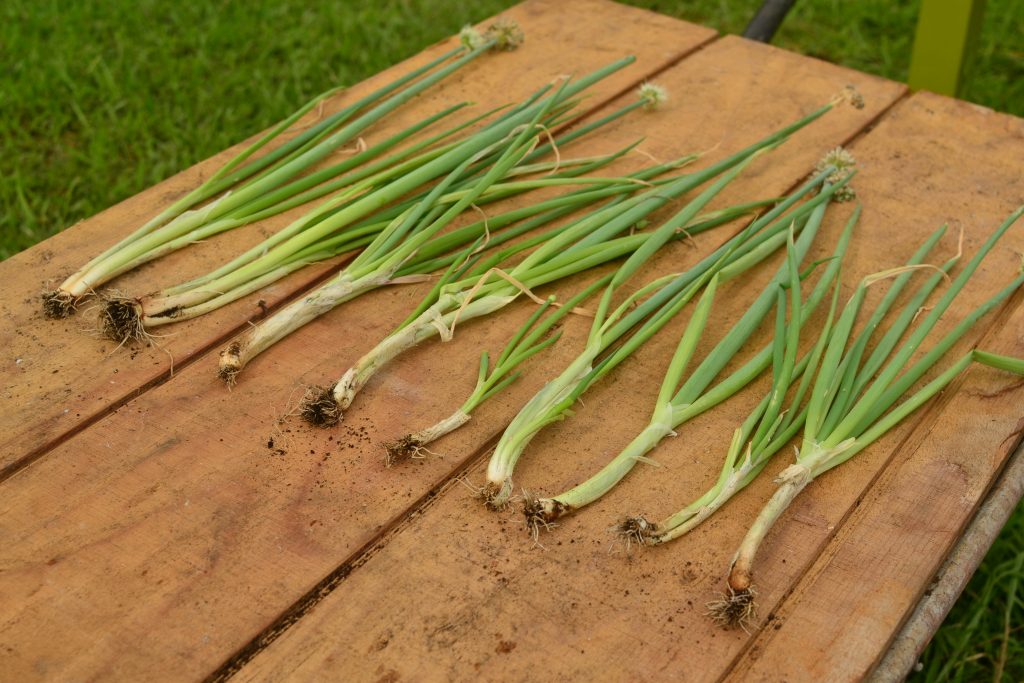
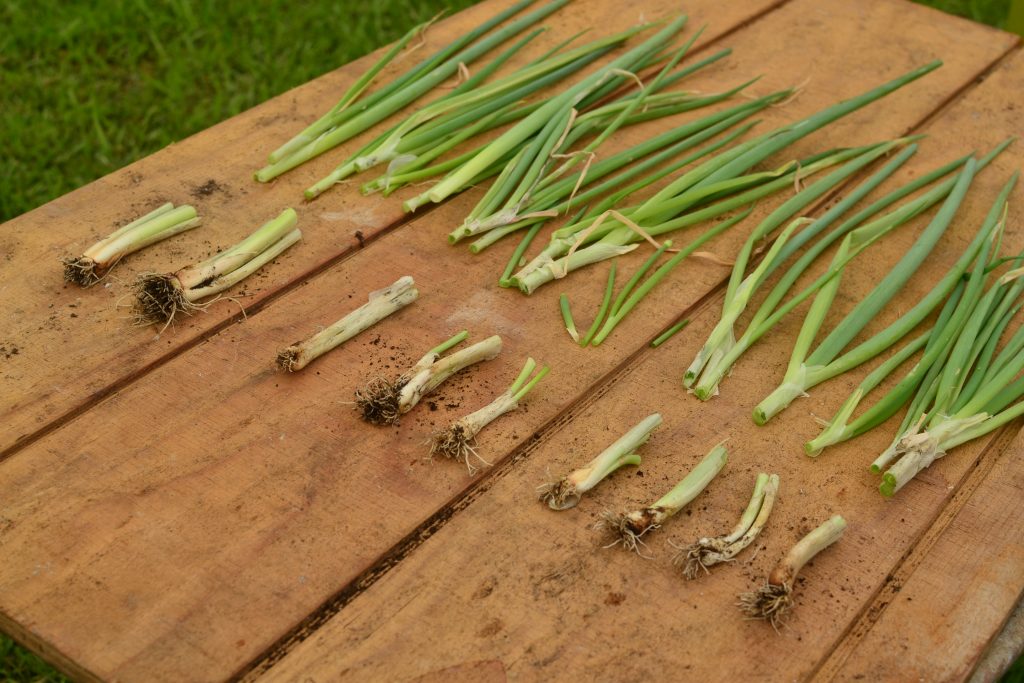
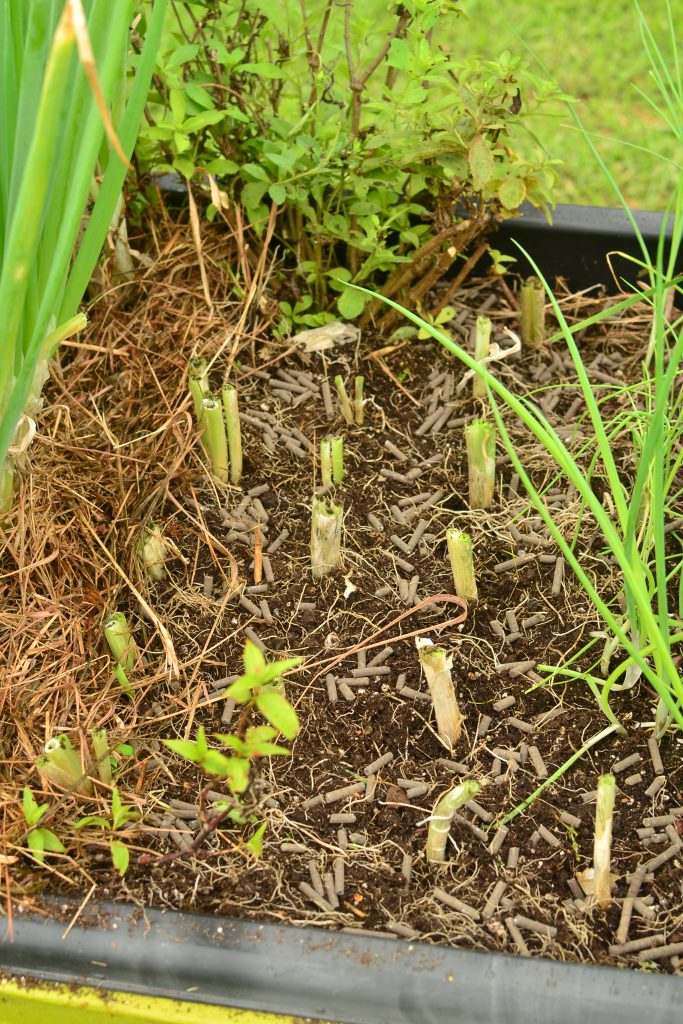
All green onion varieties will re-root and grow from the bulb (bottom white part) of the plant. Simply remove the bottom two inches including the bulb and re-plant.

Remove plant from ground

Divide

Remove tops

Replant and fertilize

Care

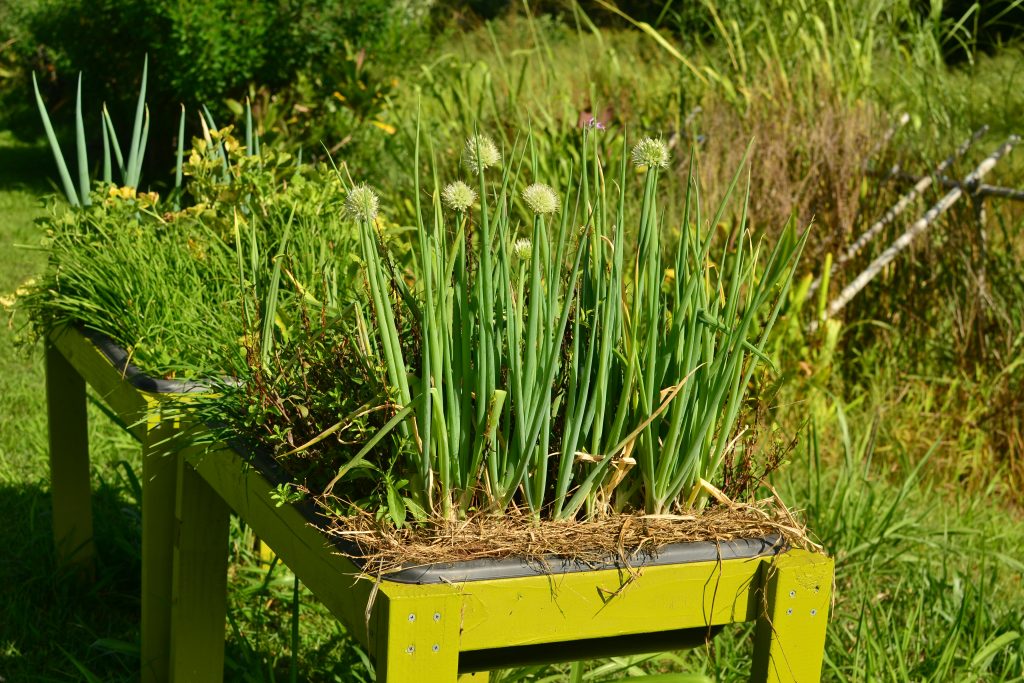
Koba green onions are very easy to grow. Keep them weeded when young, give them full sun, and fertilize regularly, especially after a harvest. I’ve found they grow incredibly well in containers, which reduces weed pressures, and you can keep them close to your kitchen for ease of harvest.

Matures in 50-60 days from clump division or 80-90 days from seed.

Eating

Flowers, greens and scapes are edible.

Green onions are perennial if harvested properly. Cutting off the top of the plant one to two inches above the soil surface will allow the plant to regenerate and grow a new top. The harvested tops can be consumed normally. Unfortunately, harvesting and eating the onions in this manner doesn’t allow you to eat the more potent part of the plant, so supplementing additional stems can make up for this missed pungency.

For the full green onion experience, pull them entirely out of the ground and consume from bulb to greens, just as you would with onions from the market.

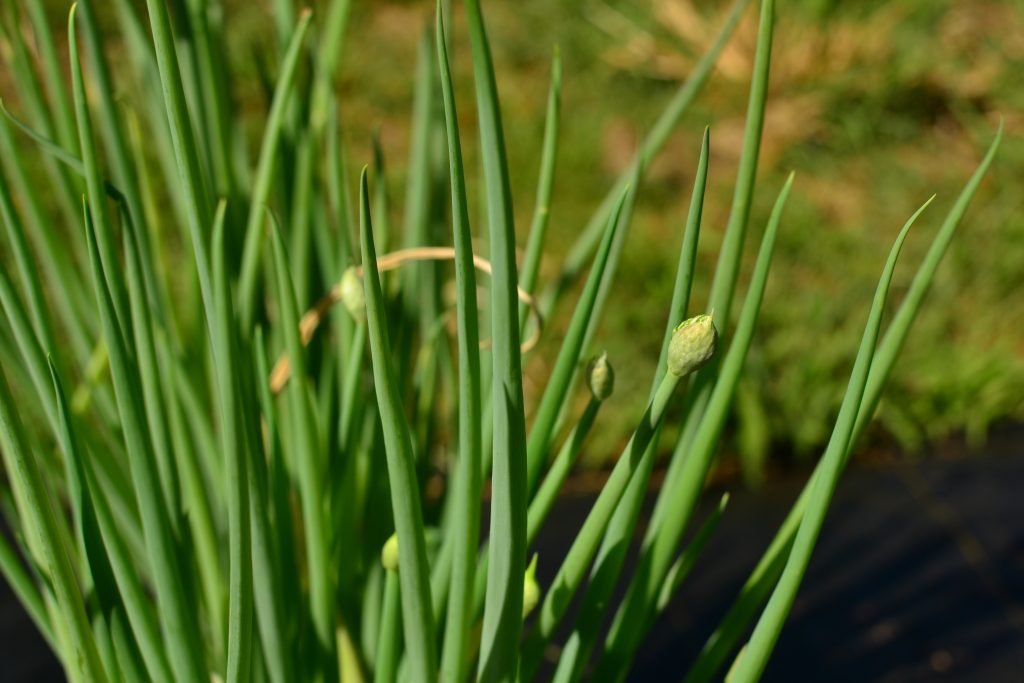
Green Onion Scapes (unopened flowers)

Where to obtain planting materials

I got my original seed from Hawaii Seed Growers Network, a wonderful resource for Hawaii. https://www.hawaiiseedgrowersnetwork.com/product-page/koba-onions

Green onions can always be grown from market purchased products. Buy fresh green onions and replant the bulb. This is a great method; however, you may not be sure of variety nor the specific cultivar habits.

My Garden

Onions are one of my favorite vegetables. It’s very hard to grow normal bulbing-type onions here in lowland Hawaii due to our daylength, rain, and lack of cool weather. I’ve tried a few times to grow normal bulbing onions and always end up with very small bulbs. Through all this trial and error, I’ve discovered that green onions are a good enough replacement without all the effort! Green onions flourish here, sometimes reaching up to two feet tall, and always have leaves ready for harvest. Every garden should have a patch of green onions near the kitchen!

a different green onion variety. notice larger leaves and blueish tint

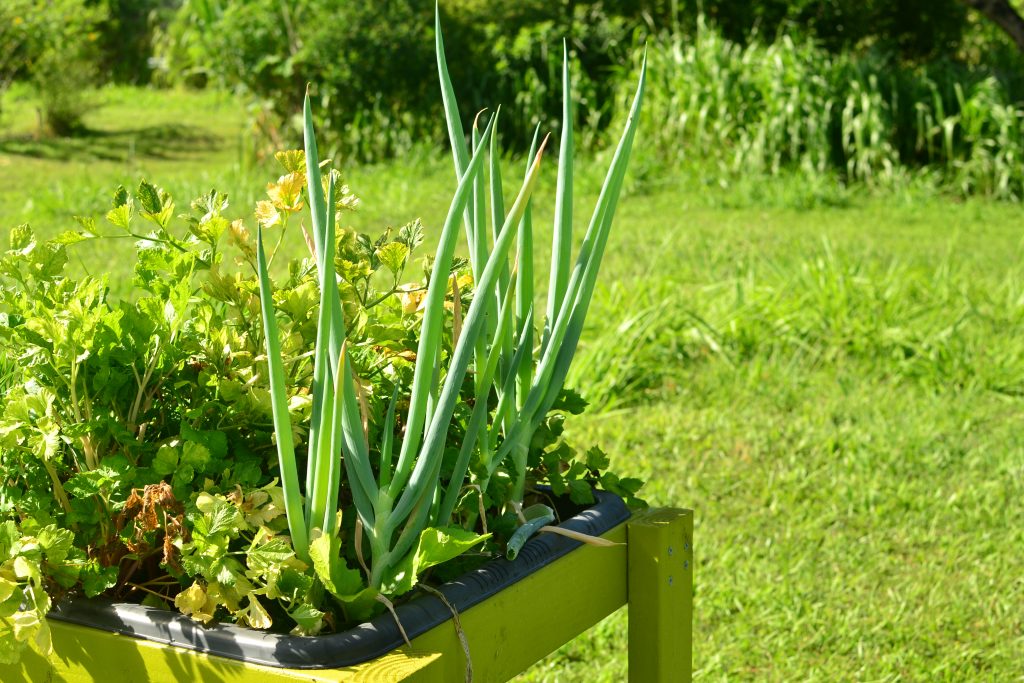
Koba grow extremely well in 1/2 gallon pots. perfect for cultivating near your kitchen

Happy Gardening!

Banana Deficiencies in Hawaii

Banana Deficiencies in Hawaii

Bananas are incredible plants; their vigor and robustness make them exciting to watch as they grow. When they put out their giant flower buds, I’m always amazed! Bananas are the epitome of a tropical garden, renowned for their giant leaves fluttering in the wind, and the huge racks of food that they produce. Bananas are, unfortunately, the most difficult plant I’ve ever grown. I regularly feed them, yet they are almost always deficient in micronutrients. It’s important to recognize the different patterns of deficiencies to combat and keep them healthy. A vigorous, healthy banana will pump out a hundred pounds of fruit in a single rack! If your banana plants are not upright, robust and deep green, pumping out a leaf weekly, they are hungry, and most likely micronutrient deficient.
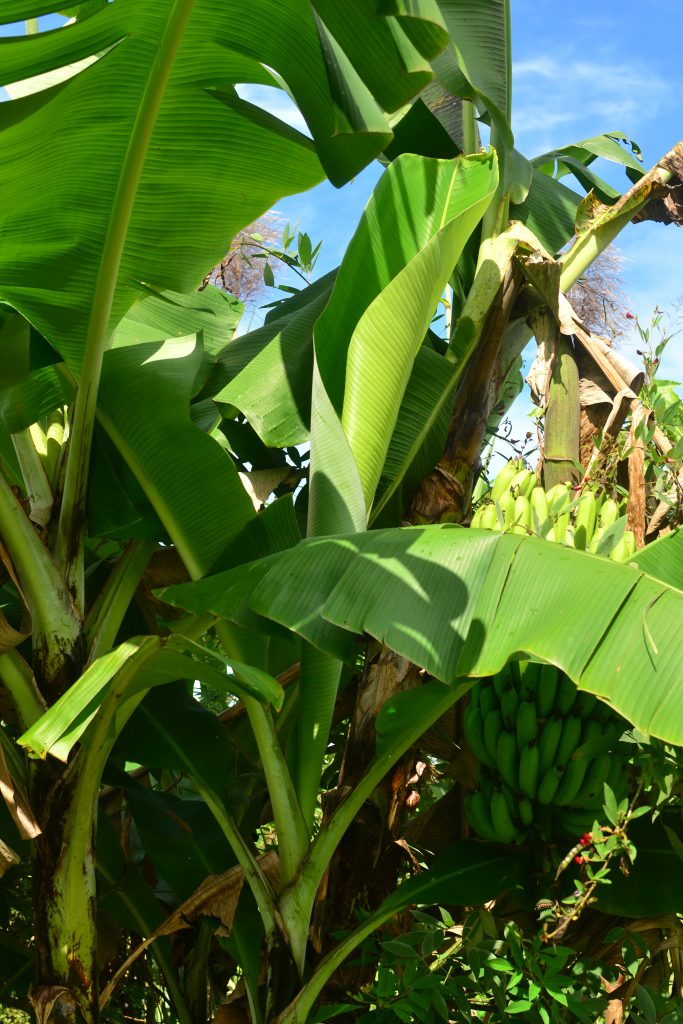
Williams. Large healthy leaf unfurling next to good sized rack
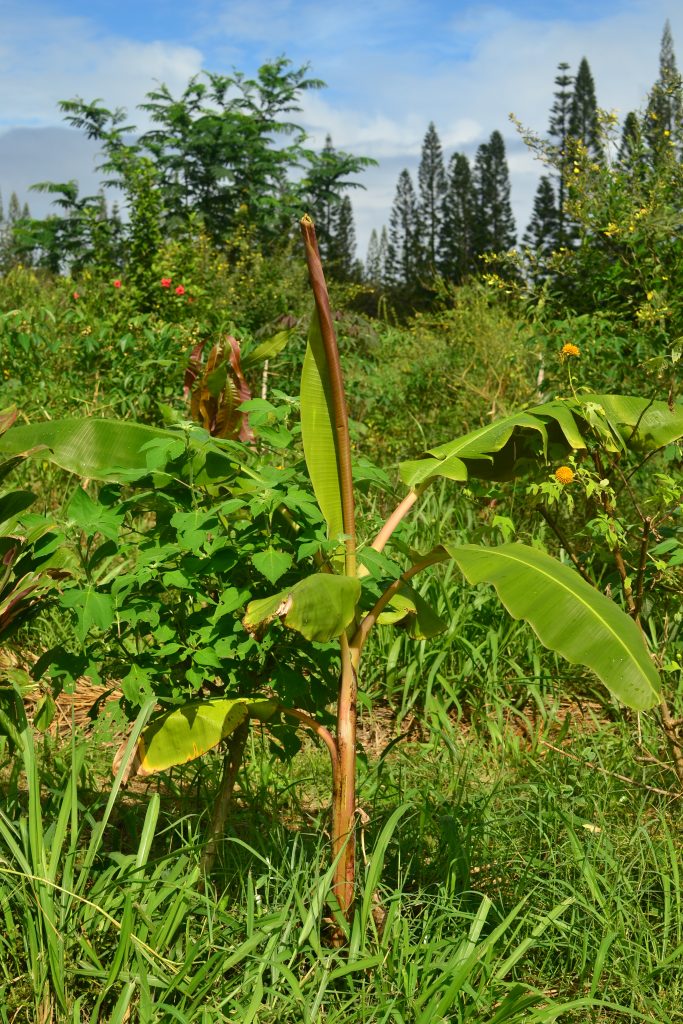
Iholena. Erect cigar leaf unfurling healthy
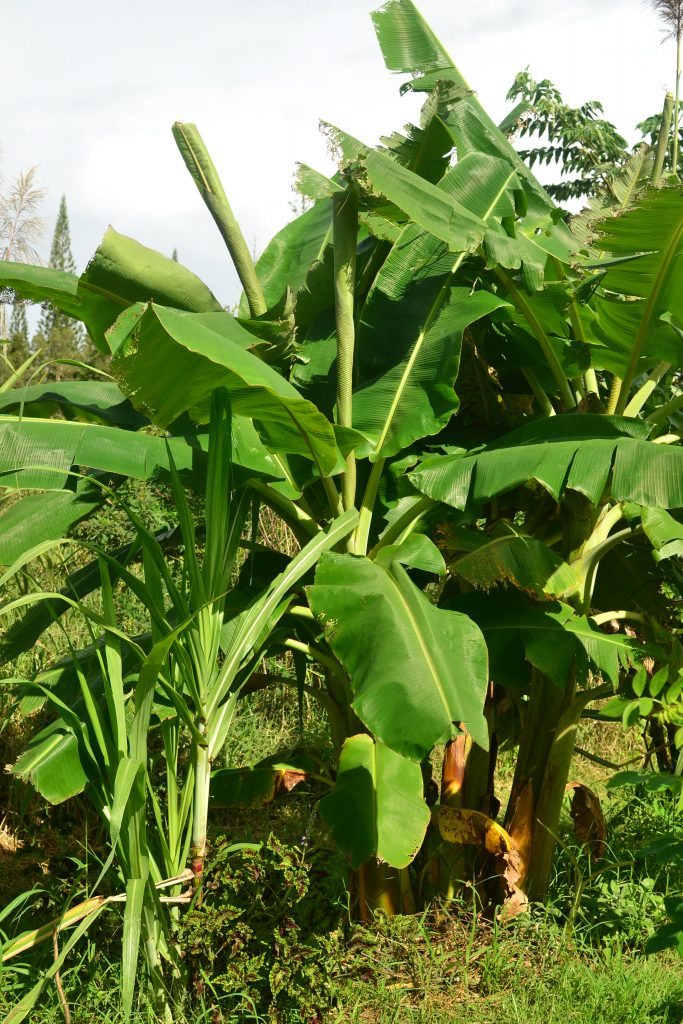
Dwarf Namwah. Deep green wide upright leaves
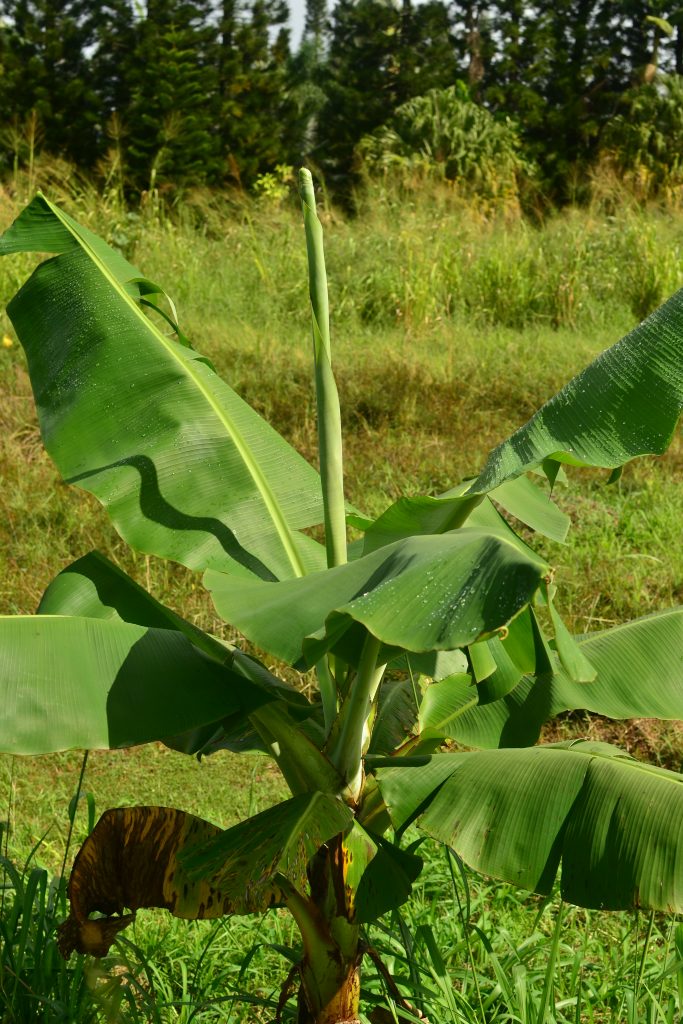
Dwarf Cavendish. Healthy leaf stature

Due to heavy degradation, banana nutrients are notoriously low in Hawaiian soils. Calcium, boron, potassium and sulfur are almost always low or unavailable to the plants. Luckily, this can be mitigated with a bit of care and consideration.
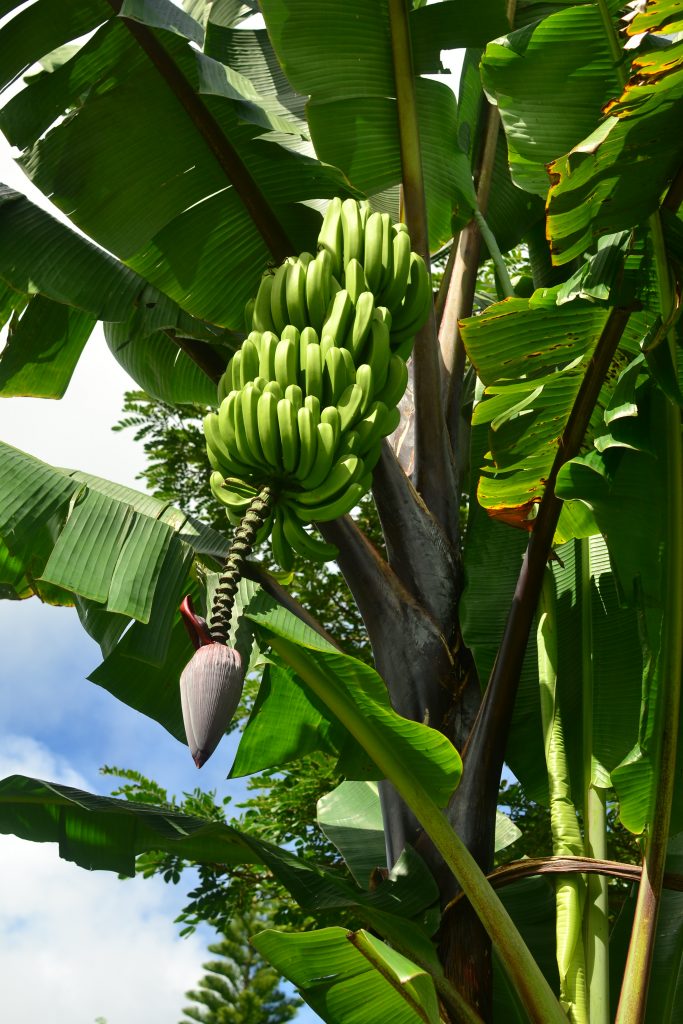
Maoli. Ele ‘ele

Banana Bunchy Top Virus (BBTV)

Banana Bunchy Top Virus is prevalent in all parts of Hawaii and is detrimental to the species. Sometimes deficiencies may look like BBTV. Knowing the symptoms of both BBTV and nutrient deficiencies will allow you to address the issues appropriately. Be sure to source virus free plants from a legitimate propagator. Too many times, people get plants from friends and they come with BBTV. There is no known cure for BBTV; a mat that has been infected will always carry and spread it. The main disease vector is aphids, who feed on the plants’ sap, and can quickly spread the disease from plant to plant. KILL YOUR BUNCHY TOP BANANAS! There is no other way around it, dig them out of the ground and chop up the corms and leave in a place they will die, like cement or in a trash bag out of the weather.

If you are suspicious of a banana plant potentially having BBTV, get it tested! The University of Hawaii extension offices do banana bunchy top virus testing for $12 per sample. Simply take the third leaf from the top, not counting the cigar leaf, cut it in half and cut out a 2 inch section on either side of the leaf midrib. Put in a plastic bag, label and bring it into the offices. Be sure to clean your tools with rubbing alcohol between sampling. I’ve tested many plants at the Komohana Research and Extension Center in Hilo. They have a very quick turnaround, and their results are very accurate.
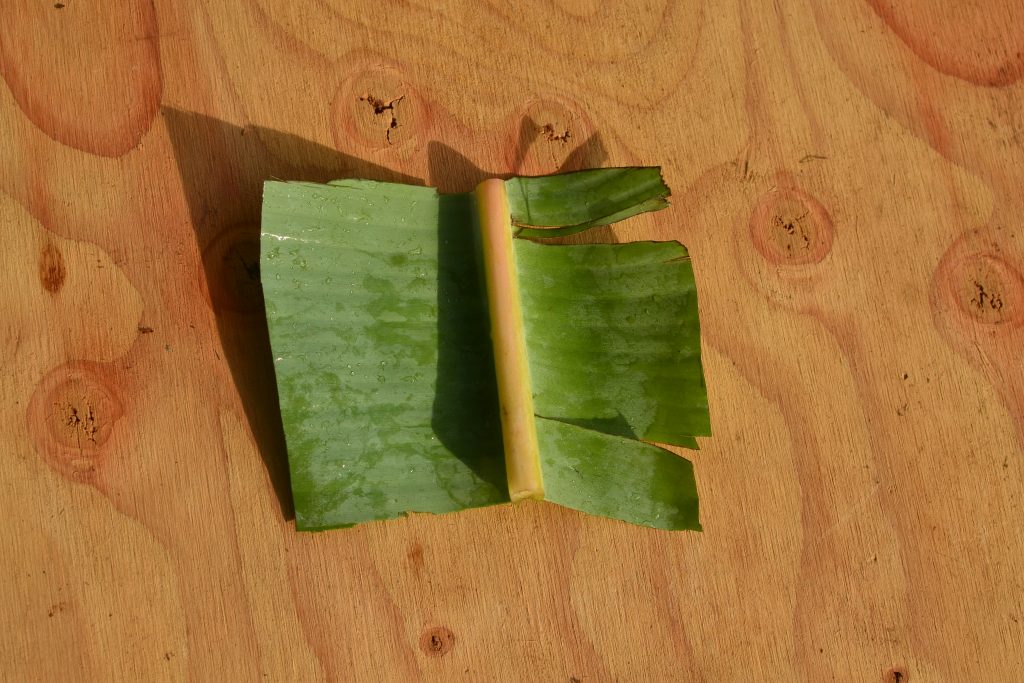
Banana Bunchy Top Virus Leaf Sample

GO TEST YOUR BANANAS; HAVE YOUR NEIGHBORS TEST THEIRS! This needs to be a community effort to reduce the problem. Many people have Banana Bunchy Top Virus and do not know or do not care. Inform other people of the problem and help them test and remove their bananas. It’s almost not worth the effort for someone to sell/propagate clean bananas because the keiki will be introduced into a diseased location, a very depressing issue. We need to change this, or we simply cannot grow bananas in populated areas. We’ve already lost many of the wild banana plants to habitat depletion and pig damage; do we really want to live in a Hawaii without bananas?

References for Banana Bunchy Top Virus. Information and detailed descriptions.

https://www.ctahr.hawaii.edu/bbtd/downloads/bbtv-details.pdf

https://www.ctahr.hawaii.edu/bbtd/

Nutrient Deficiency Patterns

Once you are sure your plants do not have Banana Bunchy Top Virus, it’s time to start identifying deficiency patterns. All banana varieties should produce fat, erect cigar leaves that open into very large, wide and dark green upright leaves. The leaves should sequentially get larger until the leaf before the flag leaf comes out just before flowering.

Be aware that one or multiple deficiencies may show up at the same time.

As water is a necessity for nutrient uptake, drought may lead to deficiency symptoms, including slowed leaf emergence and bunching, even in otherwise fertile soils. It may be a good idea to confirm plants are receiving proper irrigation prior to investing time and money into soil amendments.

Certain nutrients (calcium, boron, iron) cannot be stored and moved within the banana plants’ sap; these will need to be repeatedly added in order to be continuously accessible to the plants.

Many soil amendments are known as “slow-release minerals,” which means it will take time for them to become accessible and be utilized by the plant. A number of deficient-looking leaves may unfurl before results are visible.

To cure a plant more readily, utilize a micronutrient spray along with the mineral dispersal. This will cover the short term while the addition of minerals to the soil works in the long term.

The newest leaves on the plant tell signs of calcium and sulfur, the older leaves show potassium, nitrogen and iron levels.

Remember, an entire banana mat is a single plant, check out my post on bananas for more info.

Boron

Boron is necessary for normal formation and functioning of roots and cell walls. A classic boron deficiency symptom is abnormal unfurling of leaves. Boron deficiencies are closely linked to calcium deficiencies hence the common term “calcium-boron deficiencies.” Be very careful dispersing boron, as too much can be toxic to the plant. Normal store-bought Borax is an easy solution for adding boron.

Symptoms: Leaf etching (raised streaks across the veins); light yellow speckling; crinkling or wavy leaf edges and irregular corrugations; deformed leaves (twisted, curled, buckled or convoluted).

Recommended solution: One teaspoon of borax for immature plants; two teaspoons of borax for mature plants (plants with keiki).
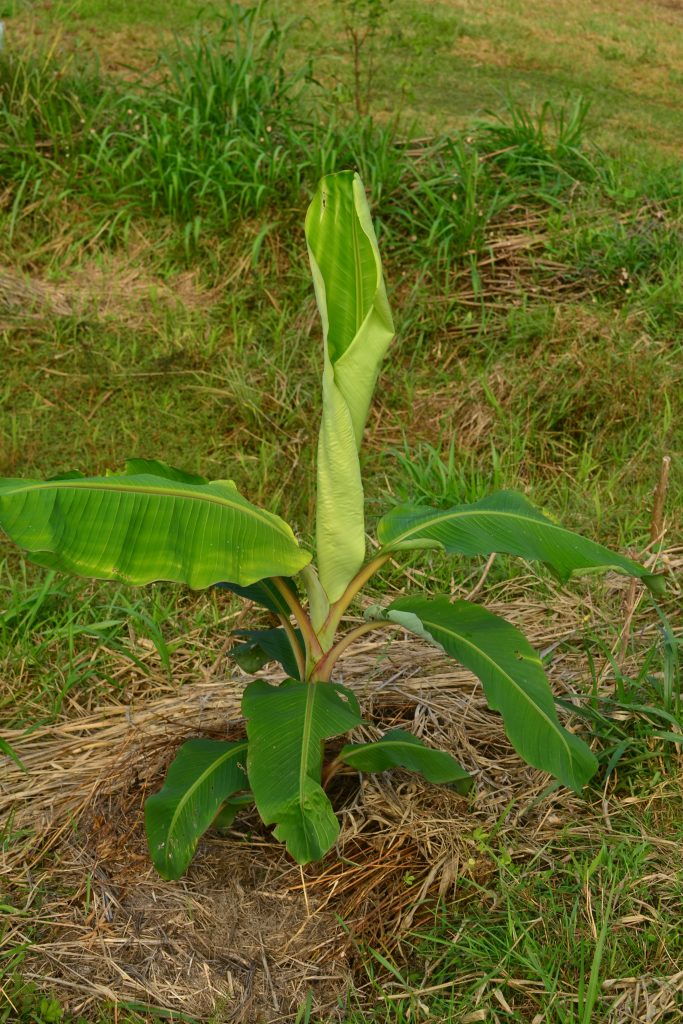
Calcium-boron and sulfur deficient

Boron Deficiency. Irregular corrugations
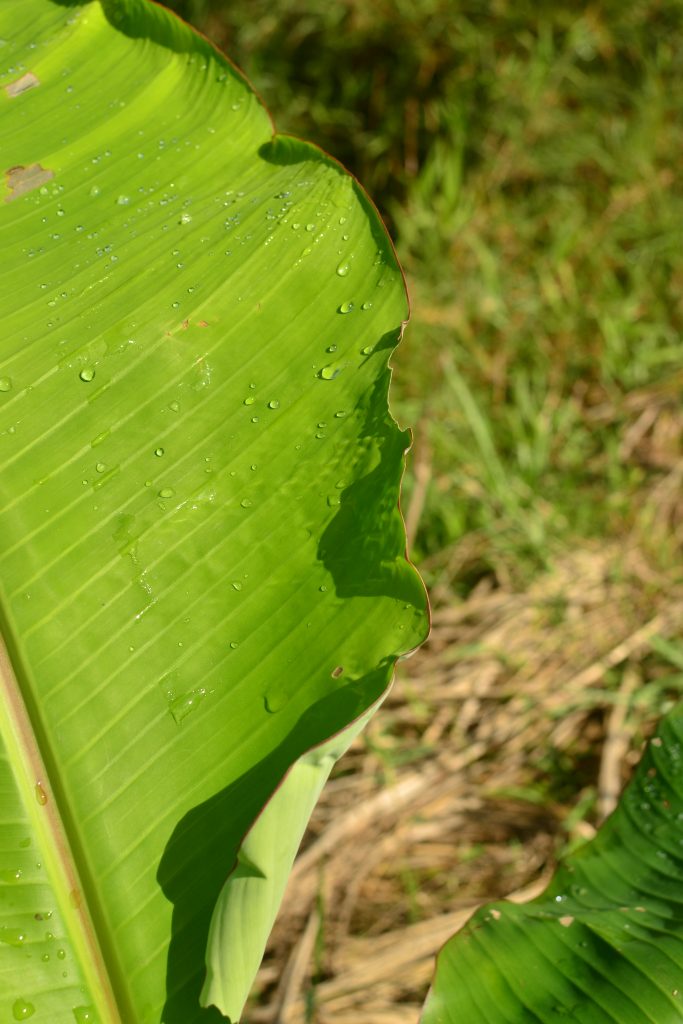
Boron Deficiency. Crinkling or wavy leaf edges
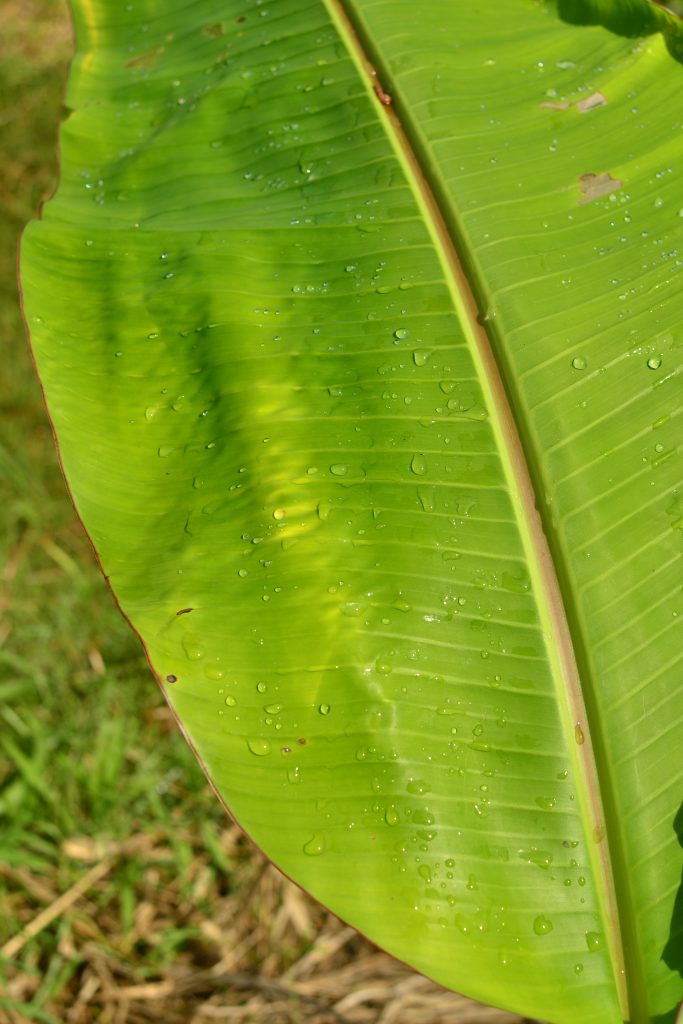
Boron Deficiency. light yellow speckling
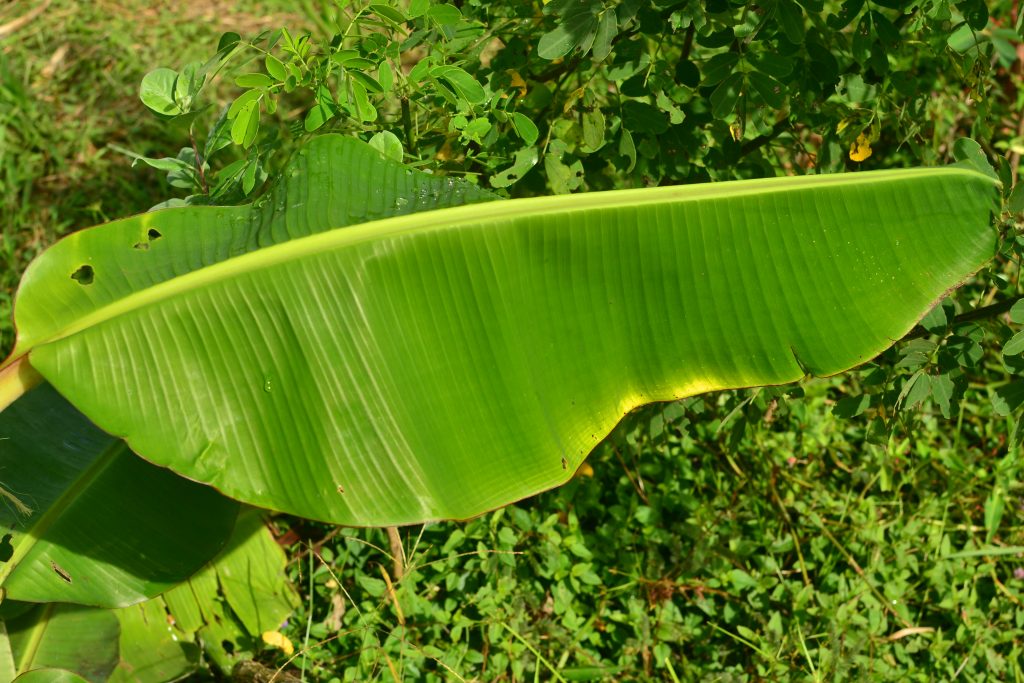
Boron Deficiency. light yellow speckling

Calcium

Calcium is necessary for skeletal development, rigidity, plasticity and hydrostatic pressure. Lacking in this mineral causes deformities indicating tissue collapse, overall weakness and is closely linked to boron deficiencies. Calcium also raises pH, enabling mineral uptake in acidic soils. Calcium deficiencies are, by far, the most common in my garden.

Symptoms: Flat, Travelers Palm look; bunched leaf stalk; leaves gradually diminishing in size and deforming, twisting, cupping, buckling and having wavy margins; newly unrolled leaves droop, unravelling slowly, weakly or incompletely, sometimes sticking together and tearing when opening; loss of rigidity in the leaf tips; marginal leaf yellowing; trunks weaken, and flower stalks lose rigidity.

Recommended solution: add limestone, crushed coral, calcium carbonate or dolomite. Mix into the soil. Use one half cup for immature plants, one cup for mature plants (plants with keiki).
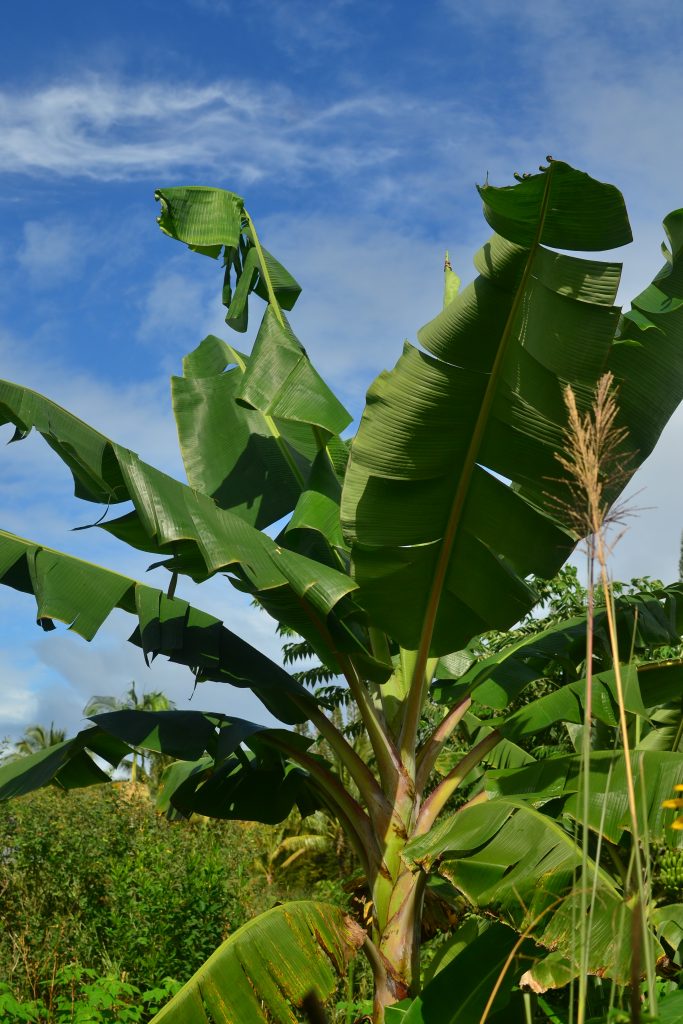
Calcium Deficiency. Curled leaf tip
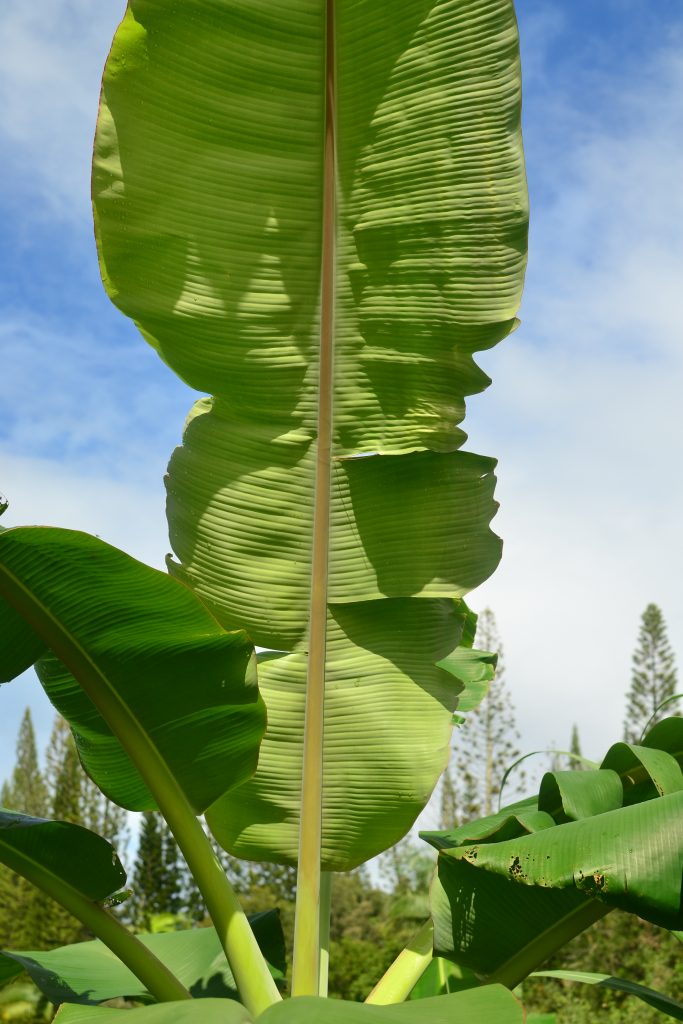
Calcium Deficiency. Deformed leaf
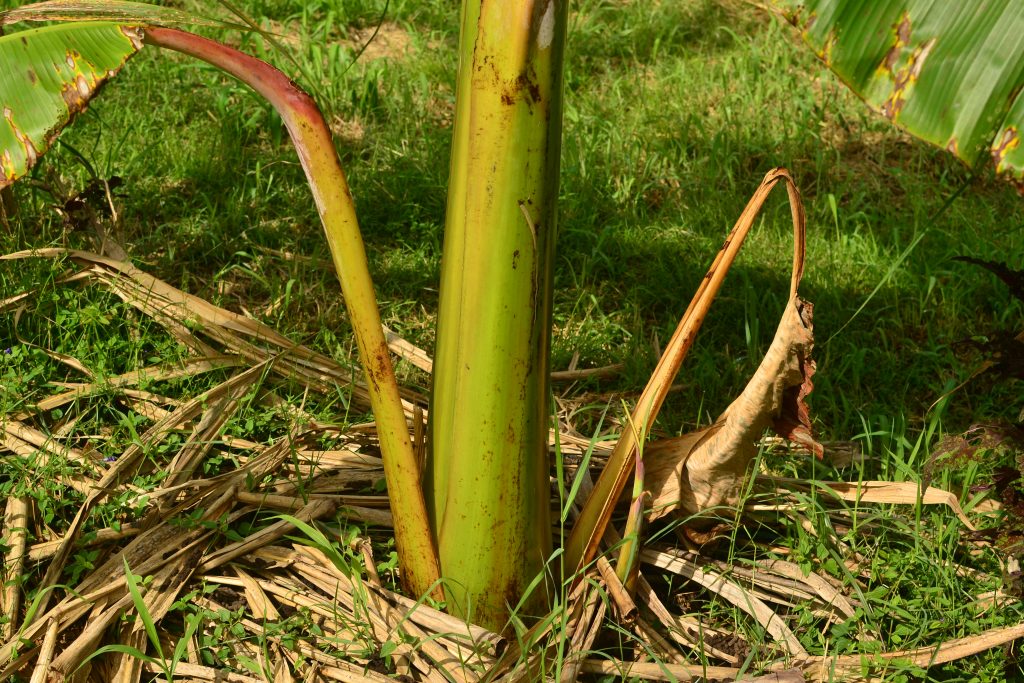
Calcium Deficiency. Collapsing trunk
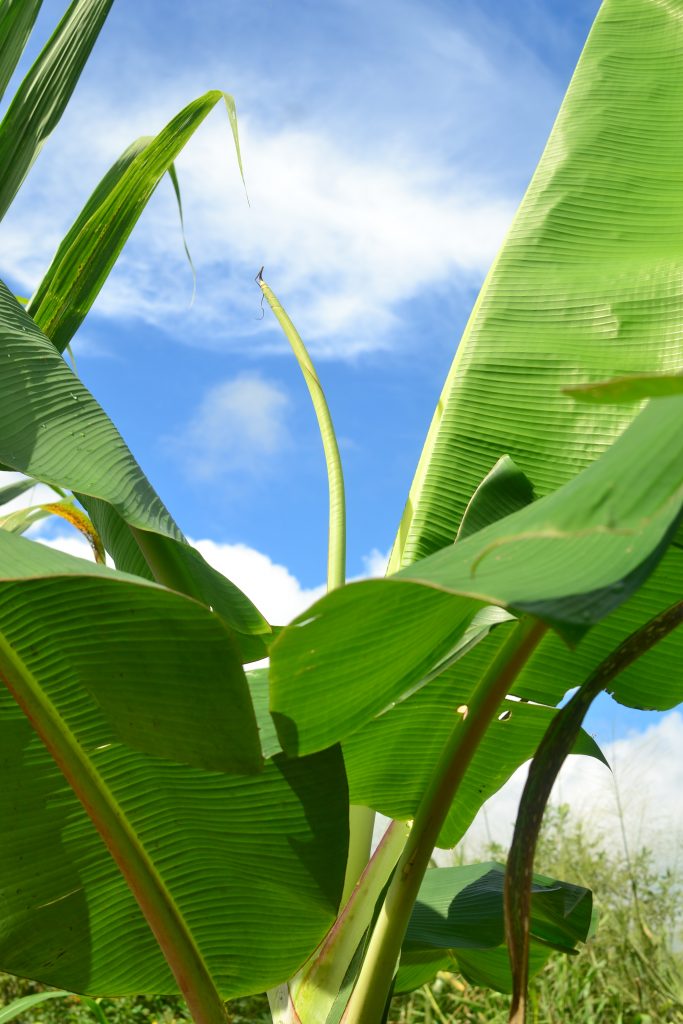
Calcium Deficiency. Bent cigar leaf
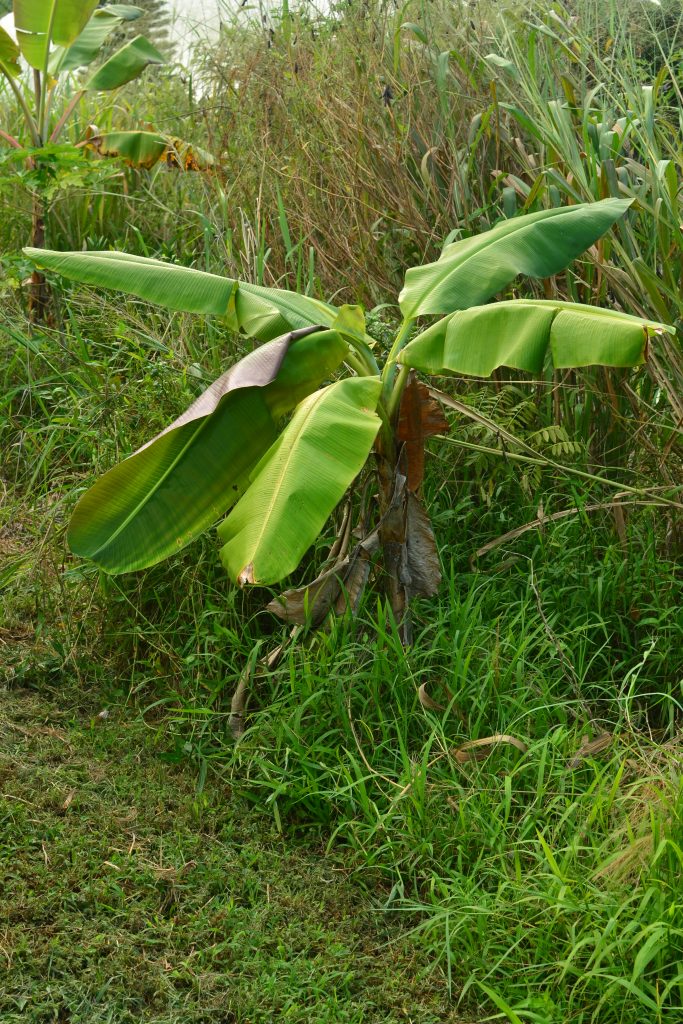
Calcium Deficiency. Curled/buckled leaf. Loss of rigidity
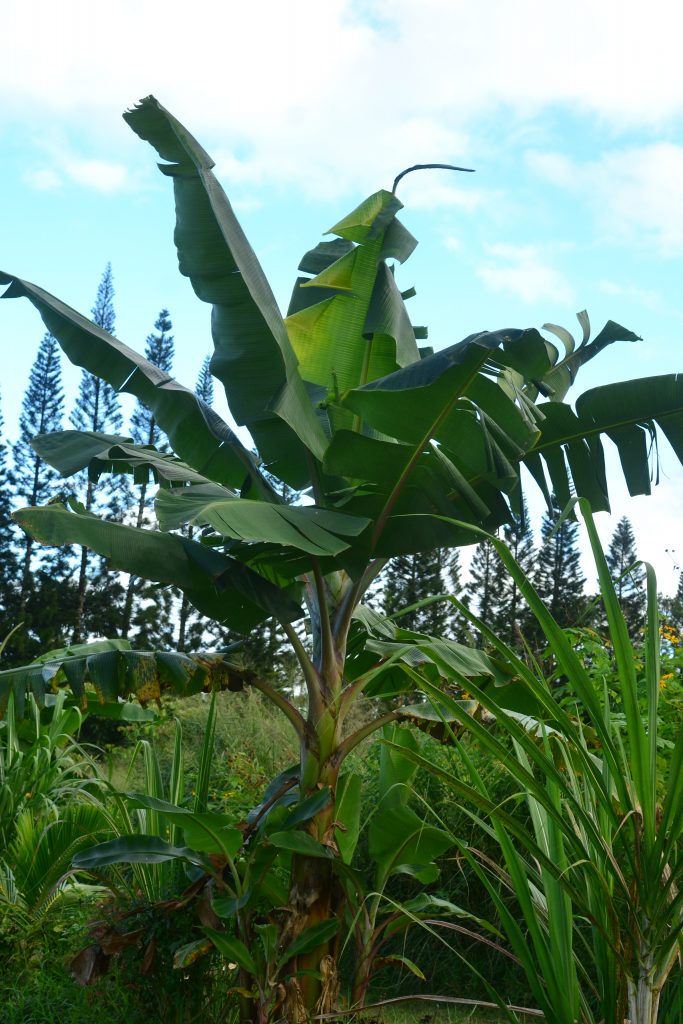
Calcium deficiency. Non-normal leaf unfurling. Yellowing.
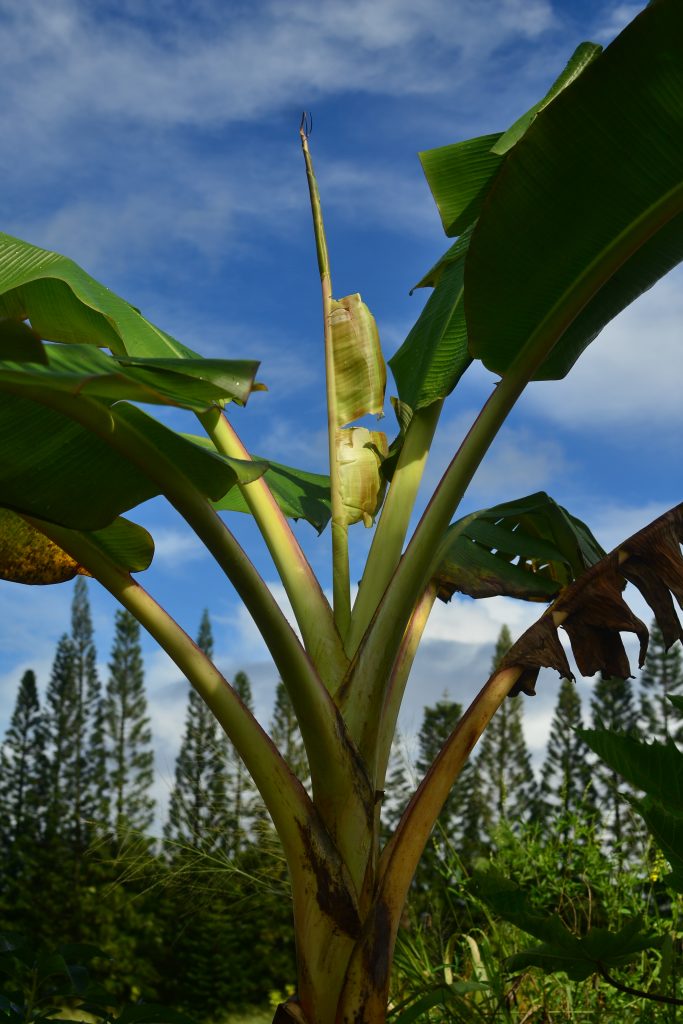
Calcium deficiency. Deformed/Shredded cigar leaf
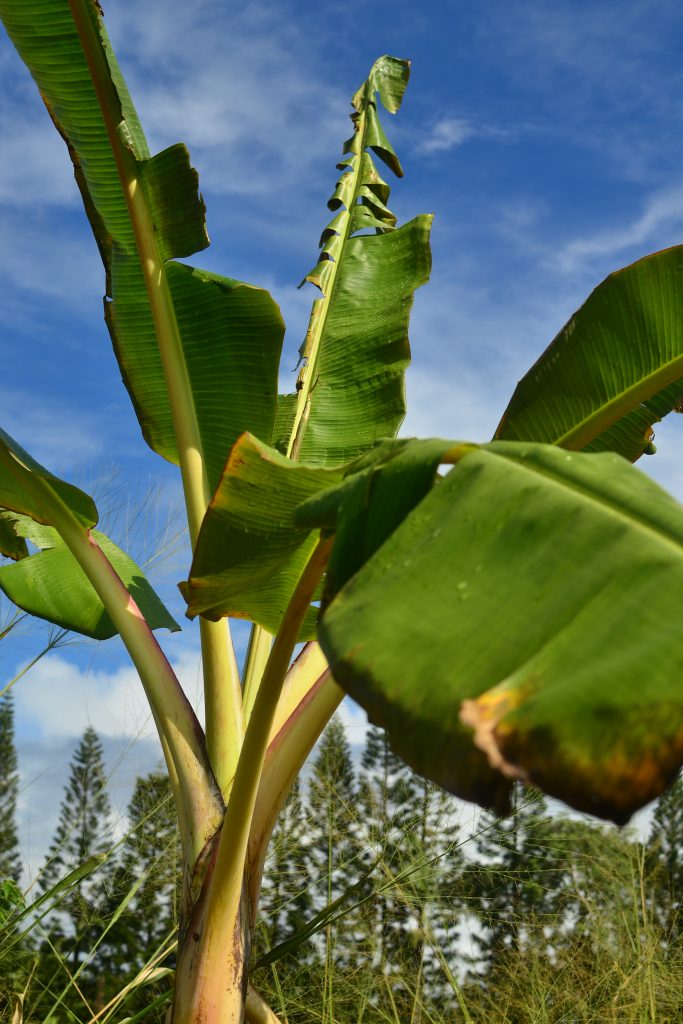
Calcium deficiency. Shredded Leaf
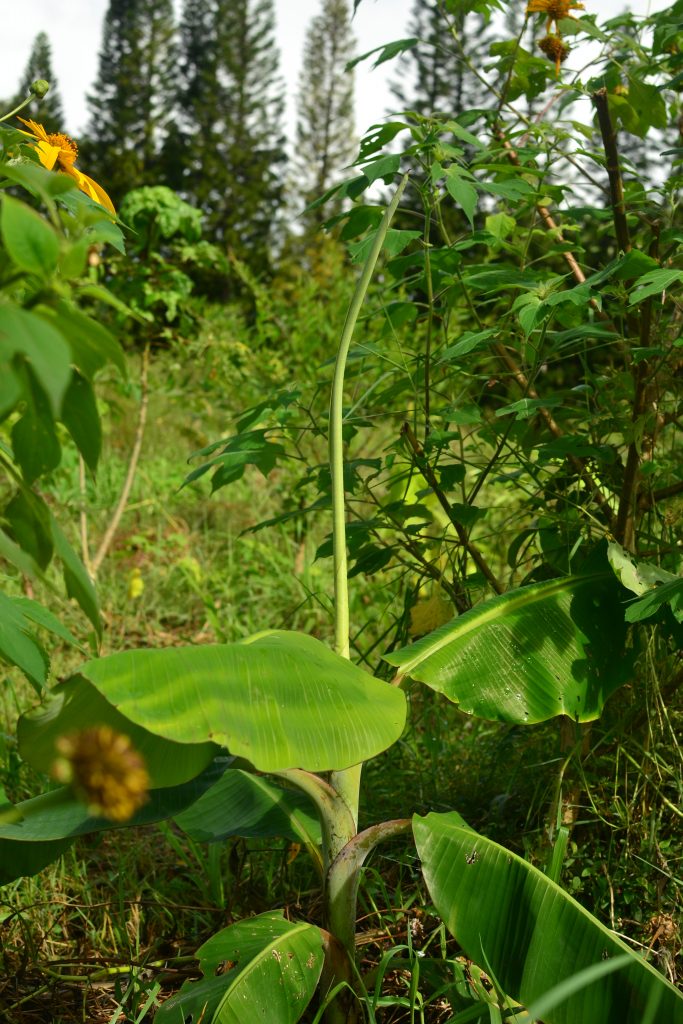
Calcium deficiency. Bent cigar leaf

Nitrogen

Nitrogen is an essential nutrient to all plants. It aids in the manufacturing of amino acids and proteins, promotes the production of chlorophyll, enzymes, vitamins and hormones. Without nitrogen, plants become stunted, anemic and weak. Nitrogen is mobile within the banana plant and will translocate into younger leaves. Bananas require water to absorb nitrogen, so water your plants in times of drought.

Symptoms: Stunted plants produce few leaves; older leaves turn chlorotic (yellow-green); bunches appear tiny; overall weakness; vibrant pink or purple leaf stalk wings that are not typical to the cultivar; weak roots; few or no keiki.

Recommended solution: Spread nitrogen fertilizer six to twelve times annually. We use Organic Nutri-Rich Chicken Manure Pellets 4-3-2 with Calcium 7% monthly, utilizing five to six cups per mature plant. Any animal manure will work as long as it’s properly composted.
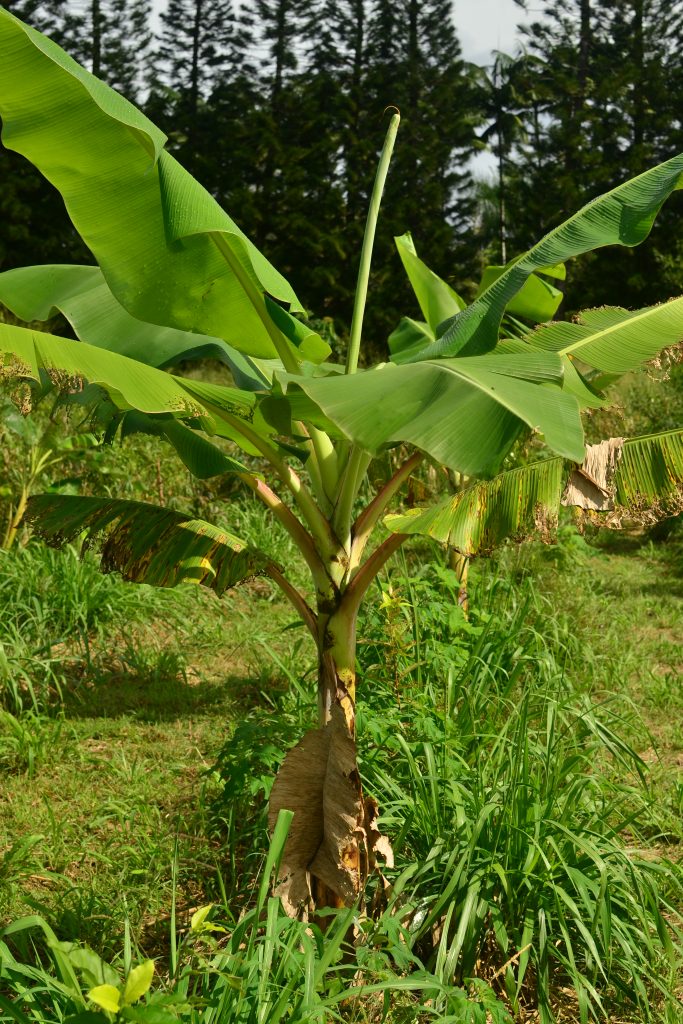
Nitrogen Deficiency. Dwarf Brazilian/Dwarf Apple. Pink leaf margins. Yellowish lower leaves

Potassium

Potassium is vital for growth, overall health, disease prevention, fruit production and quality.

Symptoms: Browning of leaf margins; premature and rapid yellowing of leaves; slow, stunted growth; fewer leaves coming out at an increasingly slow pace; general plant yellowing; maroon patches on leaves; skinny trunks; tiny racks with small, underdeveloped fruit; midribs of older leaves may be broken at one half to two thirds their proper length; Travelers Palm appearance.

Recommended solution: Add wood ashes when the flower bud appears. Add Sulfate of Potash 0-0-52. One quarter cup for immature plants and one half cup for mature plants. Also add fertilizer as the flag leaf appears before budding.
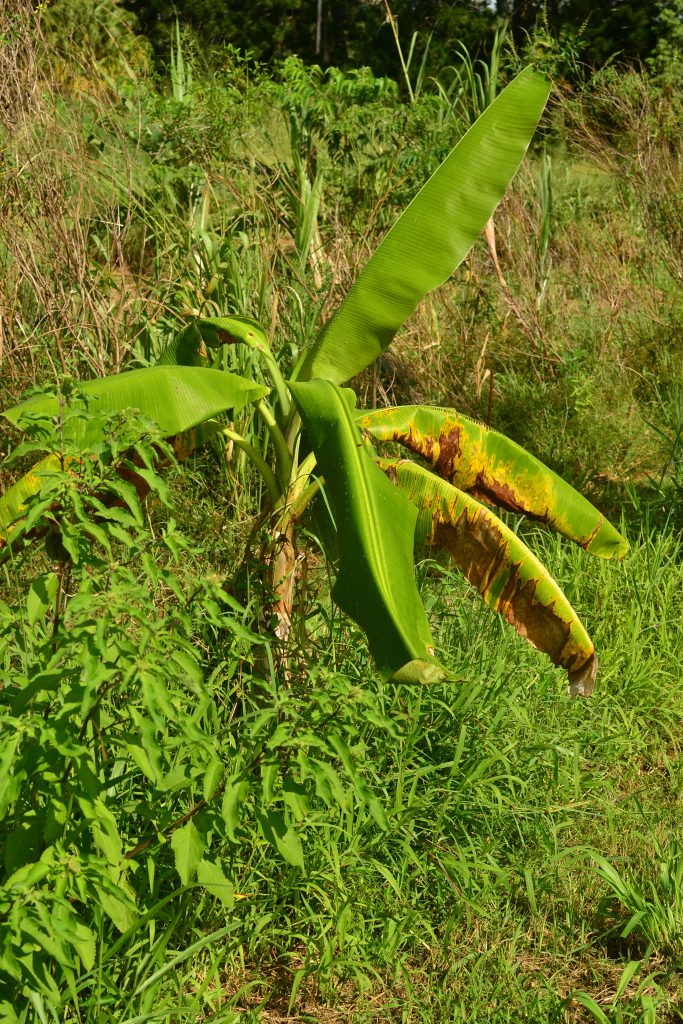
Potassium Deficiency. Non normal yellowing of lower leaves

Sulfur

Sulfur is essential for vitamin A production. Due to Hawaiian bananas being rich in vitamin A, they need larger doses to produce properly, especially Popoulu varieties.

Symptoms: Very pale-yellow coloration in new leaves; leaf blades become very soft and delicate, and tear easily; new cigar leaves may emerge completely white.

Recommended solution: Add Ammonium Sulfate 21-0-0 or Sulfate Potash 0-0-52, one quarter cup for immature plants and one half cup for mature plants. For Popoulu bananas, add one and a half cups for mature plants.
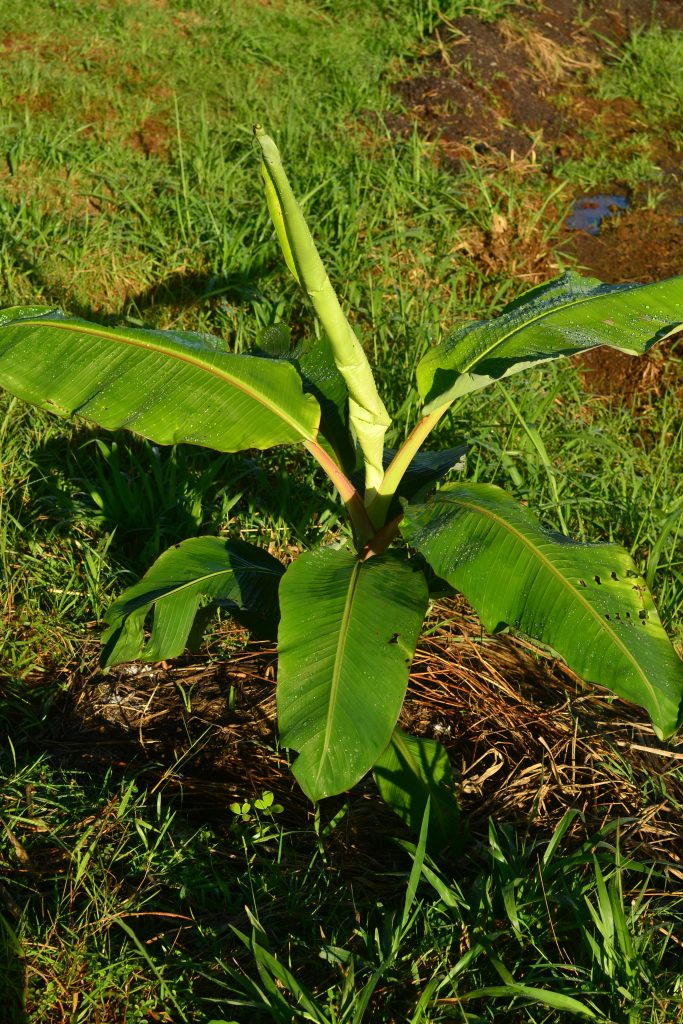
Sulfur Deficiency. Yellow cigar leaf. Calcium-boron deficiency
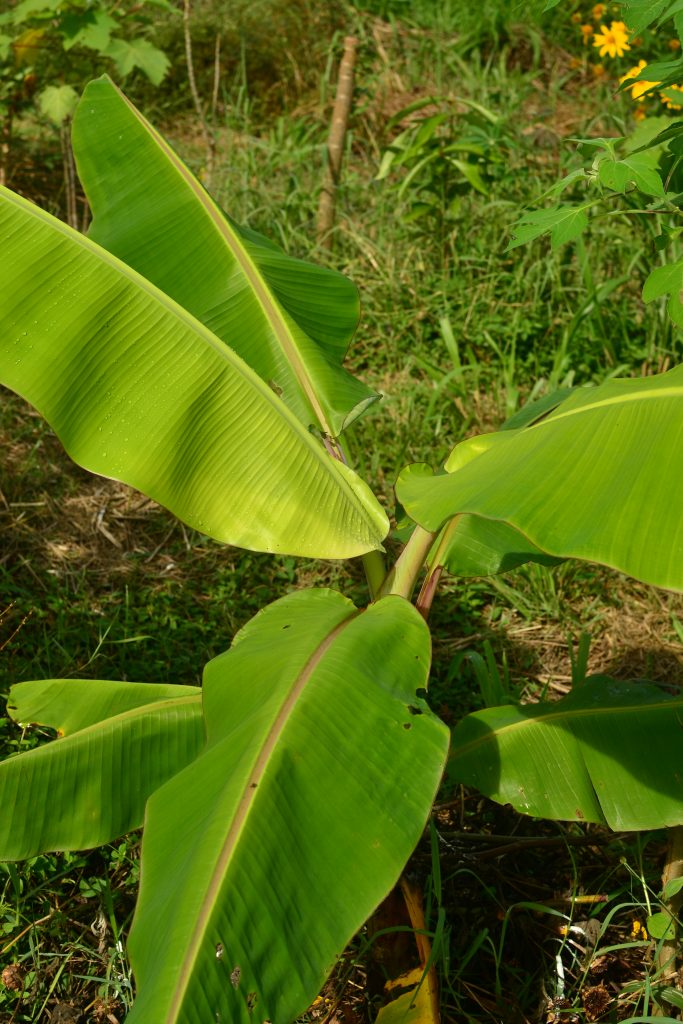
Sulfur Deficiency. Yellow new leaf
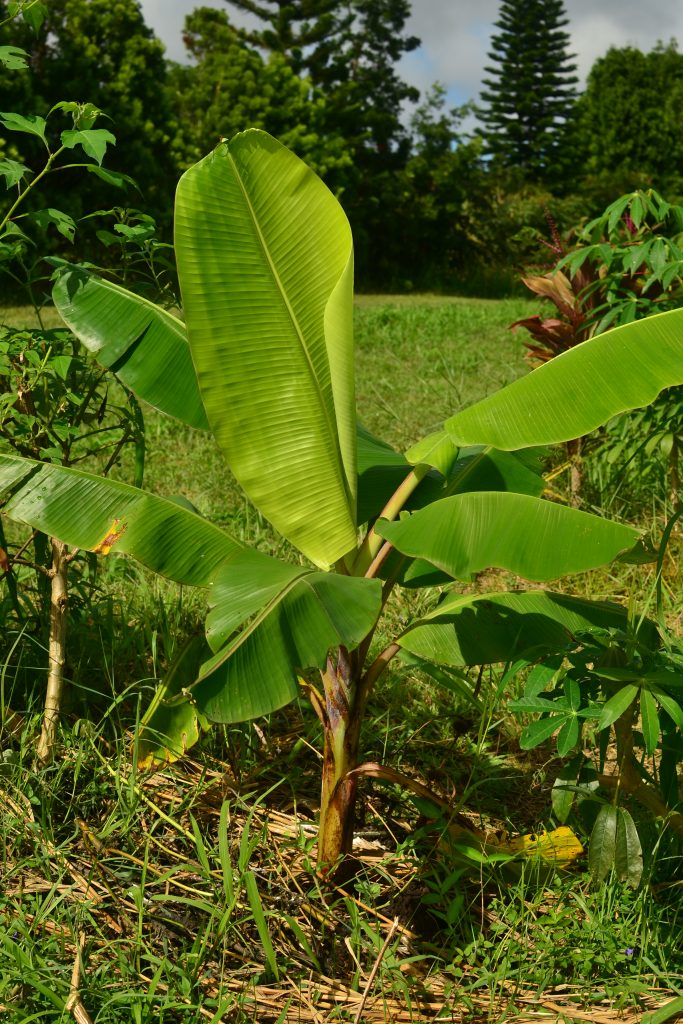
Sulfur Deficiency. Yellow new leaf. Notice tearing of margin on lower leaf

Pests

Rose Beetle Damage

Solution: Hand pick beetles at night and crush or drown in soapy water. Hand picking is surprisingly effective in reducing populations.
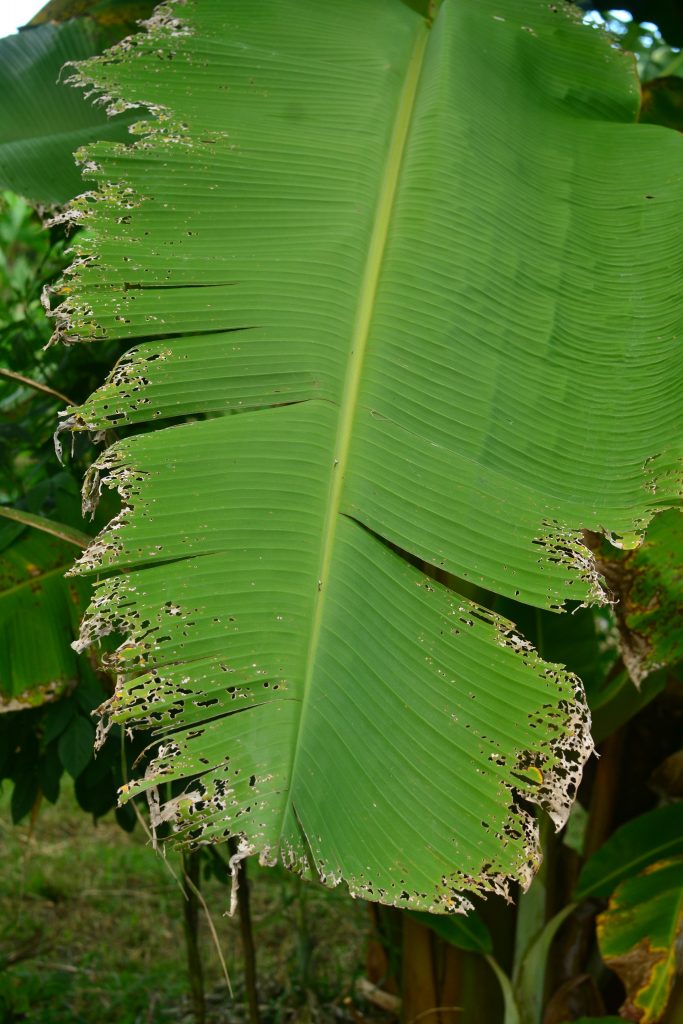
Banana Rose Beetle Damage

African Snail Damage

Solution: Hand pick and squash or drown in soapy water. Collect at night.
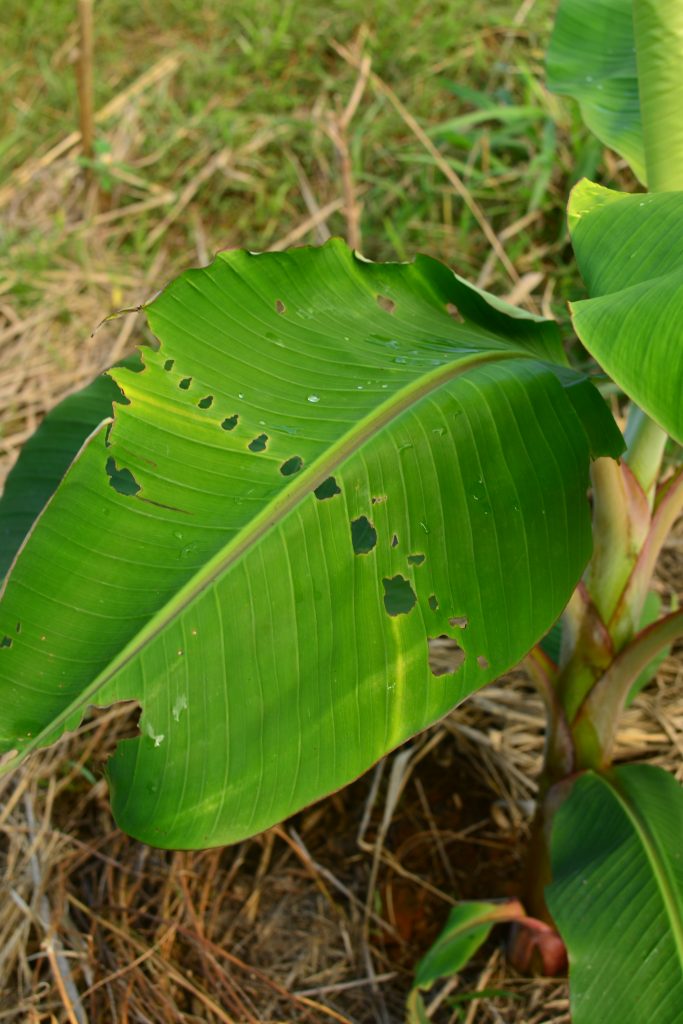
African Snail Damage

Banana Corm Weevil

Solution: Obtain weevil-less propagation material, source from a legitimate propagator. Always inspect corms before planting. If a plant has weevils, learn about the correct way to clean corms to dig and remove weevils prior to planting and/or propagation. Plant in a non-infested area.

I do not have weevils nor any photos with their damage at this time. If plants fall over due to weakened roots, banana corm weevils are most likely the problem.
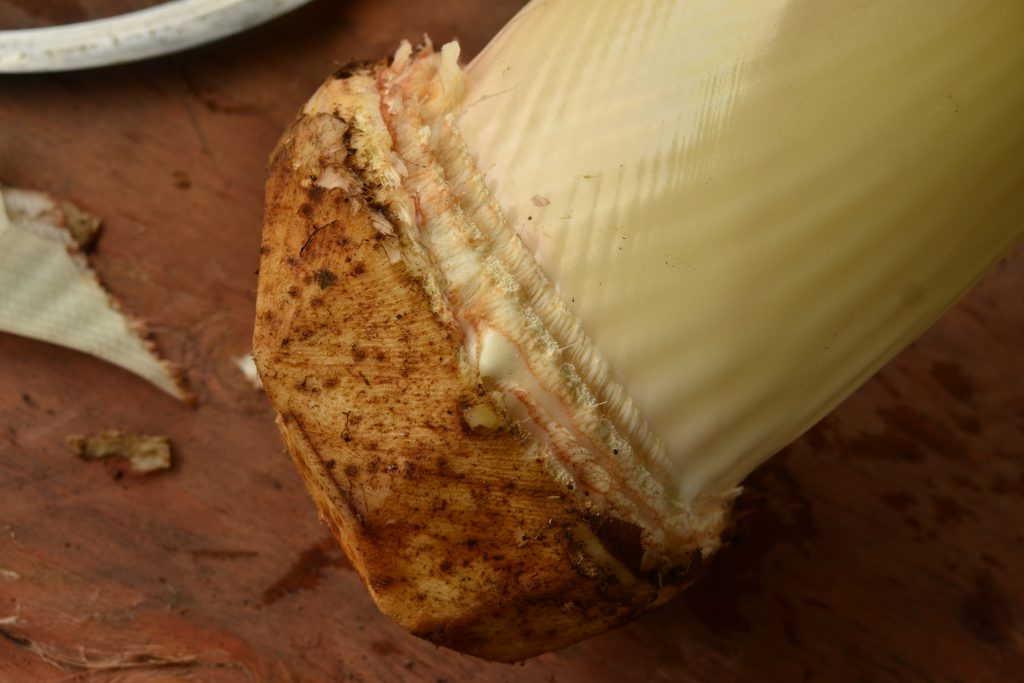
Properly cleaned corm due to banana weevil damage

Tips

To combat potential deficiencies, mineral fertilize along with your normal fertilizing procedures when planting. Up to four times per year (two to three times in low rainfall areas, <60 inches), add the following to the soil:

Immature Plants                                             Mature Plants (Plants with keiki)

1 teaspoon borax                                            2 Teaspoon Borax

½ cup dolomite                                               1 cup dolomite

¼ cup of Ammonium Sulfate 21-0-0               ½ Cup Ammonium Sulfate 21-0-0

Or ¼ cup of Sulfate Potash 0-0-52                  Or ½ Cup or Sulfate Potash 0-0-52

Dig bananas as large of a hole as possible when planting. Place fish scraps and compost in the bottom of the hole. Plant them deeper than their rootball. Fertilize with nitrogen monthly. Pee on them regularly. Spray micronutrients twice monthly. Apply composts and mulch thickly and widely around the base of the plant as often as possible. Literally hill them as you would potatoes, trunks will not rot from contact with soil/mulch. Do not remove leaves until they are completely brown. The plants may still be utilizing those leaves and translocating nutrients. Manage a few delicious varieties intensively; resist the urge to mass plant them. Understand they are difficult to manage properly, which is essential to reduce the spread of BBTV. (Don’t get in over your head!) Test your banana plants for BBTV and share them with others committed to stopping the spread of the virus.

All your efforts won’t be fruitless! Watch the plant pump out larger racks than you’ve ever seen!
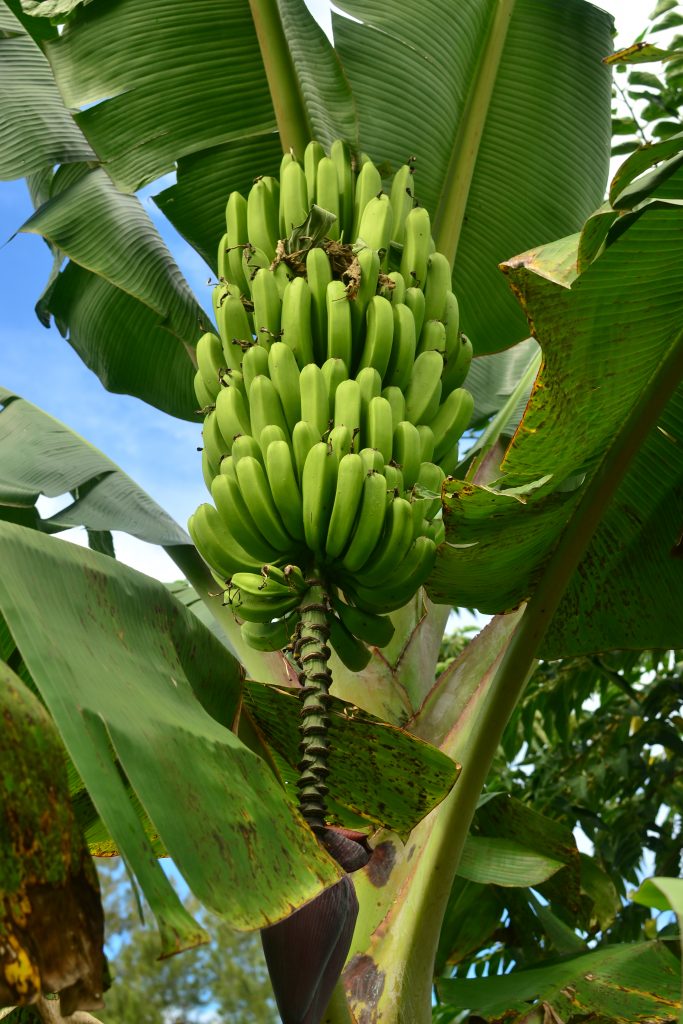
Dwarf Maoli
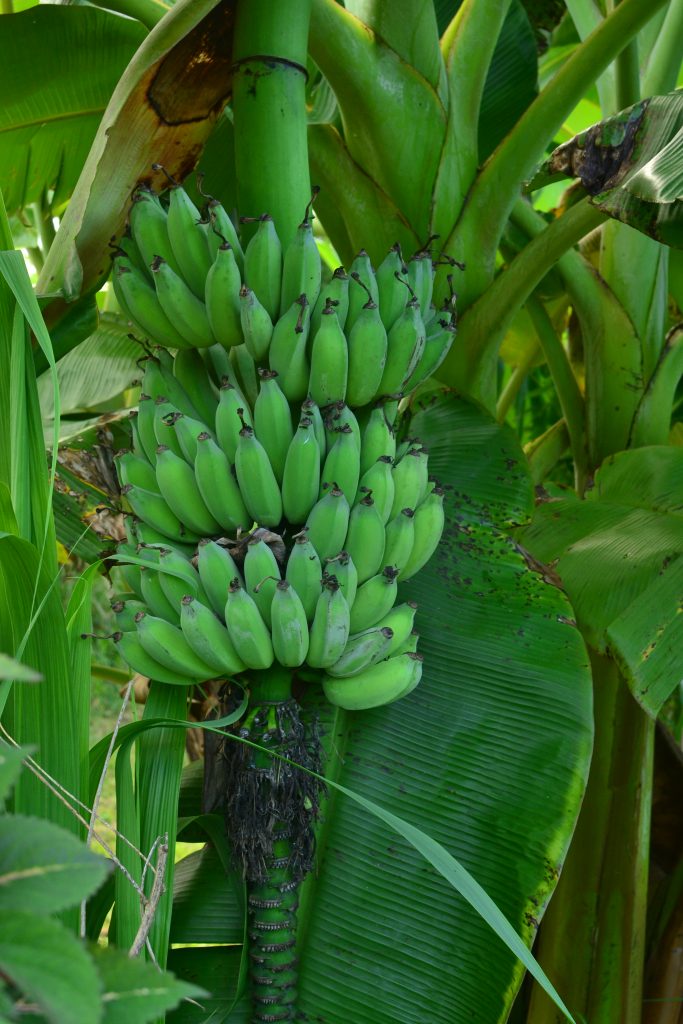
Dwarf Namwah

A lot of my information came from the amazing book: The World of Bananas in Hawaii: Then and Now by Angela Kay Kepler and Francis G. Rust. For a much more detailed and in-depth discussion of bananas in Hawaii including varieties, lore, recipes, nutrients, deficiencies, diseases and pests, check it out! https://uhpress.hawaii.edu/title/the-world-of-bananas-in-hawaii-then-and-now/

Citation: Kepler, A. K. and F. G. Rust. (2011) The World of Bananas in Hawai’i: Then and Now – Traditional Pacific & global varieties, cultures, ornamentals, health & recipes. Pali-O-Waipi’o Press. Haiku, Hawaii.

Happy Gardening!
African Blue Basil (Ocimum kilimandscharicum x basilicum ‘Dark Opal’)

Description

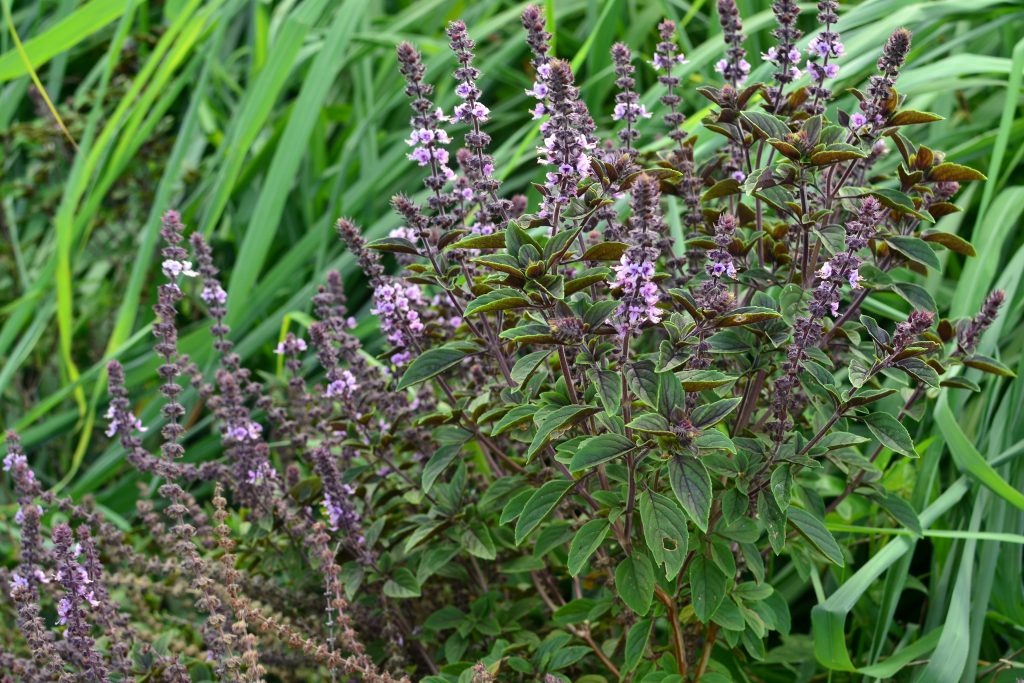
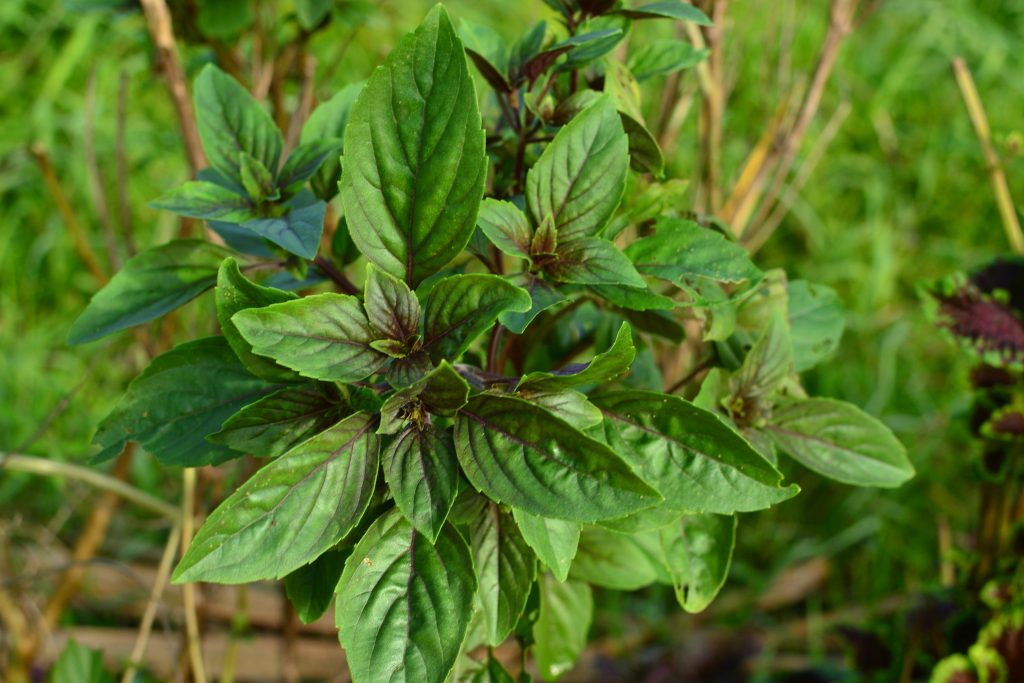
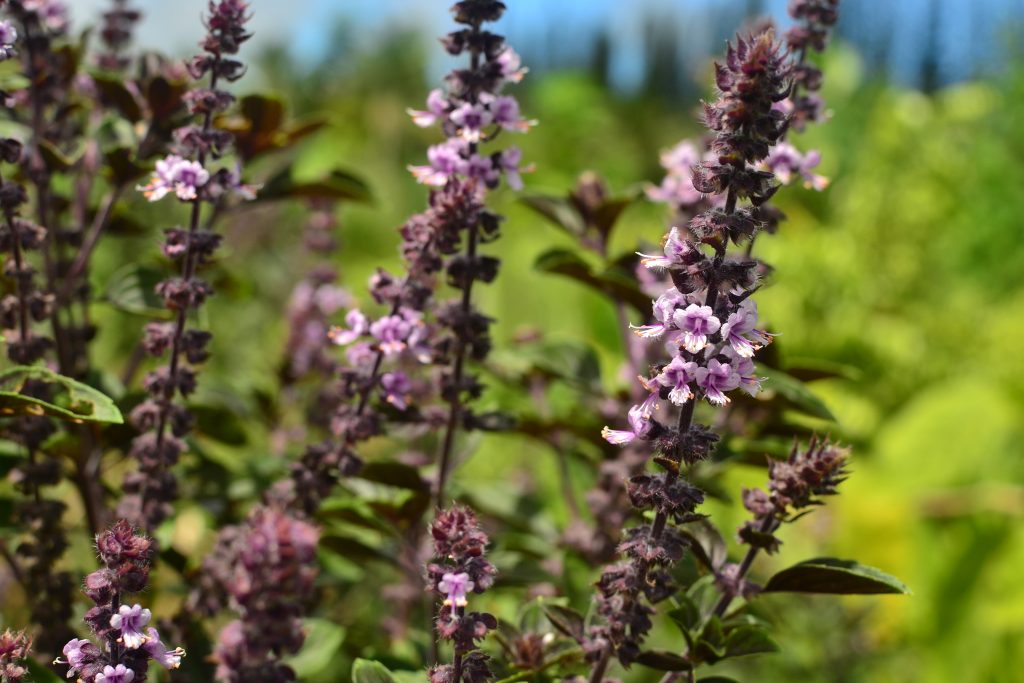
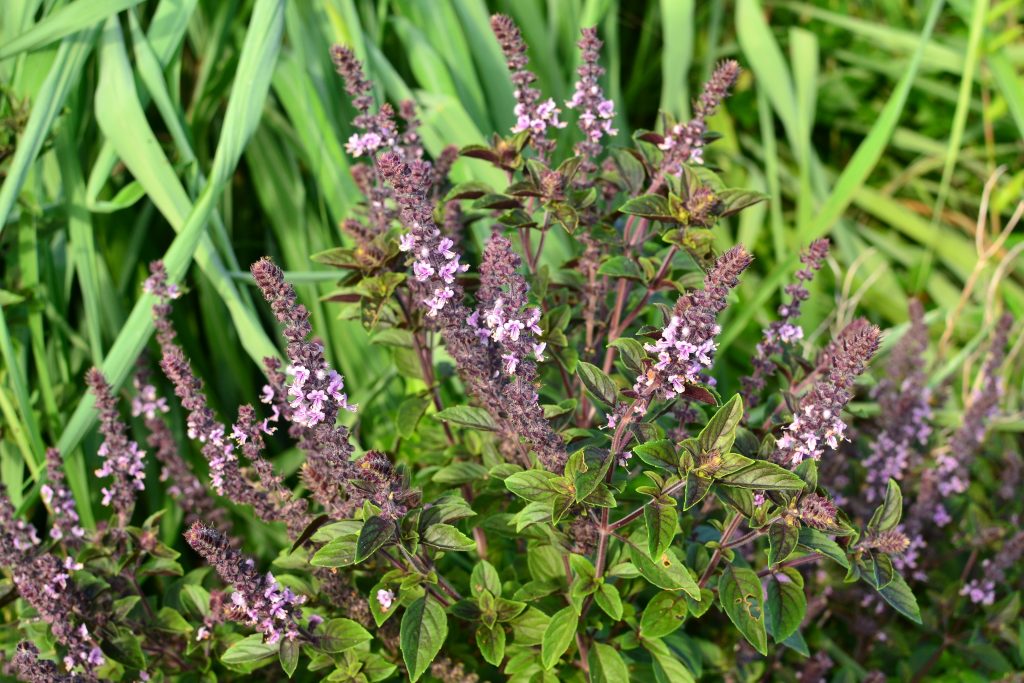
African blue basil, Ocimum kilimandscharicum x basilicum ‘Dark Opal,’ is an attractive, fragrant perennial herb. This plant is a hybrid of two basil species: camphor basil (a perennial) and common basil (an annual); the resulting cross is sterile and perennial. The plant has a somewhat spicy basil flavor with a hint of camphor, making its taste slightly medicinal. African blue basil grows to five feet tall and wide; it continually grows up and falls over, creating a bush-like habit. This plant flowers profusely and is constantly buzzing from all the pollinators coming to visit. This is one of the most carefree plants in my garden. No pests bother it, and it’s always there, just growing and flowering.

Propagation

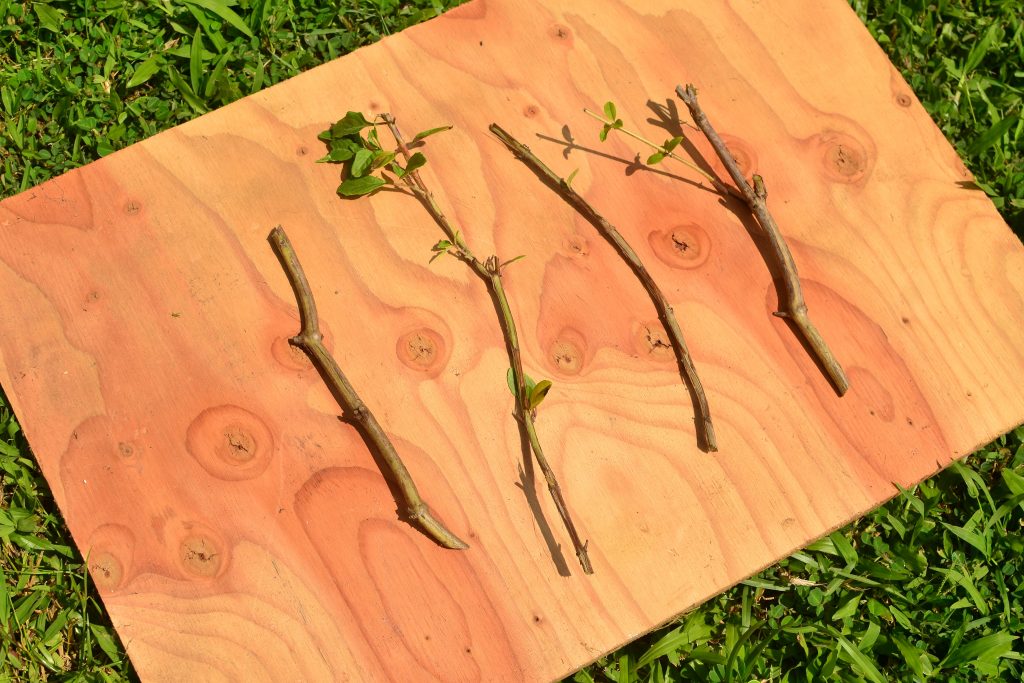
African blue basil is sterile, producing no viable seeds, and is therefore propagated by cuttings. Woody and non-woody cuttings work for propagation.

Cuttings ready for propagation

Care

This basil is carefree; it will thrive on neglect and on poor soils. It just grows and grows. Regular fertilizing and pruning promotes healthy tender growth.

Eating

Leaves are edible raw or cooked. In order to encourage the most tender leafy growth, prune regularly, removing flower heads, just as you would with common basil.

Spinach or other greens and spices can be utilized in order to offset the somewhat medicinal taste; many use this technique for pesto and other sauces, dips and spreads.

Where to obtain planting materials

Find someone growing this plant and ask for cuttings. I’ve never seen this plant for sale; it was gifted to me by a neighbor some years ago.

My Garden

I’ve been growing this plant for a few years, now, just as an unidentified blue or purple basil. I utilize it in my polycultures primarily as a biomass plant to feed the soil and as a pollinator attractant, eating a leaf myself here or there. I recently identified the plant as African Blue Basil and started learning a bit more about it. Only today, I learned that people actually make pesto with it – yum! With that in mind, it’s time to go prune my plants and get them to push out some tender new growth for consumption.

Happy Gardening!

Sugarcane (Saccharum officinarum)

Description

Sugarcane, or kō in Hawaiian, Saccharum officinarum, is an impressive multipurpose perennial clump grass. This plant has been cultivated for thousands of years around the world and was brought to Hawaii long ago as a canoe plant of the Polynesian migrants. (For more information on sugarcane as it specifically relates to Hawaii, check out: https://cms.ctahr.hawaii.edu/cane/.)

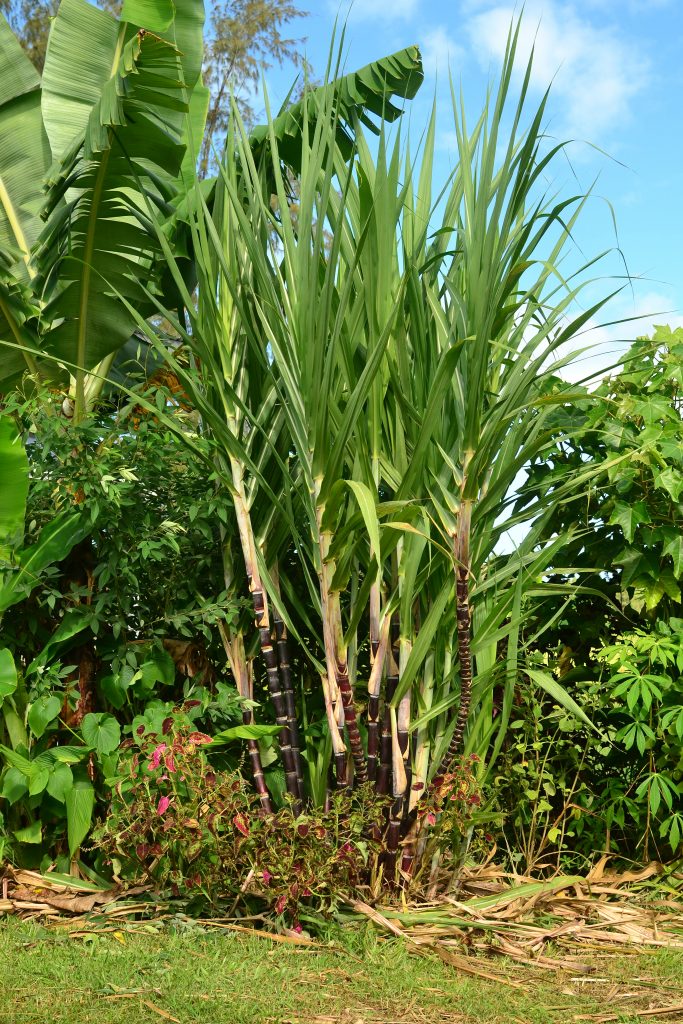
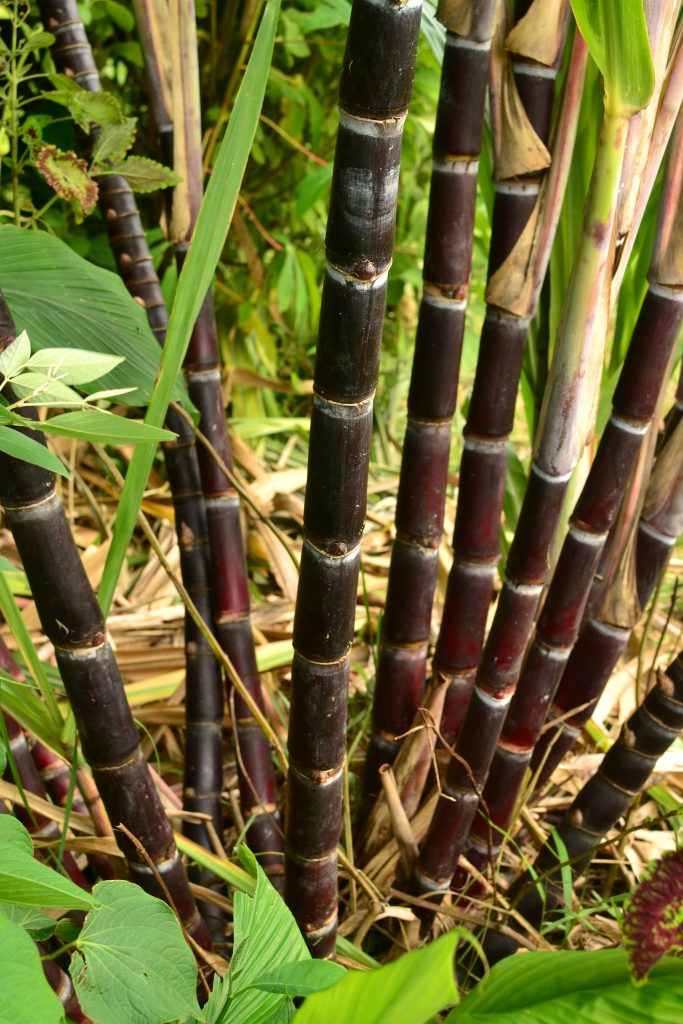
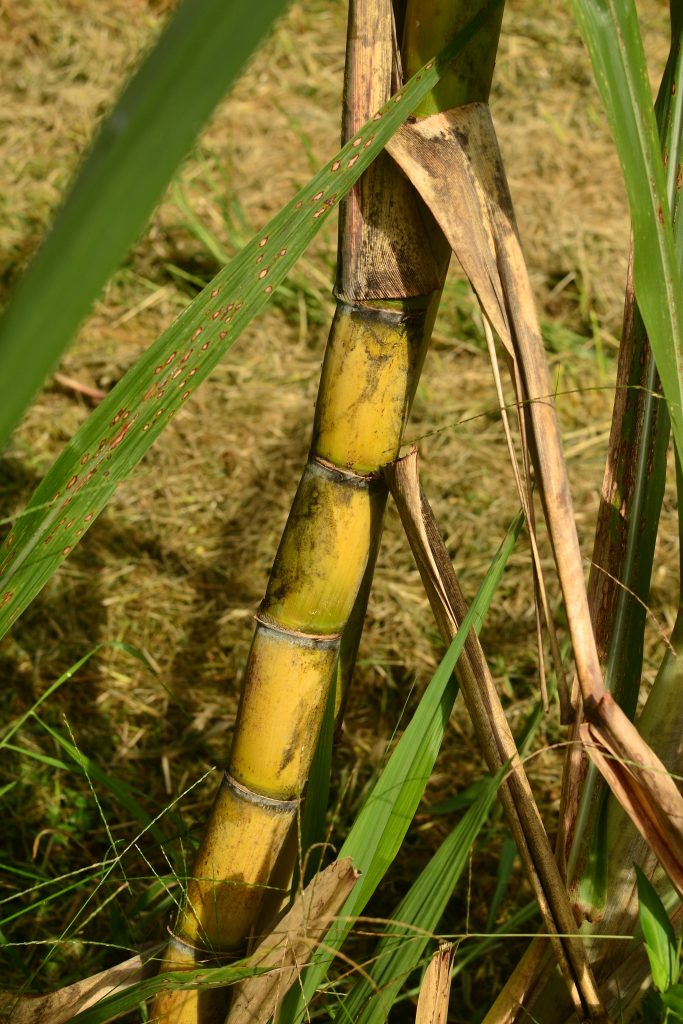
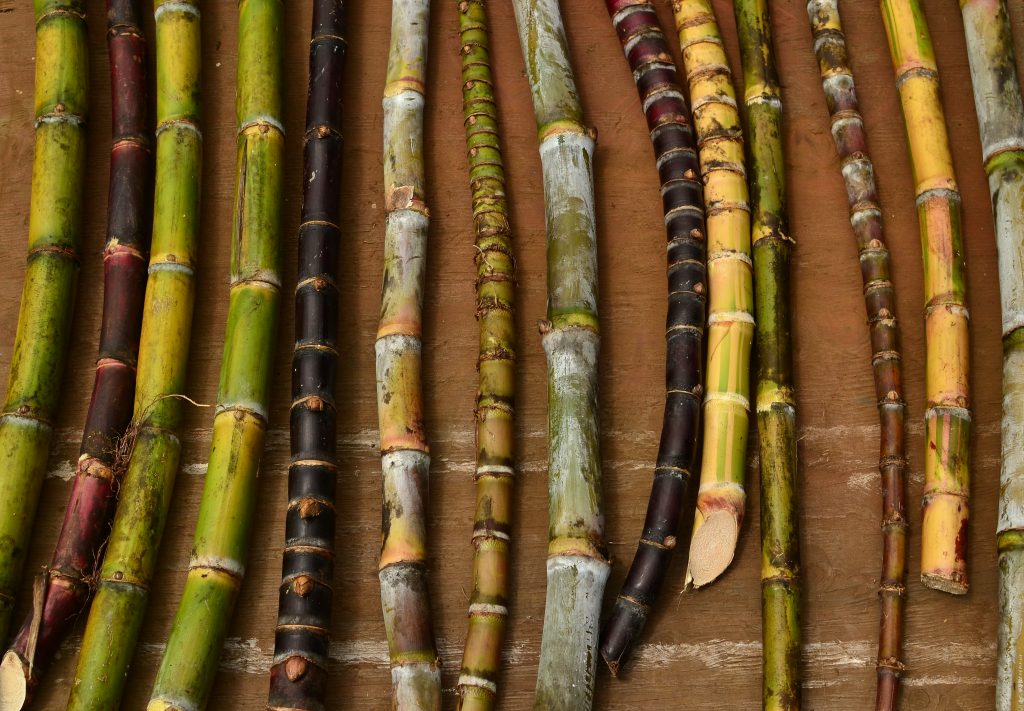
Depending on variety, sugarcane can vary widely in size and stature; some of the more common types grow on average to twelve feet tall by two inches in diameter, with the clump about six feet wide. Not only is sugar cane one of the most efficient known photosynthesizers, some varieties even fix their own atmospheric nitrogen in association with the bacterium Gluconacetobacter diazotrophicus living in the stem!

Sugarcane is a perfect permaculture plant in the tropics; as an easy indicator of soil fertility, it can be grown up quickly as a windbreak and provides ample amounts of biomass. When the canes and leaves of sugarcane are chopped and applied as mulch, the result is an amazing fertilizer. As it decomposes, the nitrogen and sugars in the stem are released, supporting more green leafy growth, as well as beneficial microorganisms in the soil. Silica is also returned and made available, aiding and improving surrounding plants’ defense mechanisms and enhancing plant water translocation.

Sugarcane is traditionally used for sweetening medicines, as an anti-bacterial for wounds, and of course, juicing and processing into sugar. It’s edible and it’s medicine, too. I didn’t even mention the diversity and beauty! What a cool plant!!!

Propagation

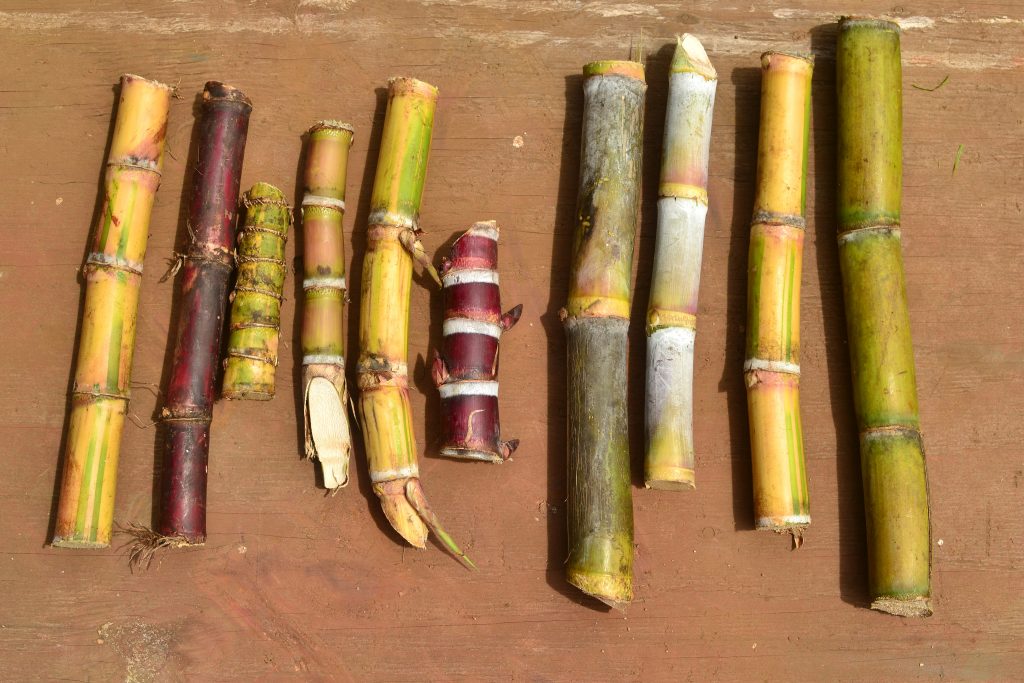
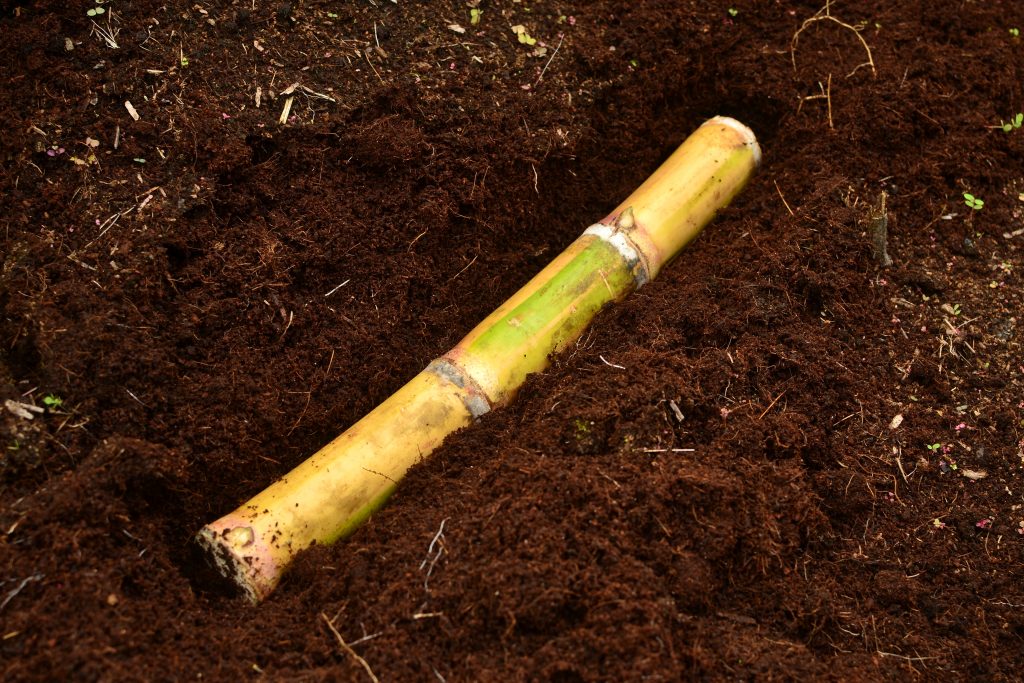
Although mature clumps sometimes produce seed, sugarcane is typically propagated from cuttings. Take a stem with at least two to three nodes and bury it horizontally. Another option is to partially bury it at a 45-degree angle into the soil, making sure some nodes are under the soil surface. Typically, the highest portion of the stem is used for propagation, while the lowest part containing the most sugars is processed for consumption.

2-3 section node cuttings ready for planting

Plant horizontal with some of the shoots directed upward while the rest are pointed directly downward

Care

This plant loves sun, rain and is quite hungry. Plant in fertile soil and/or feed regularly for maximum production.

I maintain my plants as upright clumps only. Once canes begin to sprawl too much toward the earth, I cut down for mulching, propagation or consumption. I find leaving a tidy patch for easy maintenance is most beneficial. I also periodically remove spent leaves from canes to expose their beauty and mulch their beds.

Expect anywhere from nine months to two years before the first harvest. To ensure as much sugar energy is left in the cane as possible, harvest the plants before they flower (typically November and December in Hawaii). Sugar is concentrated in the lower portion of the cane.

Sugarcane is commercially harvested two to three times then replanted. However, with proper management, a clump can be grown for 10 years (or more) before replacement.

Eating

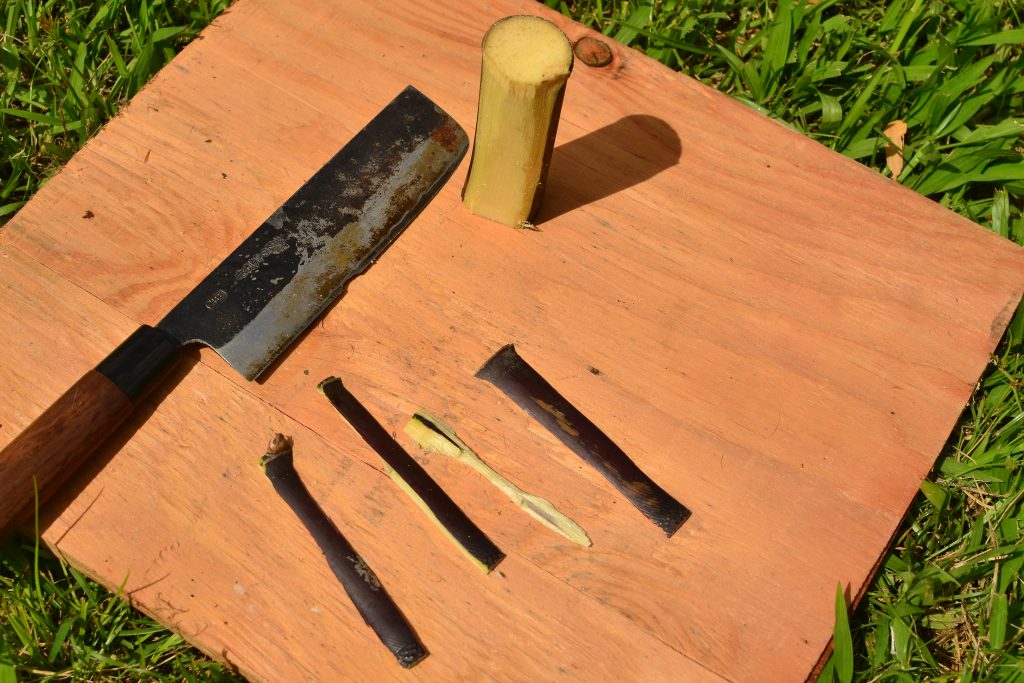
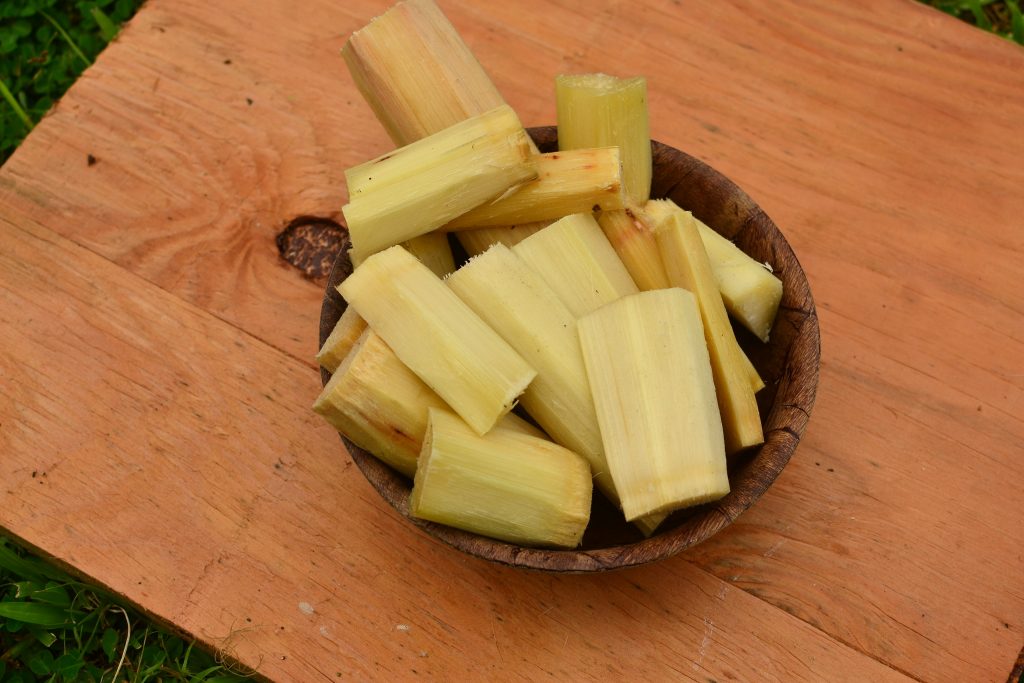
The easiest way to enjoy sugarcane is to divide into node sections and remove the thick outer skin of the cane. The inside is chewed to release the juice; fiber should be spit out/composted.

Sugarcane juice is obtained by pressing canes. Further processing and drying will result in crystallized or granular sugar.

Unopened flowers are edible raw, steamed or toasted. Unfolded leaves are edible cooked.

Cut into node sections and then cut off skin

Quartered and ready for snacking

Where to obtain planting materials

Sugarcane is everywhere! Sugarcane is regularly available at many plant sales, and is often naturalized in wild places. There are also a handful of collectors/enthusiasts around who share their specimens readily.

My Garden

Sometimes I overlook plants’ qualities, and until I’m actively cultivating that plant, I don’t fully appreciate the species. Sugarcane is a perfect example. It’s on the road everywhere, and it was in my first garden in Hawaii before I moved in. So, I allowed it to grow and ate it a few times. It wasn’t until one of my friends brought me over to his place that I truly recognized the diversity in colors, shapes and robustness. He’s always trying to share his collections’ diversity; just in case he loses any, he’ll know where to find them, again. As an individual who always wants to promote biodiversity and sharing, I gladly accepted a number of sugarcane cuttings and planted them in my own garden. It was only this month that I recognized and appreciated the unique attributes that I described above, and realized the importance of this species in a tropical cropping system. This is one of the first pioneer plants that should be planted in a system to feed the soils to allow for greater cropping capability for future plantings. It makes sense why this plant has been cultivated for generations as a biomass, protection crop and fertility builder. Grow sugarcane!

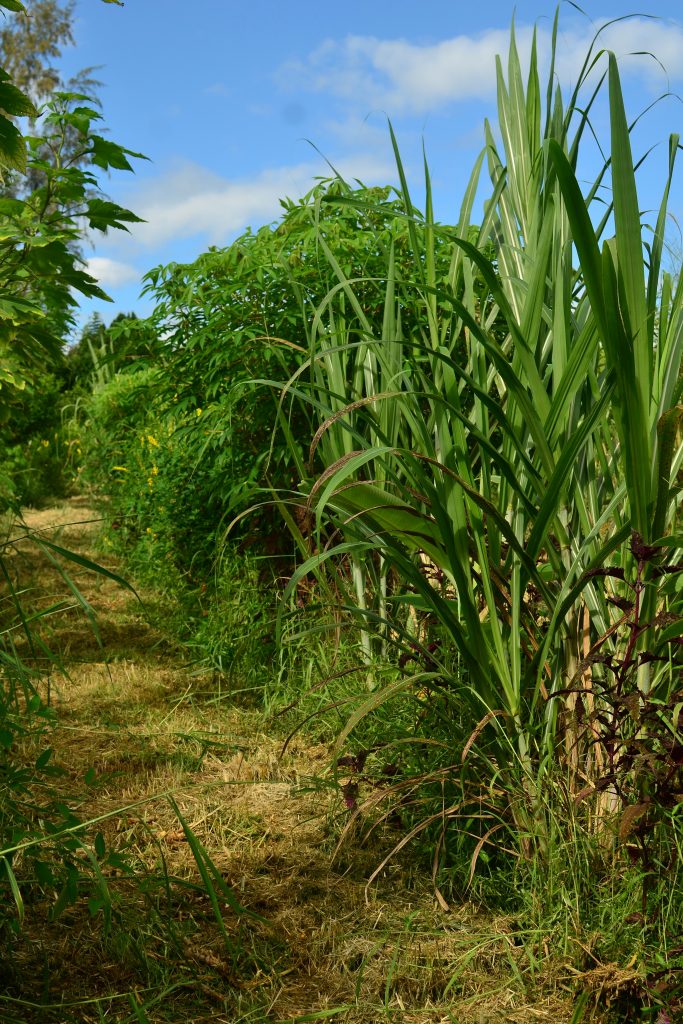
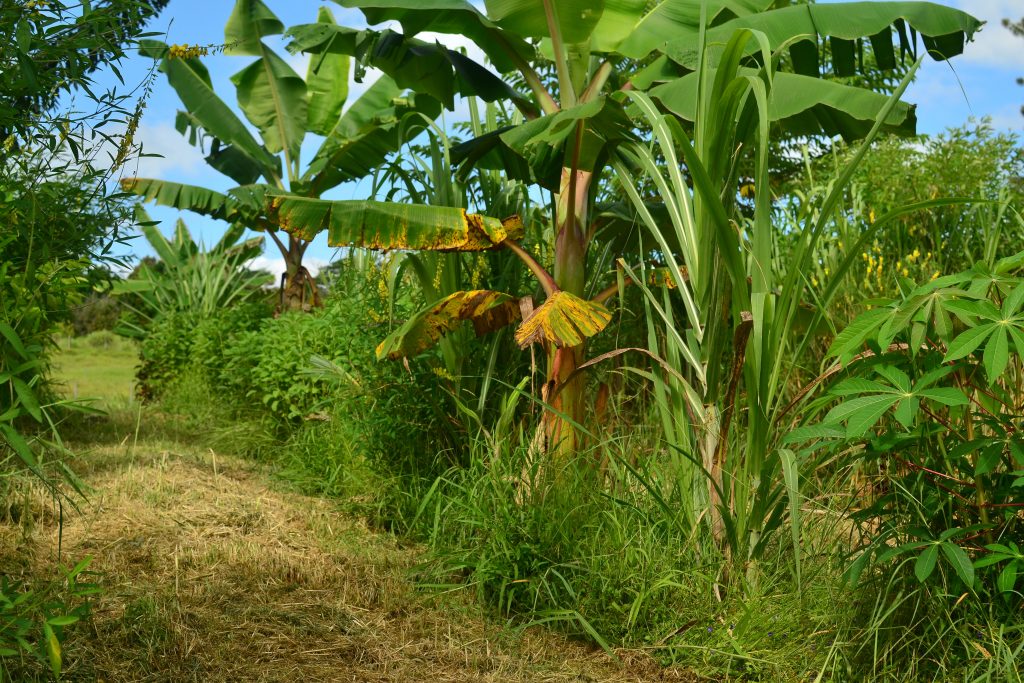
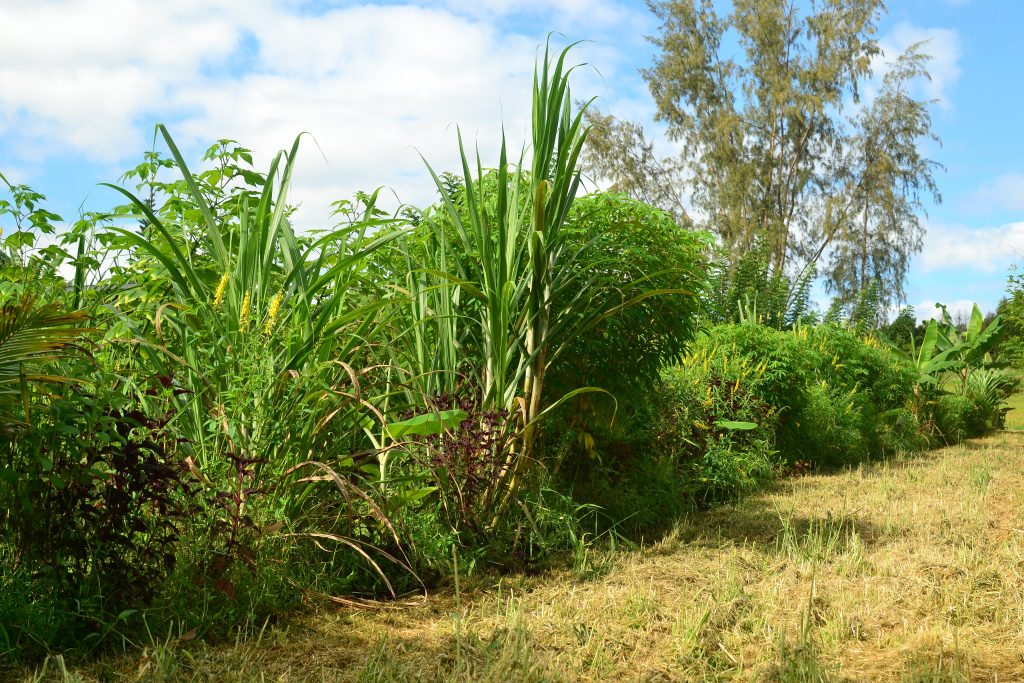
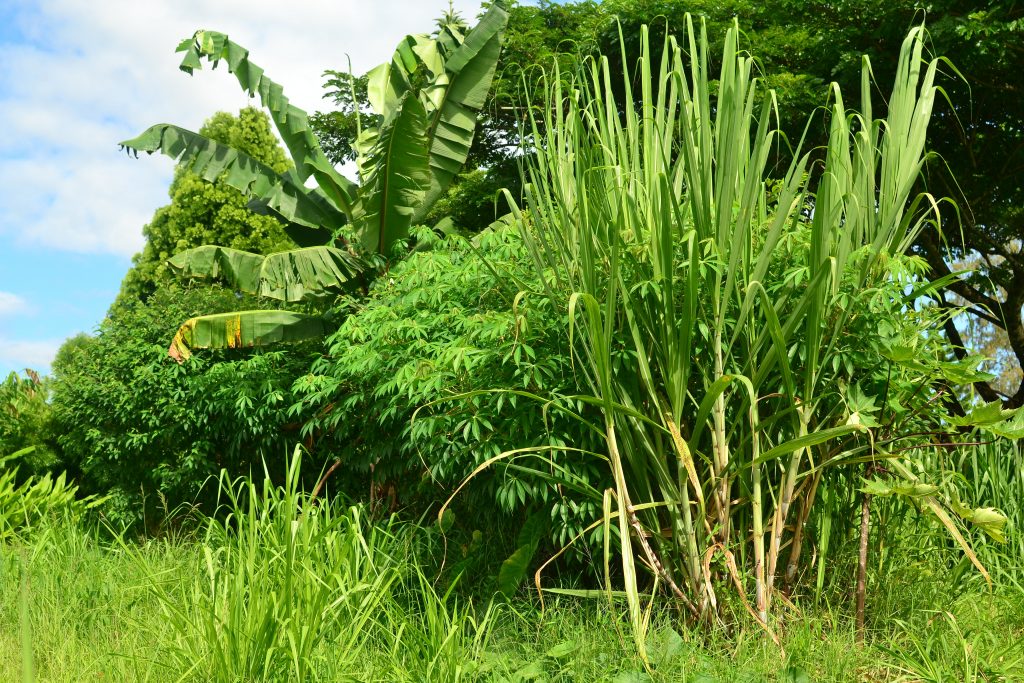
Sugarcane grown with: coconut, banana, squash, cosmos, cassava, blue basil, bush basil, edible hibiscus, Plectranthus barbatus, coleus, and crotalaria

Sugarcane grown with: coconut, banana, squash, cassava, cosmos, blue basil, bush basil, edible hibiscus, Plectranthus barbatus, coleus, and crotalaria

Sugarcane grown with: coconut, banana, squash, cassava, cosmos, blue basil, bush basil, edible hibiscus, Plectranthus barbatus, coleus, and crotalaria

Sugarcane with: Thai Basil, Catnip, Amorphophallus konjac, Shallots, Ginger, Boesenbergia rotunda, Pigeon Pea, ele ele banana, Broadleaf Papaya, Squash, Finger Lime, Kava, Kalo, Jobs Tears, Cassava, Alternanthera dentata

Happy Gardening!

Rosemary (Salvia rosmarinus)

Description

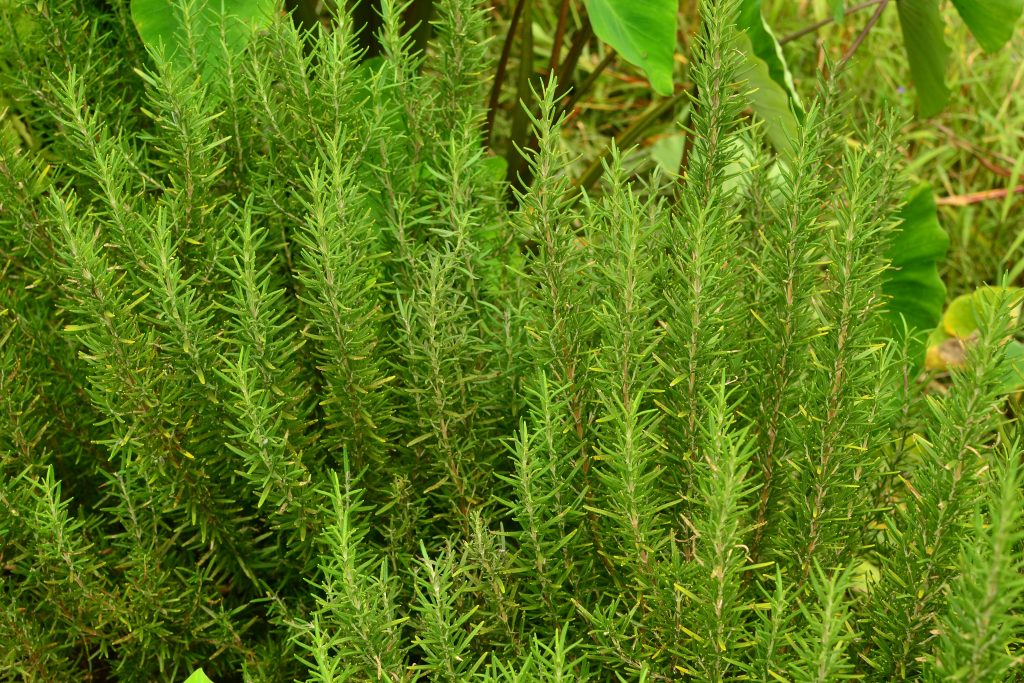
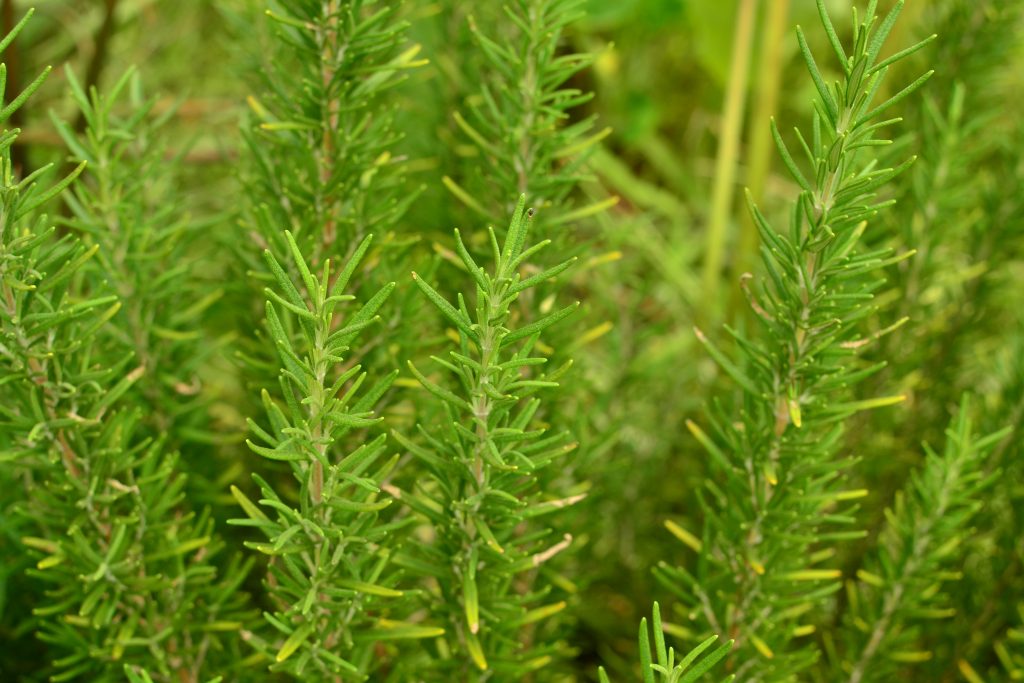
Rosemary, Salvia rosmarinus, is a highly potent perennial herb, with a long history of cultivation. Rosemary has the potential to grow up to six feet tall and wide; different cultivars may have differing growth habits. I prefer upright forms because I find them easier to maintain than low-growing sprawlers. Medicinal properties are attributed to antioxidant and anti-inflammatory compounds, which may boost the immune system and blood circulation. It is also considered a cognitive stimulant and can improve memory! Rosemary has an amazing aromatic smell and an interesting structure, too!

Propagation

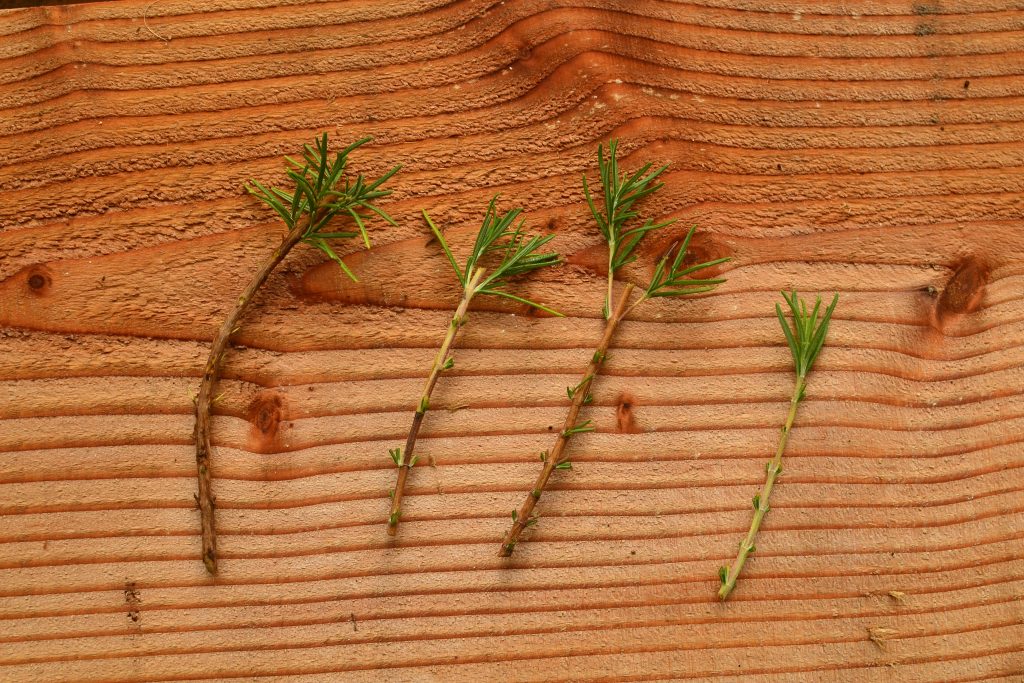
Rosemary is propagated by cuttings. Use cuttings six inches long and strip off all lower leaves, leaving a few at the top. It can set seed, however, seeds often have low viability and can be very difficult to germinate.

Cuttings ready to plant

Care

Rosemary prefers full sun. Once established, it is quite tolerant of most conditions.

Rosemary is from the Mediterranean region where conditions are typically quite dry. These conditions are very different from a wet tropical ecosystem, so a few techniques are recommended to allow it to thrive in the tropics. If you live in a wet zone, it is beneficial to add cinder into your planting hole to allow for better drainage, as rosemary cannot handle waterlogged conditions. Pot culture is common with rosemary as it allows one to create more desirable soil conditions and the plant can be moved out of excessively rainy weather, when necessary.

Eating

I harvest the youngest, most tender leaves and use them in the kitchen as an herb. I prefer to cook them rather than use raw because of its slight bitterness. Used as a savory seasoning on baked goods or roasted veggies is my favorite way to consume it.

Where to obtain planting materials

Rosemary is sold pretty much everywhere. Whenever possible, I find it beneficial to acquire propagation materials from a neighbor or other local source growing successfully, as this indicates a cultivar that will be more adapted to our climate.

My Garden

Growing up in California, I’ve always been around rosemary; it’s in a lot of people’s front yards where you can smell it as you walk by, and it’s a common ingredient in many foods. I have fond memories of walking to school and putting rosemary in my pocket to smell all day long. Moving to Hawaii, I was shocked to learn it would grow here as well! I grew rosemary in pots for a few years in Puna (from cuttings from friends), and after moving to Hilo, I noticed one of my neighbors had a small hedge growing on their fence. Their planting inspired me to take my plants out of pots and stick them in the ground. Wow! I’m actually surprised at how they are thriving and growing much faster now. I added plenty of cinder into the planting hole and planted them in a slightly raised bed. Now, the real questions: how big will they get, and will they flower?

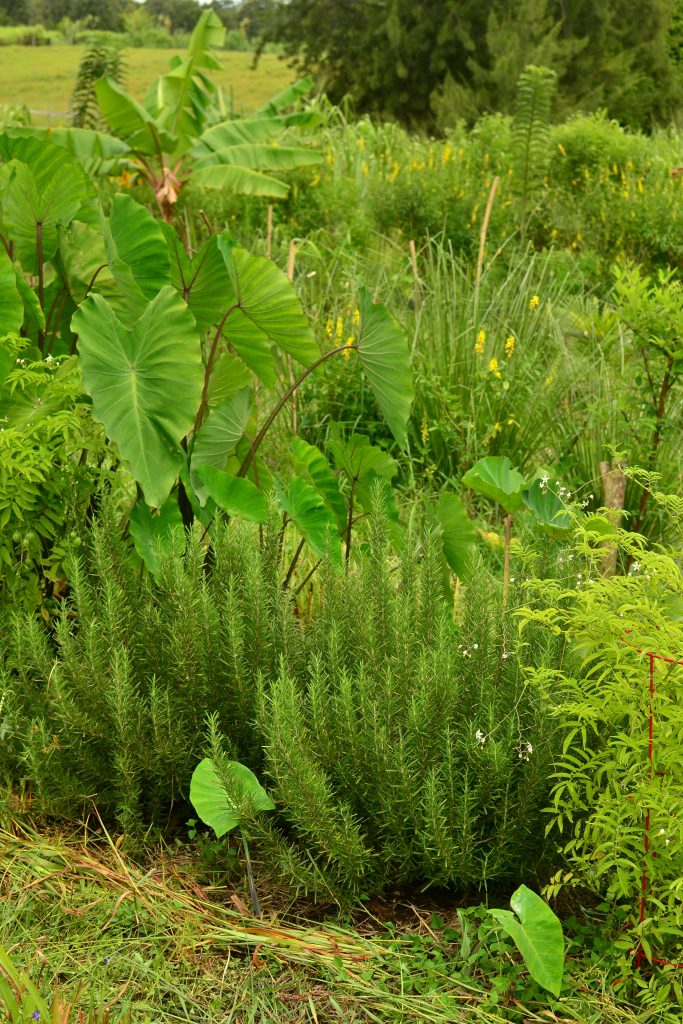
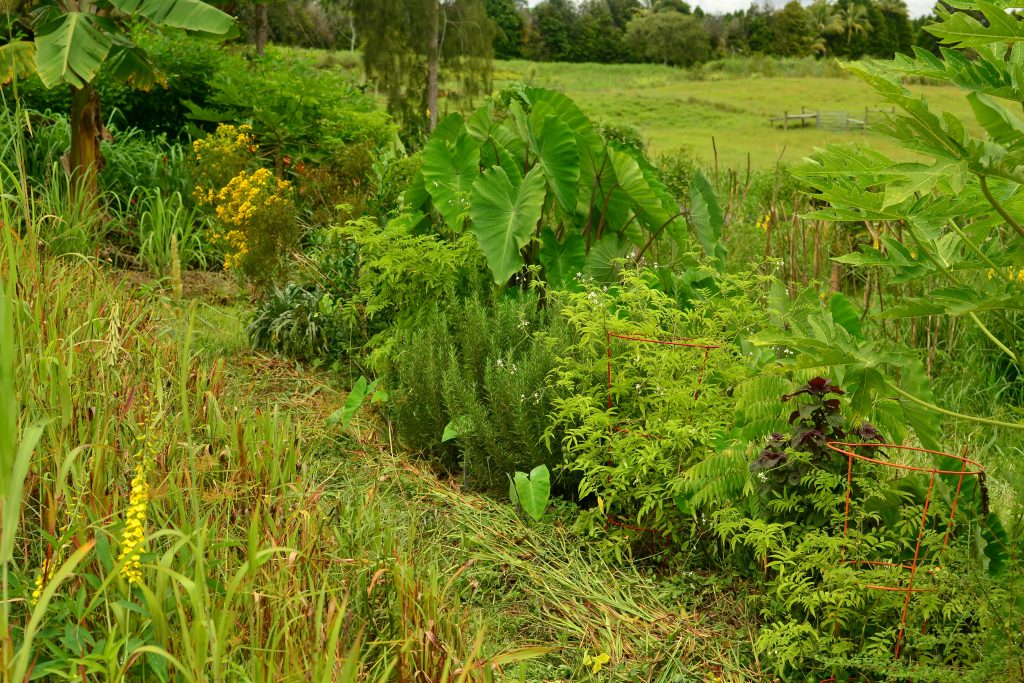
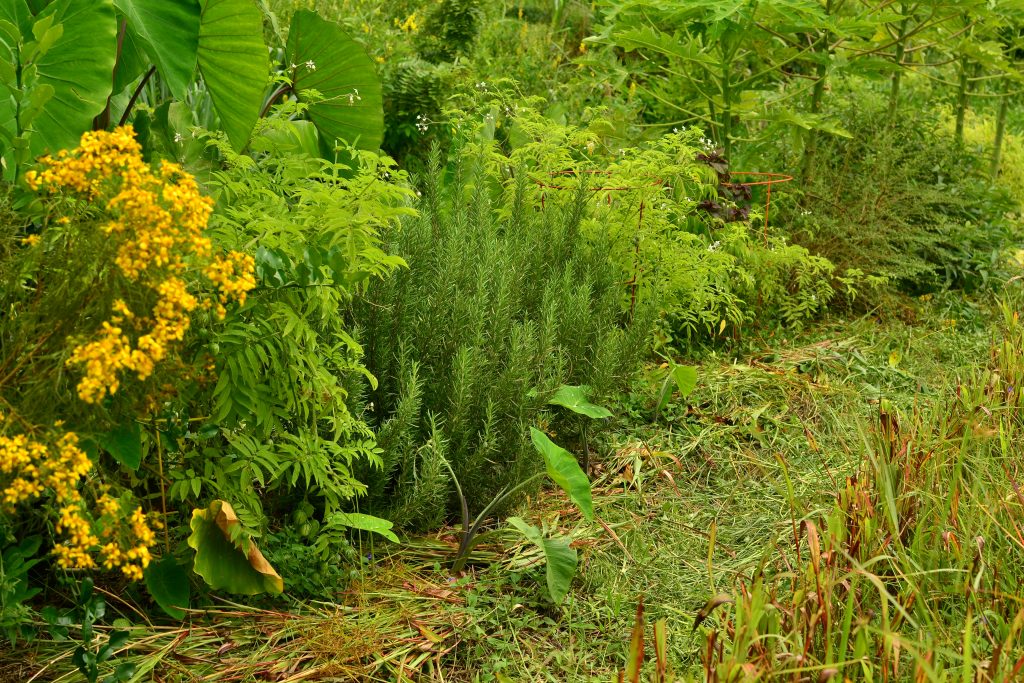
Rosemary planted in my herb garden with: mitsuba, ko’oko’olau, kafir lime, tzimbalo, kalo, belembe, curry leaf, shiso, papaya, bush oregano, bouillon plant, bush mint, fragrant pandan, mint, mugwort, strawberries, blue berries and moringa.

Rosemary planted in my herb garden with: mitsuba, ko’oko’olau, kafir lime, tzimbalo, kalo, belembe, curry leaf, shiso, papaya, bush oregano, bouillon plant, bush mint, fragrant pandan, mint, mugwort, strawberries, blue berries and moringa.

Happy Gardening!

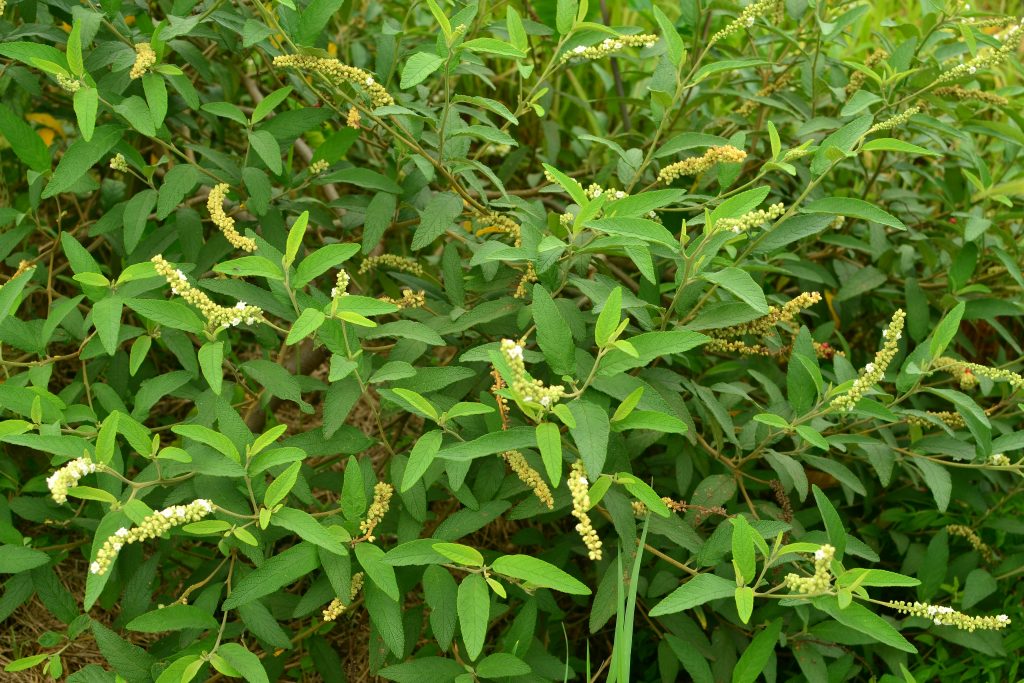
Bouillon Plant (Cordia verbenacea)

Description

Bouillon plant or erva baleeira, Cordia verbenacea, is a perennial herb and potent medicinal plant. This plant seems relatively rare in cultivation and is quite hard to find information on growing, yet there is much literature describing the medicinal properties. Bouillon plant is a small tree, growing up to twelve feet tall and wide. The scent and flavor of the leaves is almost exactly like soup stock, most closely resembling chicken noodle soup, in my opinion. This plant is extremely medicinal; its antibiotic, antifungal, anti-inflammatory, analgesic, antiseptic and diuretic properties are utilized to treat colds, flu, fever and coughs, pneumonia, parasitic diseases and infections, rheumatism and arthritis, insomnia, malaria, skin diseases, ulcers and bleeding, all while promoting muscle relaxation, pain relief, digestion, and overall healing! This plant is used topically and internally in its leafy form, and made into an essential oil to be used medicinally, as well.

Propagation

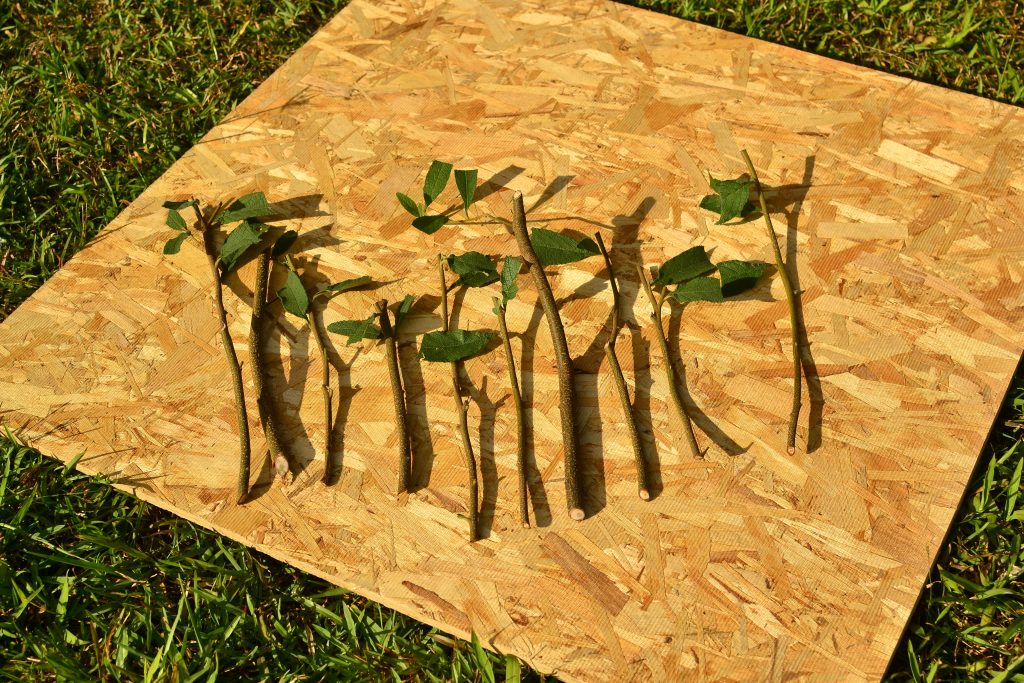
Bouillon plant is easily grown from cuttings. Woody cuttings take more readily than non-woody cuttings.

The plant flowers profusely and sets some small red berries, I have not yet done any experimentation to determine if these seeds are viable or not.

Cuttings ready for planting

Care

Bouillon plant thrives in any location, part shade to full sun. I have started cuttings in pots as well as directly in the soil in a few different places and they’ve all taken off. This plant is very vigorous and is always full of edible leaves. Flowering does not affect the taste of the leaves, so this one can be maintained in a less diligent manner than some other herbs.

Eating

This plant may be eaten raw or cooked. I personally think the leaves are a bit intense raw. We typically take leaves, chop them coarsely and add them early in cooking, right after the onions are sautéed. We cook them with beans and soup quite often; the bouillon plant is actually one of our most used herbs.

Where to obtain planting materials

This seems to be a really rare one. As far as I know, only a handful of people have this plant on the island. It should be more widely grown!

My Garden

I first discovered this plant while visiting and working on a farm in Kohala with a friend. It was planted directly next to the house and when we brushed up against it, I was instantly intrigued. When we asked what the plant was, no one knew. I asked for a cutting to try and propagate, as seeds weren’t on the plant at the time. I started two cuttings and although they both took, I kept them in pots awhile, as I wasn’t sure what the plant was or where I would want to plant it. Those plants eventually rooted into the ground and I decided to pull one up and go plant it out in the field. My friend, who also got a cutting, grew his out a little bit and posted photos in a few online forums, asking for help with identification. We finally got an ID and were able to research and learn a little bit more about it.

I’ve since started eating it regularly, and just a few days before press time, experienced the medicinal properties of it firsthand. I recently got quite a few wasp stings and was very swollen, so I decided to try the plant on my hand, rather than my regular injury go-to (comfrey). I didn’t fully cover my swollen hand with the poultice and after I took off the covering I noticed half of my hand was still swollen and the other half completely normal. At this point, I was convinced of the medicinal properties and covered my hand for one full day; after that, the swelling was gone and my hand was back to normal. Wow, the magical properties of plants! This plant is another amazing addition to anyone’s homestead. The plant fascinates anyone who smells it, and the medicinal properties are on par with comfrey, another magical herb; this one is just a bit more pleasant to consume!

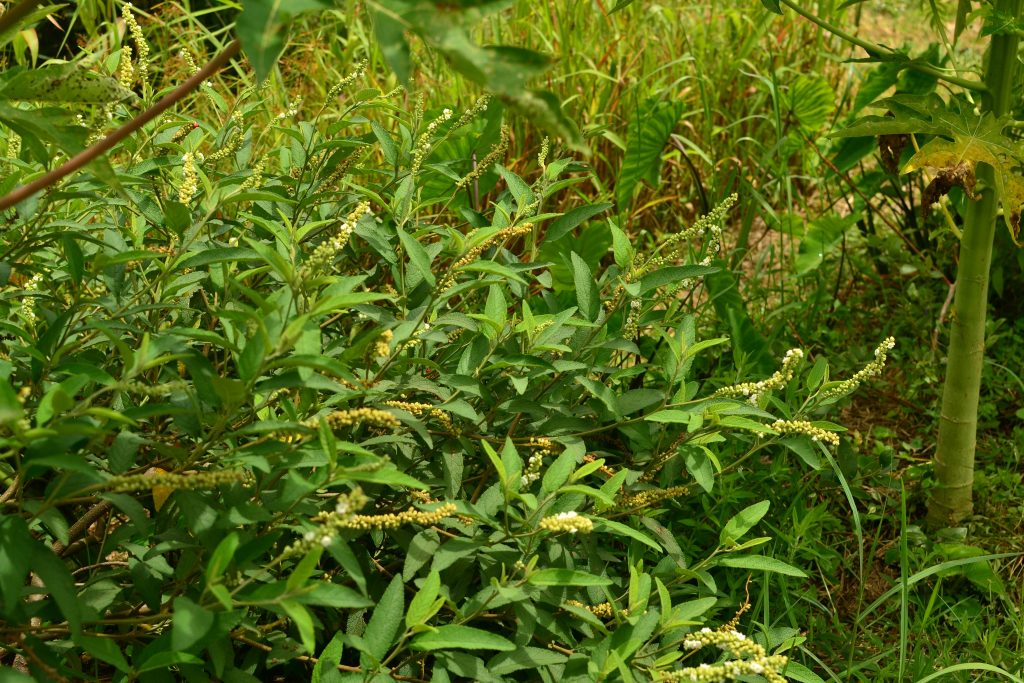
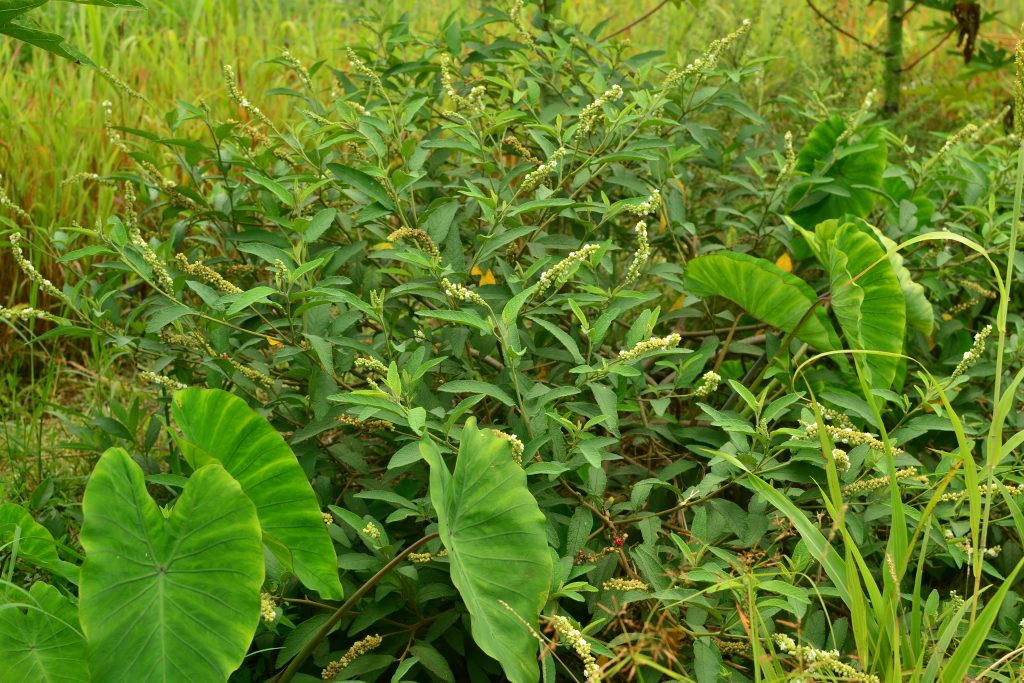
Bouillon plant planted with taro and papaya

Bouillon plant planted with: taro, stick oregano, papaya and tzimbalo

Happy Gardening!

Black Turmeric (Curcuma caesia)

Description

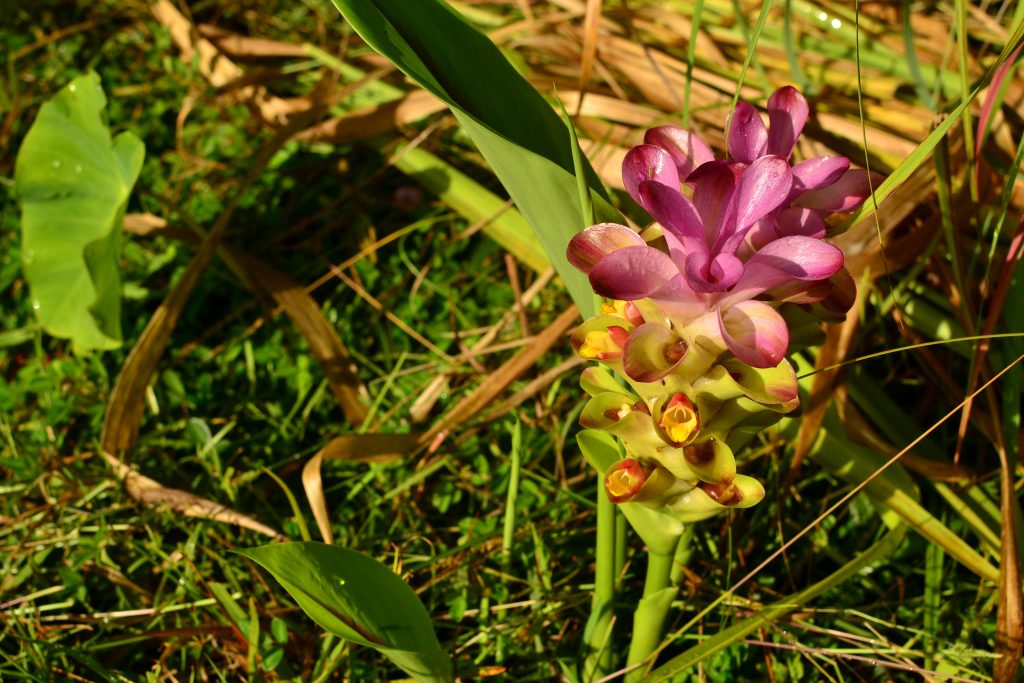
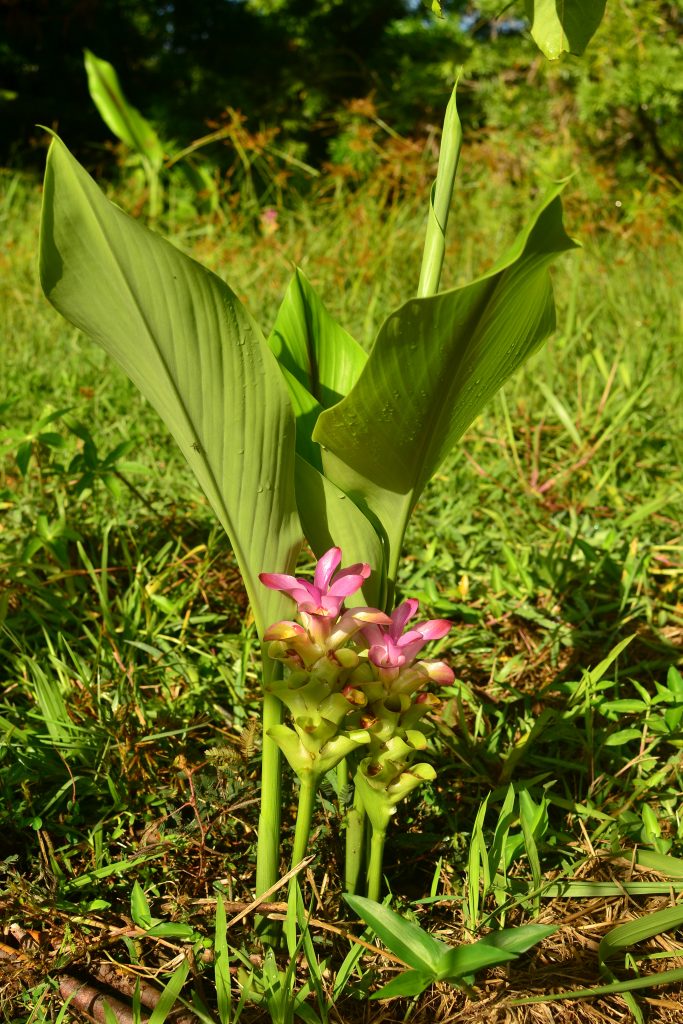
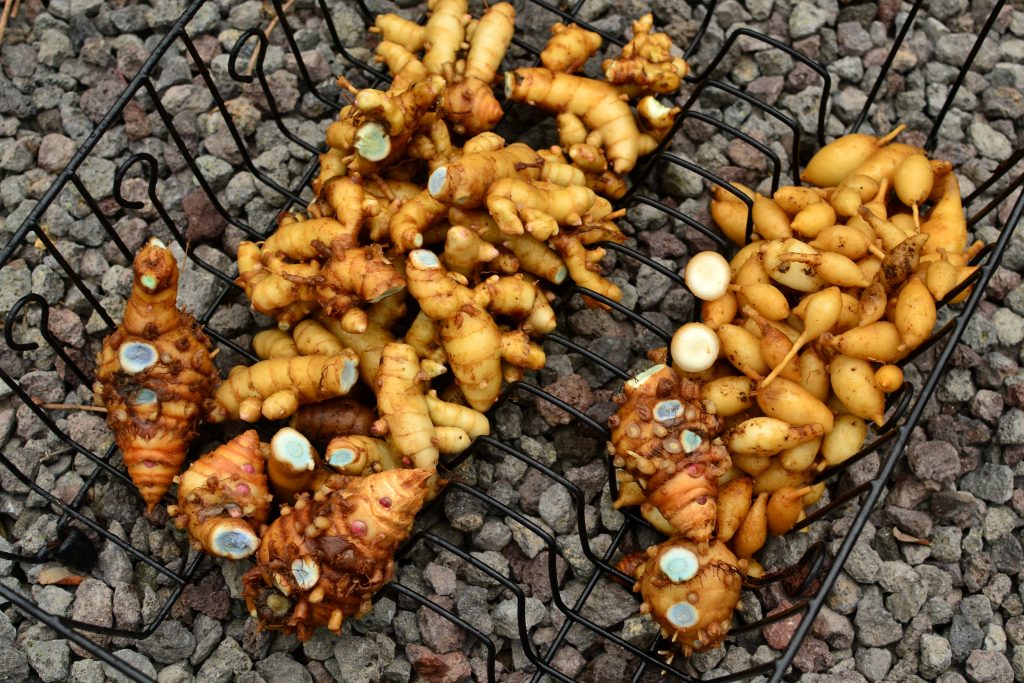
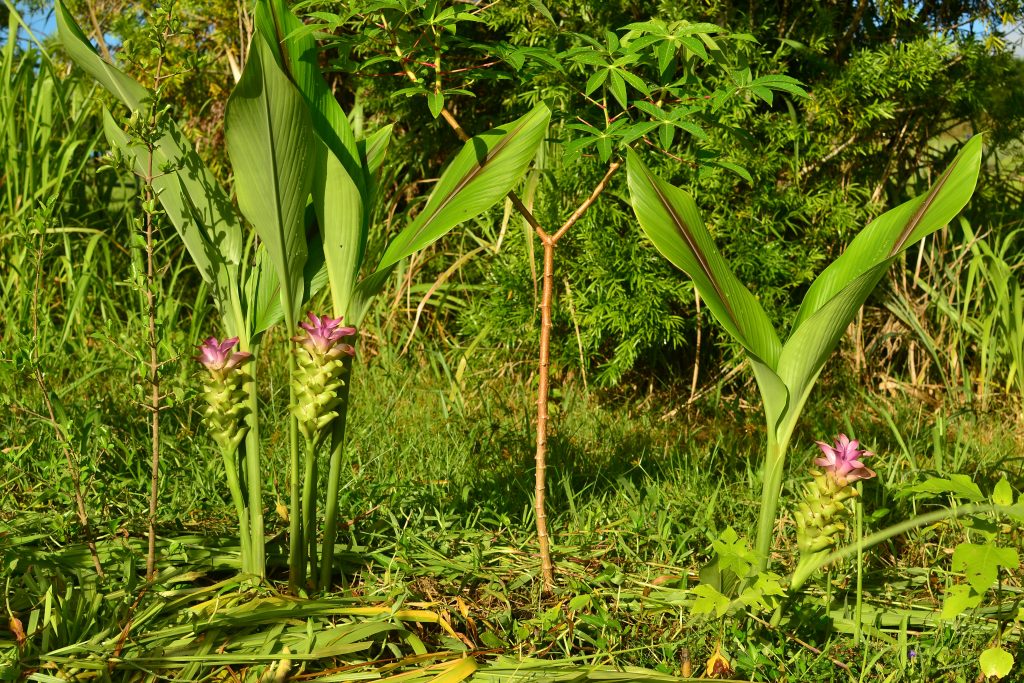
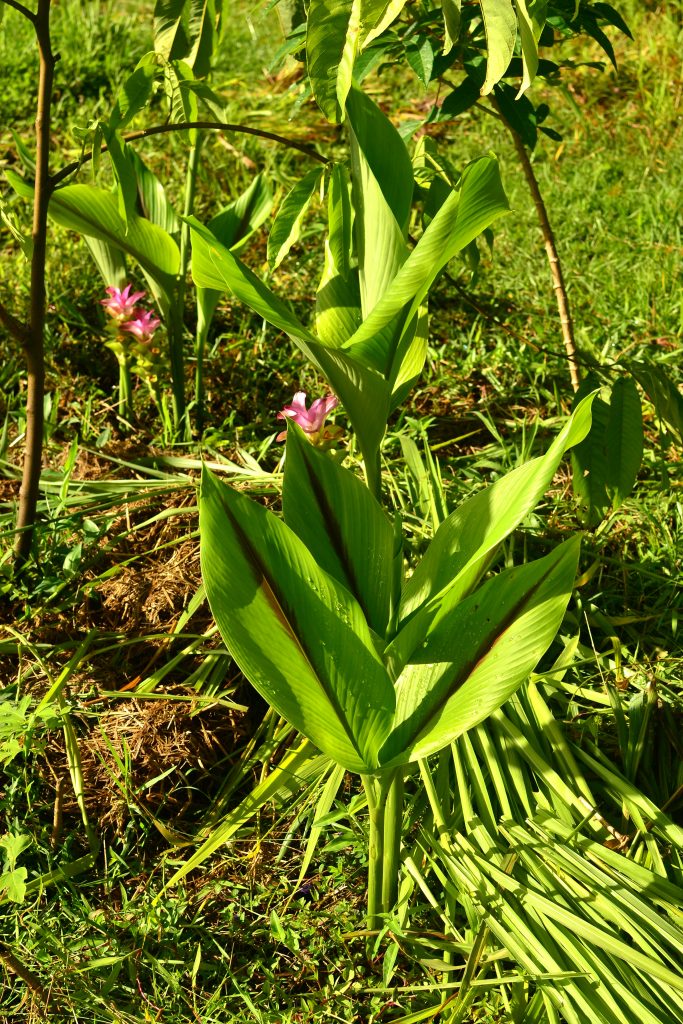
Black Turmeric, Curcuma caesia, is a potent perennial medicinal herb. This plant and its amazing blue-green colored rhizomes have an agreeable odor, but intense flavor, somewhat reminiscent of turpentine. Black turmeric goes dormant during part of the year, reverting to underground storage rhizomes to wait out the winter. Mid-spring, the plant shoots up bright pink and yellow flowers, and leaves up to four feet tall, bearing a red stripe along the midrib, follow a few weeks later. Common medicinal applications include use as an anti-inflammatory, anti-fungal, anti-asthmatic, antioxidant booster that can also soothe gastric issues, relax muscles, ease joint pain, control bleeding, and speed up healing of cuts and wounds. Pretty much a cure all!

Propagation

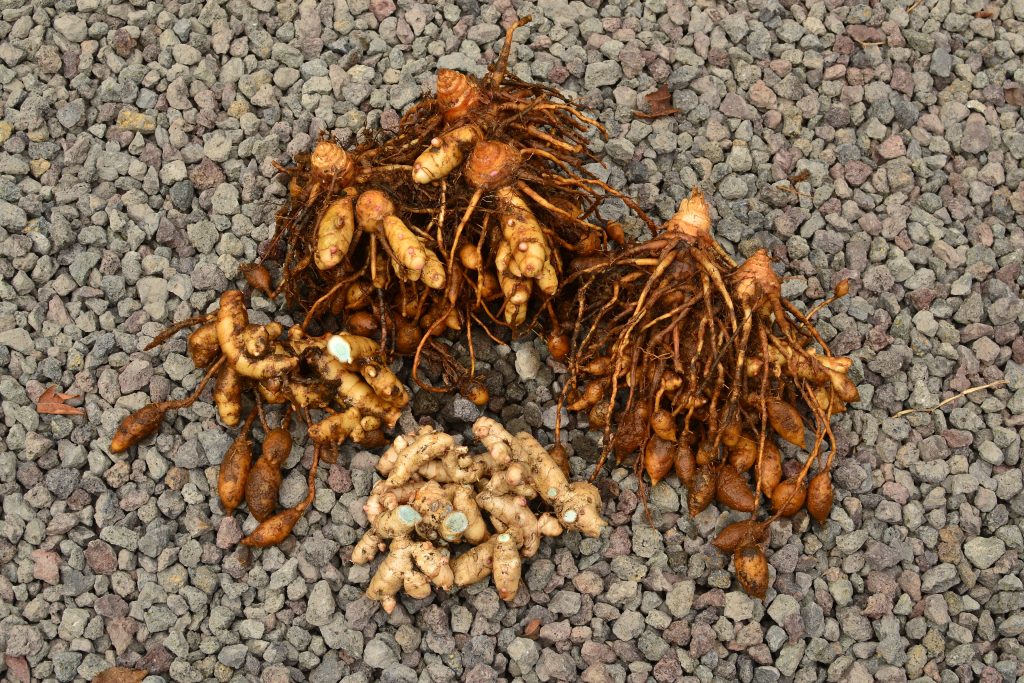
Separate roots into rhizomes, mother rhizomes and storage roots. Typically, turmeric is planted only from the mother rhizomes; the regular rhizomes are sold or used. If you only have access to regular rhizomes or are trying to propagate as many plants as you can, growing from the rhizomes is fine. Break them into sections where you have at least three eyes per rhizome. Plant them into the soil three to four inches deep and await their emergence.

Thus far, I have not figured out what to do with the storage roots; they do not grow, and I haven’t experimented with utilizing them. I usually only use the rhizomes.

Regular Rhizomes on top left. Mother Rhizomes bottom. Storage Roots top right.

Care

Black turmeric is grown exactly the same as regular turmeric. Take a rhizome and stick it in the ground, await its emergence in the spring and then fertilize. Once it goes dormant in the winter (leaves die back completely), dig it up and enjoy its beauty and taste!

Eating

In my opinion, rhizomes are too intense to use for cooking. We do a simple tincture and take a dropper full every night before bed. I’ve heard of people doing honey infusions as well.

To make the tincture, we take freshly washed rhizomes and add them to a food processor to chop finely. We then soak it in Hawaiian Okolehao (moonshine made from Ti leaf and sugarcane) for three to four weeks, agitating/shaking once a day, then strain and jar the liquid.

Where to obtain planting materials

I’ve seen this plant for sale a few times at plant sales, but it still seems to be oddly rare on the Big Island. I think because of its intensity, many people do not know how to use it.

My Garden

I’ve been growing black turmeric for a few years now; it wasn’t until this past year that I started consuming it on a regular basis. Previously, I only grew it as an ornamental because I couldn’t find a way to utilize the rhizomes appropriately. My mom’s co-worker shared with us her recipe for the tincture in exchange for some rhizomes. This simple exchange gave us the potential to utilize this amazingly medicinal plant. I believe the sugarcane in the moonshine smoothes out the intensity of the turmeric flavor, allowing it to be diluted enough to be enjoyable. We haven’t experimented with other alcohols, yet, but I’m already convinced the moonshine is the way to go.

This plant is highly ornamental and thrives without much attention. Everyone should be growing it!

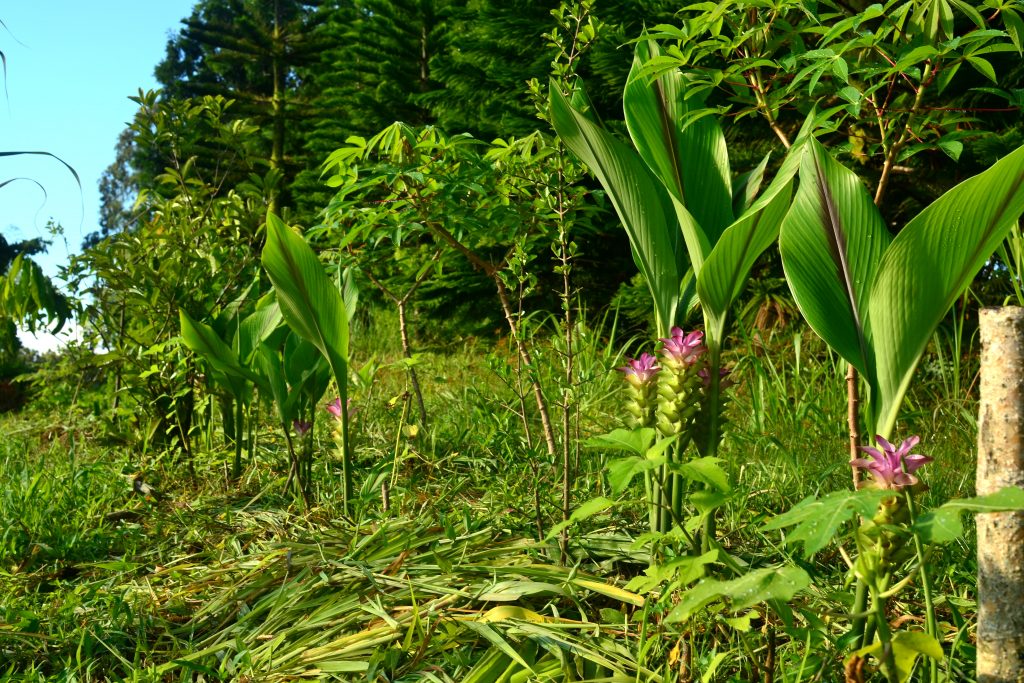
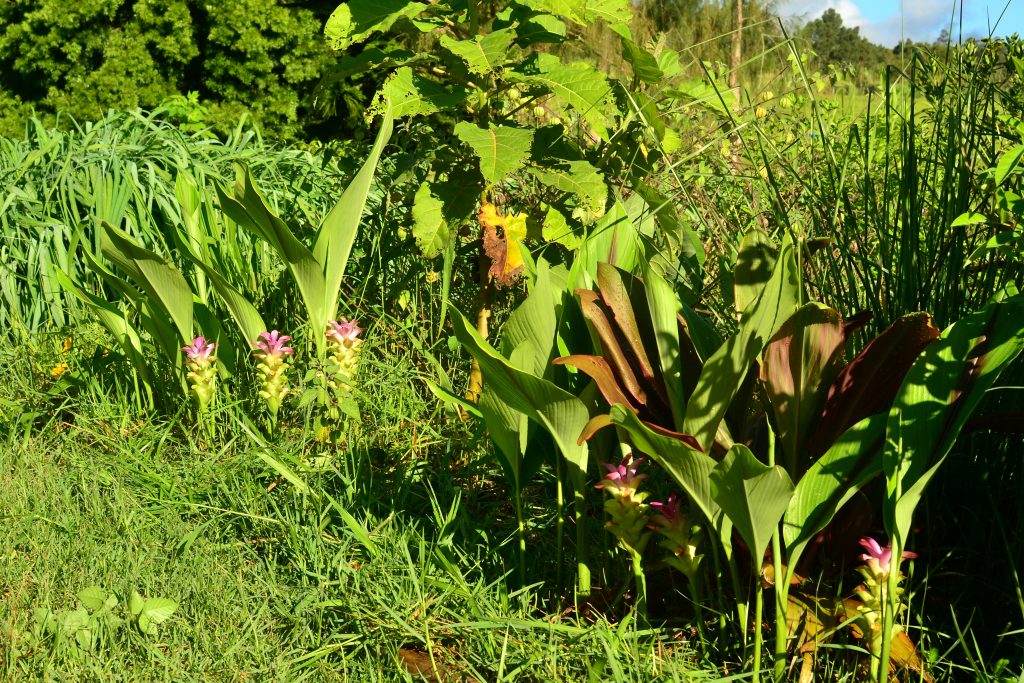
Black Turmeric growing with: Acerola, cassava, mexican sunflower, awapuhi, sugar cane, mocambo, brazilian cherry, rollinia, mulberry, ooray, blackberry jam fruit, Ugni, podocarpus and cook pine.

Black Turmeric growing with: Acerola, cassava, mexican sunflower, awapuhi, sugar cane, mocambo, brazilian cherry, rollinia, mulberry, ooray, blackberry jam fruit, Ugni, podocarpus and cook pine.

Black Turmeric growing with: ti leaf, vetiver, pigeon pea, belembe, triple crown thornless blackberry, culantro, tamarillo, kumquat, poha, bell peppers, and citronella grass

Happy Gardening!

Hawaiian Hot Pepper (Capsicum frutescens)

Description

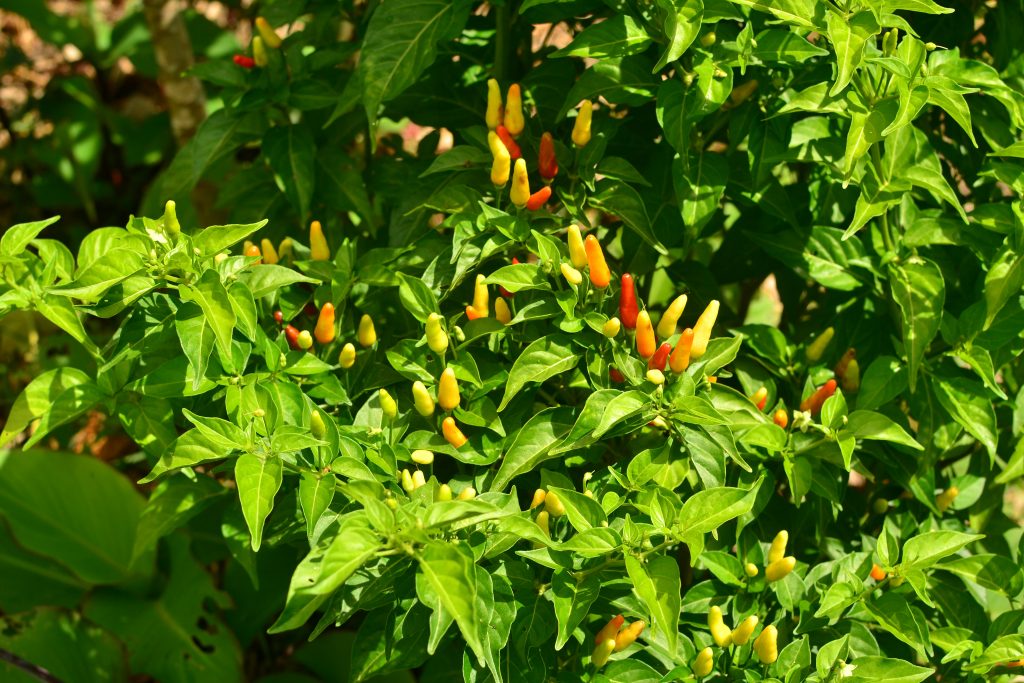
The Hawaiian Hot Pepper, Capsicum frutescens, is the classic local hot pepper. These peppers are quite small, but hold a perfect punch of heat. Plants are prolific five foot tall shrubs that live for two to three years and produce an amazing abundance of fruits. This pepper is most Hawaiian gardeners’ go-to pepper, as it’s always available to quickly grab and add to any dish. Hot peppers are nutritious and good for our general health, due to their antioxidant, anti-inflammatory, and endorphin-releasing properties. This is the pepper added to make “chili peppa watah,” a traditional Hawaiian condiment.

Propagation

Hawaiian Hot Peppers are grown from seed. Simply open up a pepper and scrape out the seeds. Either cover very lightly with potting soil or surface sow. (Check out my seed propagation entry for more info.) Typically, peppers are slow at the start of their life; after a few weeks in the nursery, they start growing rapidly. I usually add five to ten seeds per pot and cull them as they reach two to three inches in height. I leave only one pepper plant per pot and then transplant to the garden after they are about five inches tall. At this stage, plant them in the garden as close to the kitchen as possible.

Care

Once established, these plants are extremely hardy and can pretty much grow on their own. They like as much sun as you can give them, but will do fine with partial sun. Regular harvesting promotes more fruit set, as does regular fertilizing. Fruit flies and/or pepper weevils can be a bit of a problem with peppers; to reduce losses from insects, harvest peppers when turning orange and allow them to sit a day or two to turn red before consumption. (I eat them orange sometimes as well.) They can also be pruned heavily and tend to re-sprout just fine.

Eating

In my opinion, one pepper per person in a meal is the perfect heat level. When I make large batches of salsa, I use two Hawaiian Hots, and one for a small batch.

Where to obtain planting materials

These peppers are regularly sold at nurseries, or you can buy some peppers from the farmers’ market and plant those seeds. Everyone should grow this pepper!

My Garden

I’ve grown Hawaiian Hot Peppers for over four years. This past year, I trialed over twenty different pepper varieties; the Hawaiian Hot still persists as one of my choice peppers, as they seem to be the least affected by fruit flies and almost always have fruit available for consumption. They become strong, sturdy bushes and can hold their own against competing vegetation. I like to keep three or four pepper plants close to the kitchen and have more in other places further away. Peppers are, in fact, one of my most used ingredients in the kitchen. They are so easy to grow, it’s almost insane not to grow them yourself! Peppers are quite ornamental as well, so they add a splash of beauty in any location. Grow them, eat them, and share your overabundance!

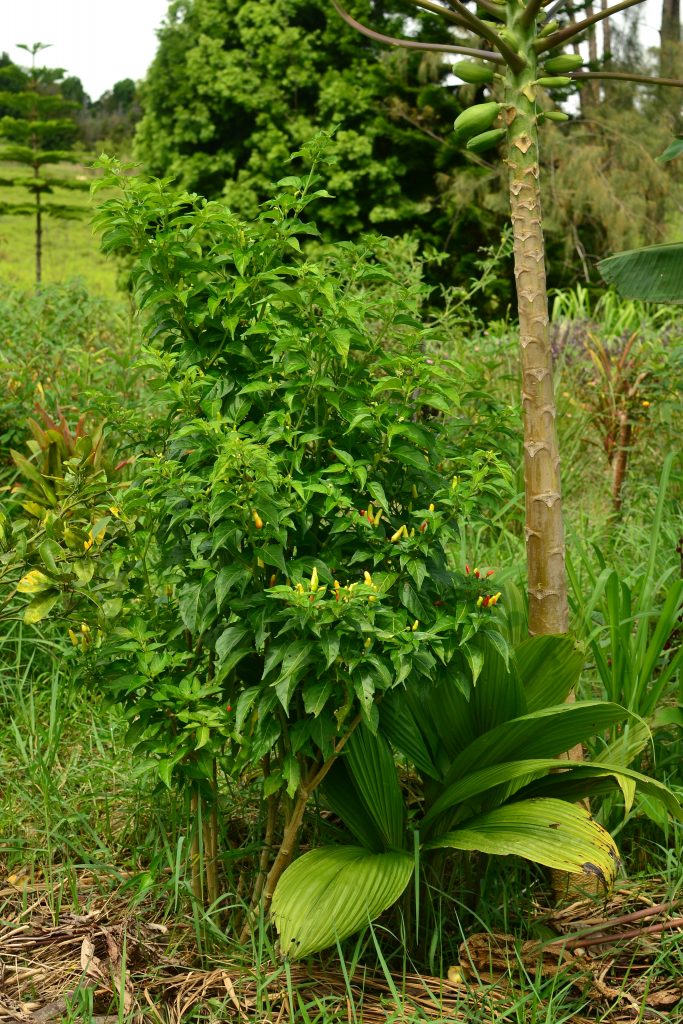
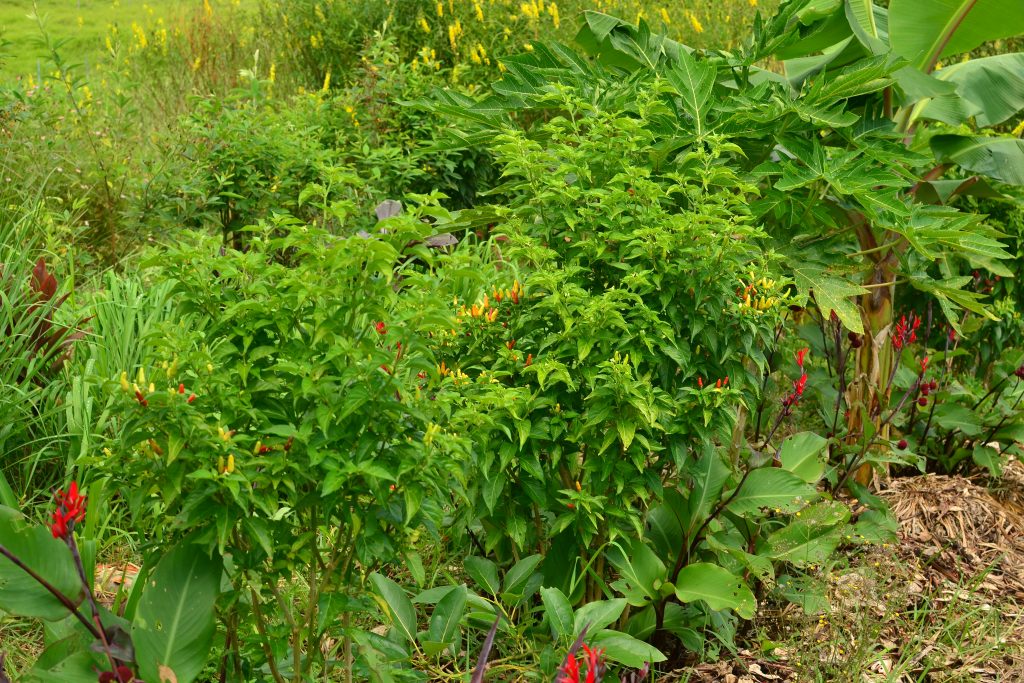
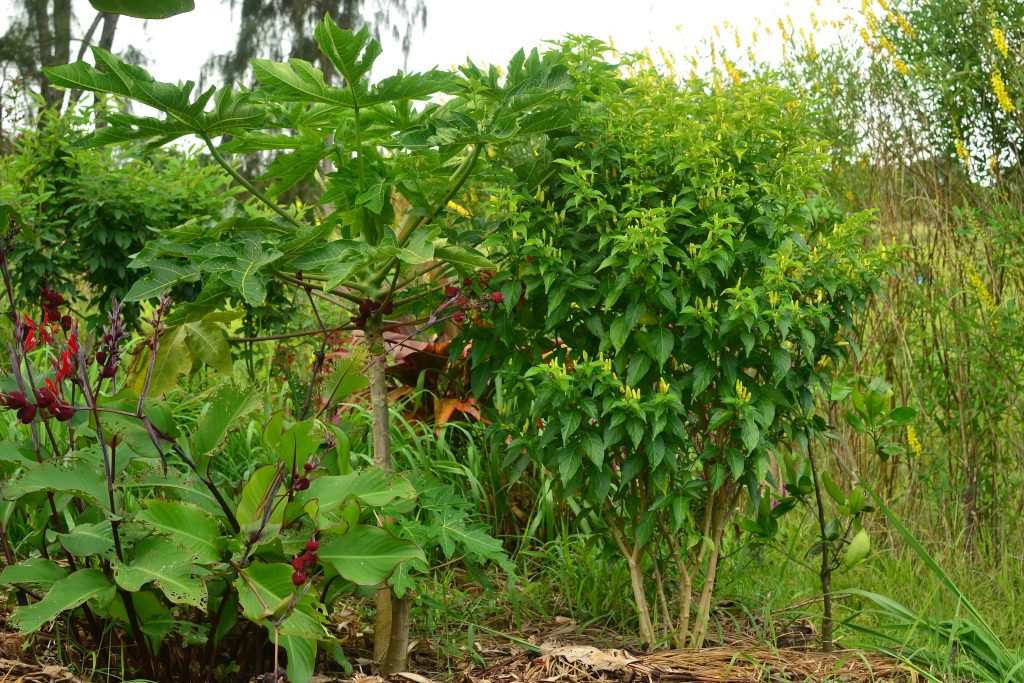
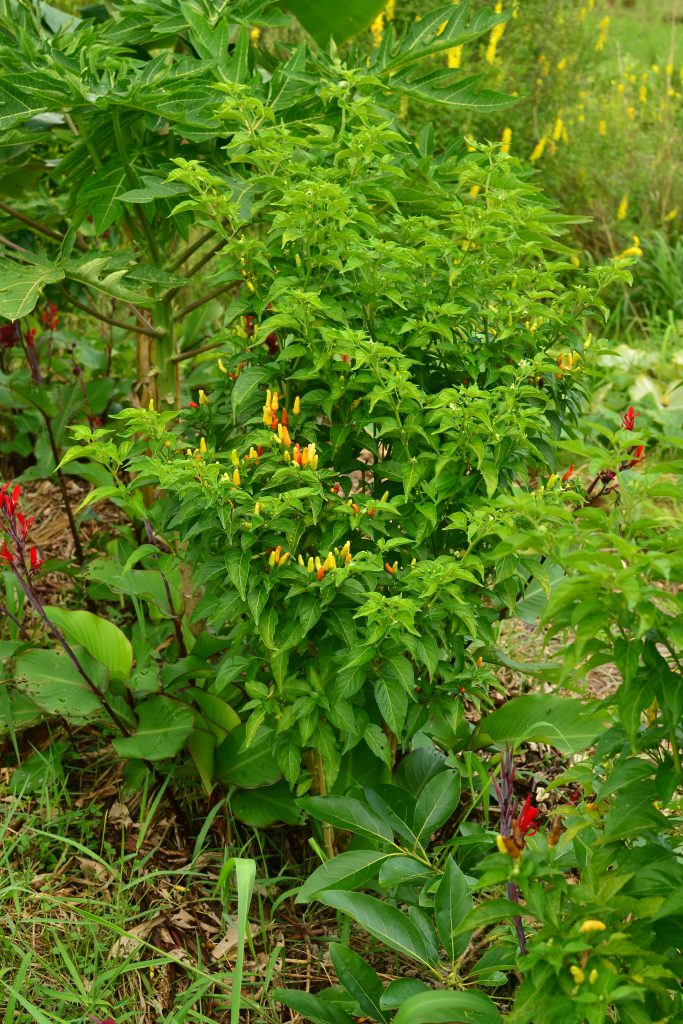
Hawaiian Hot Pepper with: tangerine, avocado, tangelo, dwarf maoli bananas, papaya, canna, bell peppers, lemba, kalo, lemongrass and ti.

Hawaiian Hot Pepper with: tangerine, avocado, tangelo, dwarf maoli bananas, papaya, canna, bell peppers, lemba, kalo, lemongrass and ti.

Hawaiian Hot Pepper with: tangerine, avocado, tangelo, dwarf maoli bananas, papaya, canna, bell peppers, lemba, kalo, lemongrass and ti.

Happy Gardening!

Canna (Canna edulis)

Description

Canna, Canna edulis, also known as Achira and Queensland arrowroot, is a highly productive, hardy, perennial food source. The rhizomes are the main food product, however, immature seeds and young growing shoots may also be harvested for consumption. Canna grows six to eight feet tall and produces abundant flowers and leaves. The rhizomes are high in starch content, yet are easily digestible. This plant is closely related to ornamental canna plants; however, this plant has been domesticated as a food source for its starchy roots for thousands of years. Canna thrives in poor soils and waterlogged conditions and rhizomes can live underground for years without becoming too woody or inedible. This is the perfect sow-it-and-forget-it plant; leave it in the ground and dig as you desire a starchy food in times of need. Not to mention this plant is highly ornamental!

Propagation

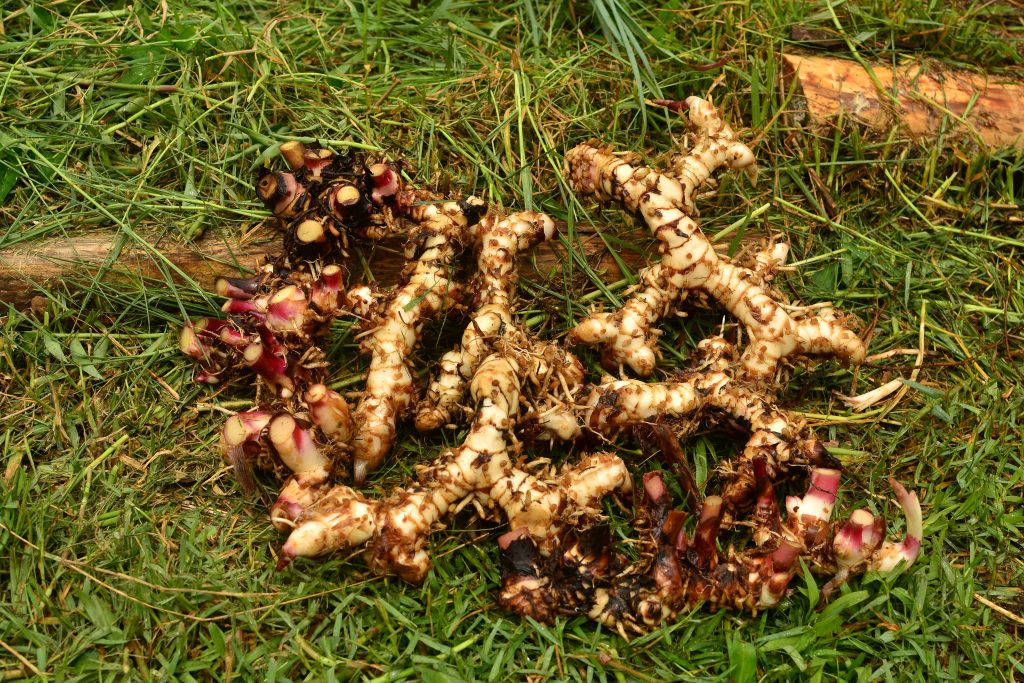
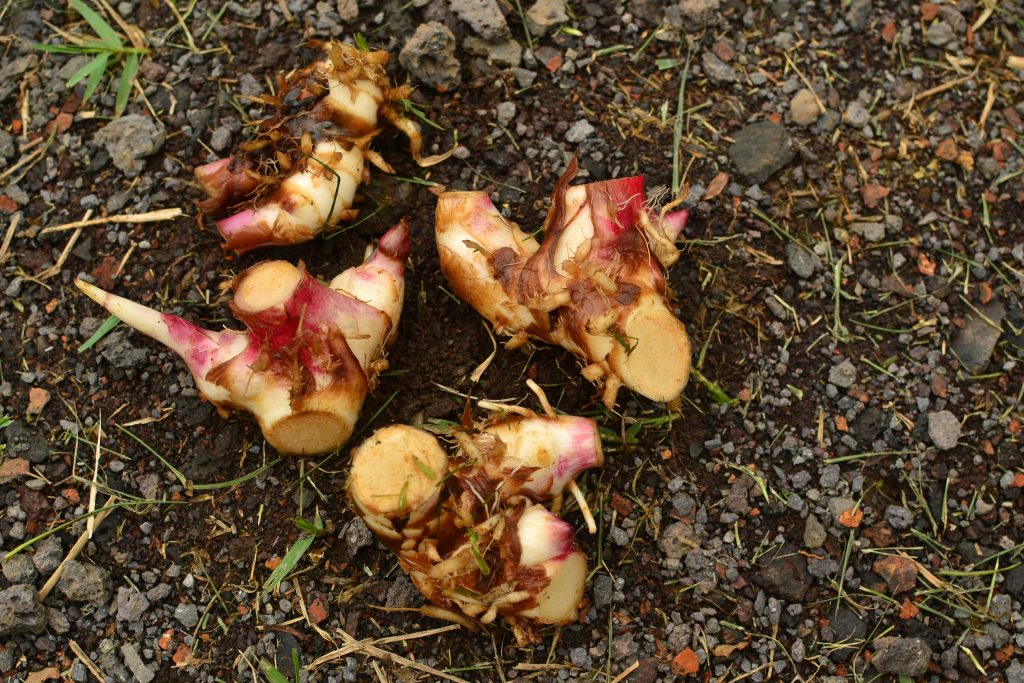
Canna is typically grown from root division: digging and splitting of rhizomes and replanting in new locations. Make sure propagation material has at least two buds for new growth.

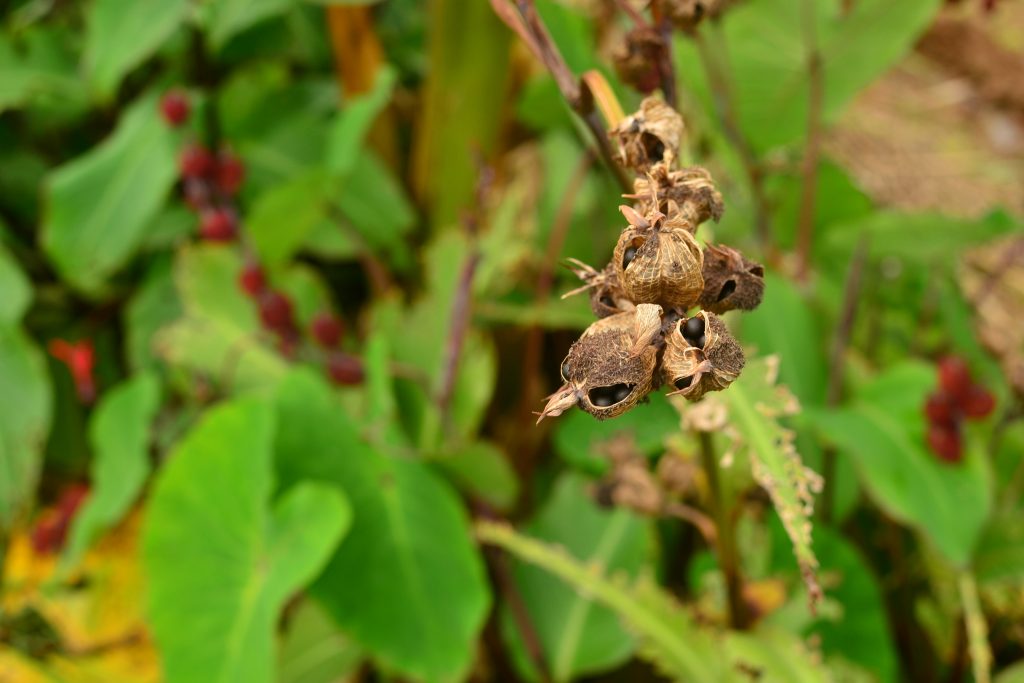
This particular variety does grow true from seed, however, not all varieties do, especially where cross-pollination with ornamental varieties can occur. Scarification is commonly used to speed seed germination.

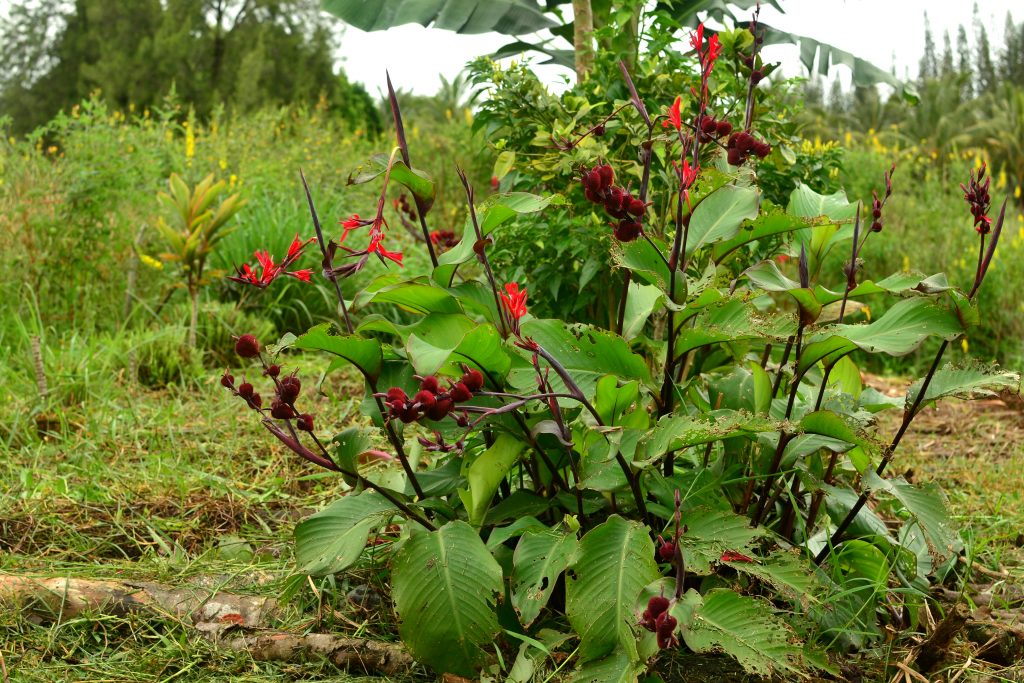
Canna ripe seed pods

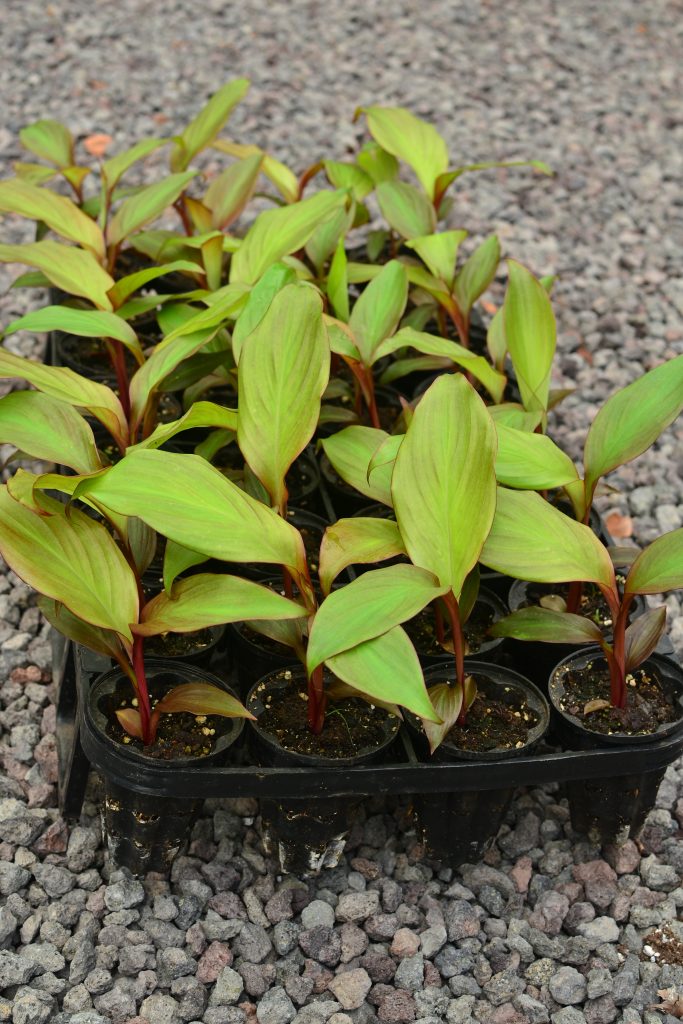
Canna Seedlings

Canna root division propagules

Care

Canna is a carefree plant. It will grow in light shade or full sun. Canna may be used as a mulch source and likes to be regularly pruned to remove exhausted or older growth.

Harvest of rhizomes may begin as early as four months from root division. Ideal harvest time is six to ten months after planting.

Eating

Young tender shoot tips may be consumed as a vegetable.

Rhizomes are cooked and consumed like a potato, typically boiled or baked. A traditional method for preparation is to bake them underground whole for 12 hours, then scoop out the insides and consume. The starch may be extracted to make a flour to use as a thickener. Some Asian cultures even make clear noodles with the flour.

Where to obtain planting materials

I’ve only met one other person growing this plant intentionally on our island. I have seen this plant one other time on a hike to a Puna beach. Besides that, I’ve only seen the ornamental varieties around. Try an internet search, or ask around to see if it’s more commonly grown in your area.

My Garden

I looked for this plant for a long time; I finally stumbled upon it while working at a friend’s farm. He has many varieties of canna growing. One day, I asked him about this one colorful canna plant. He said, “that’s achira from the Andes!” Little did he know I’ve been searching for this particular species for years! He said he only had one plant and I could take some seeds to propagate it. Luckily, it was in a lone location in his agroforest so it wasn’t cross-pollinated with any other species. I took my few seeds and started a tray of them. Within a few weeks’ time, I had 32 little keiki awaiting a spot in the ground! I eagerly planted them out at two different sites and feeling the need to spread these hard to find genetics I gave some away to some trusted gardener friends. At this point, I’ve collected so many of the seeds from my plants that I don’t even know what to do with them! I will continue to plant them throughout my agroforest in the wettest locations where some other plants don’t want to grow so I can create patches of food insurance for later. My friend’s farm is located in a fairly dry environment; once I took those seeds and planted them in a wet location, they became extremely prolific!

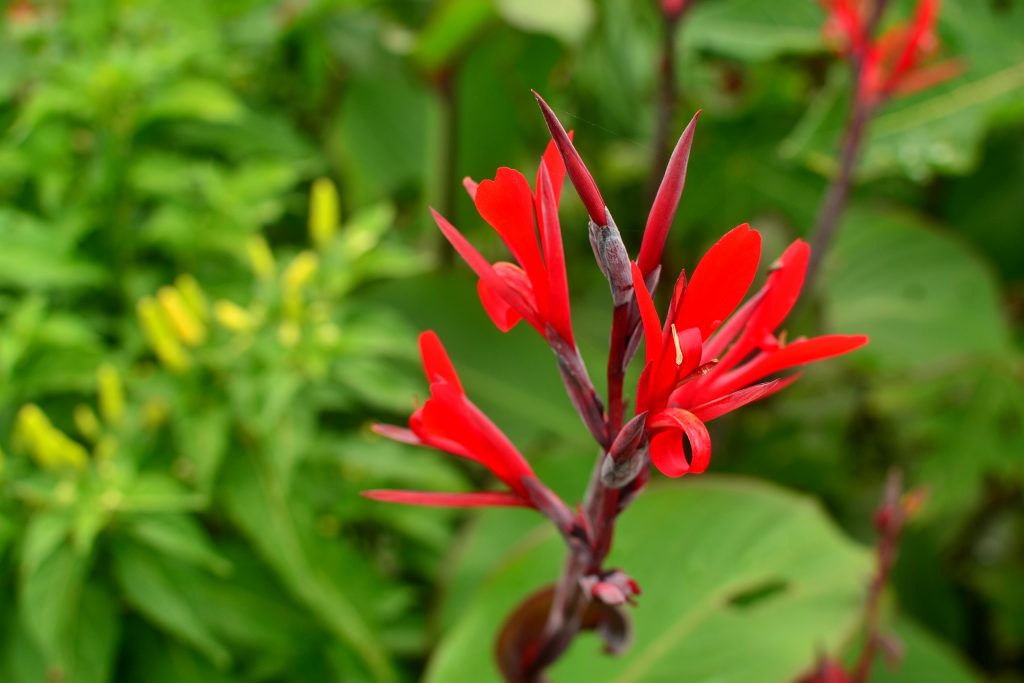
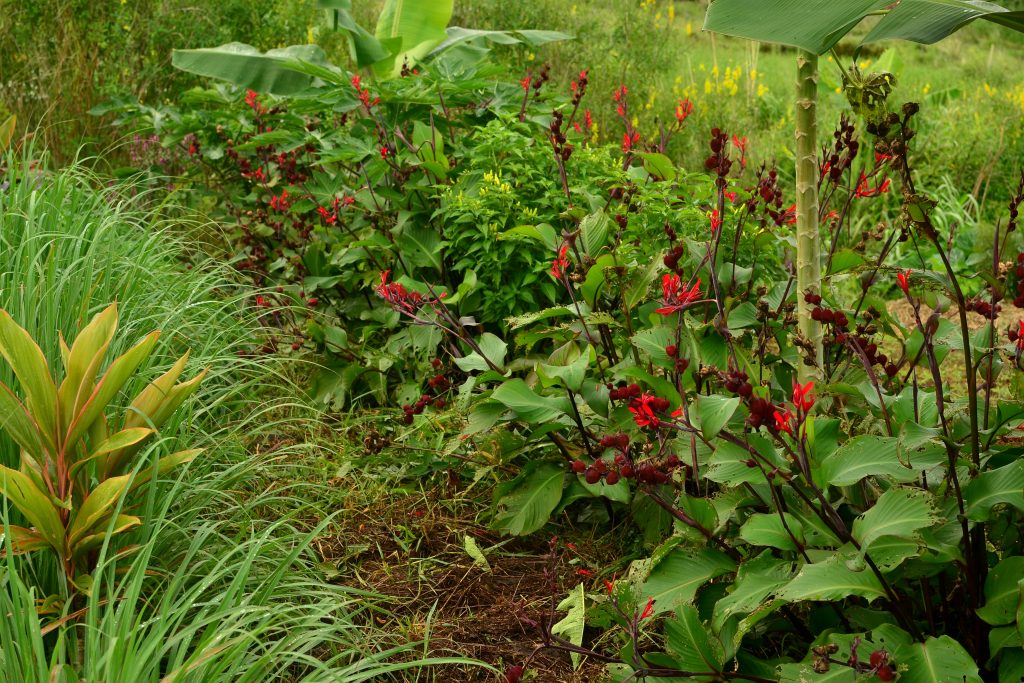
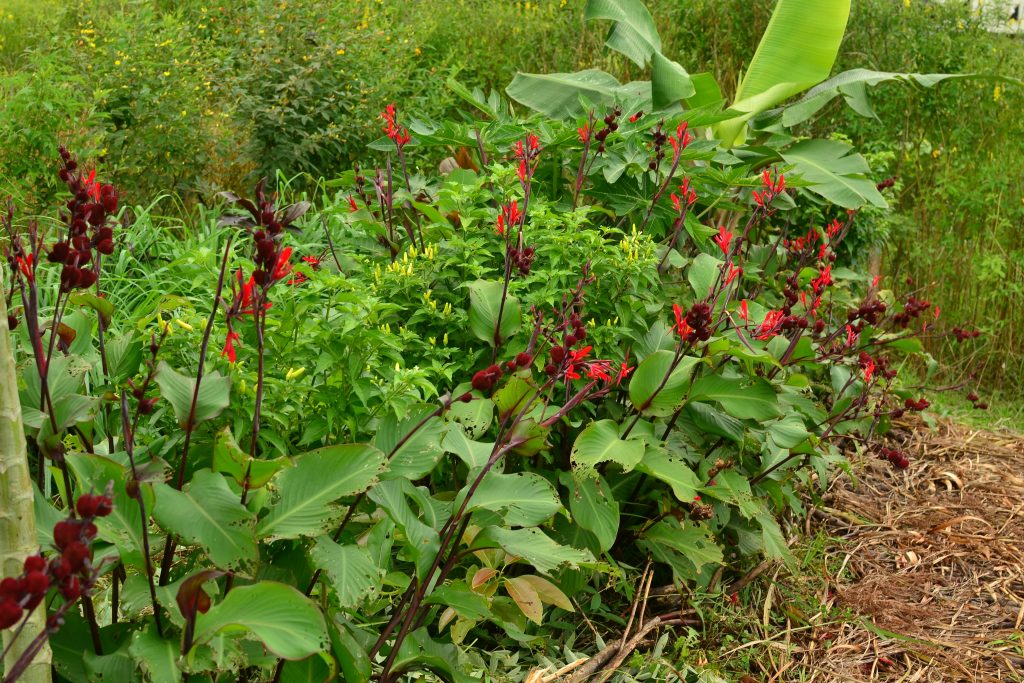
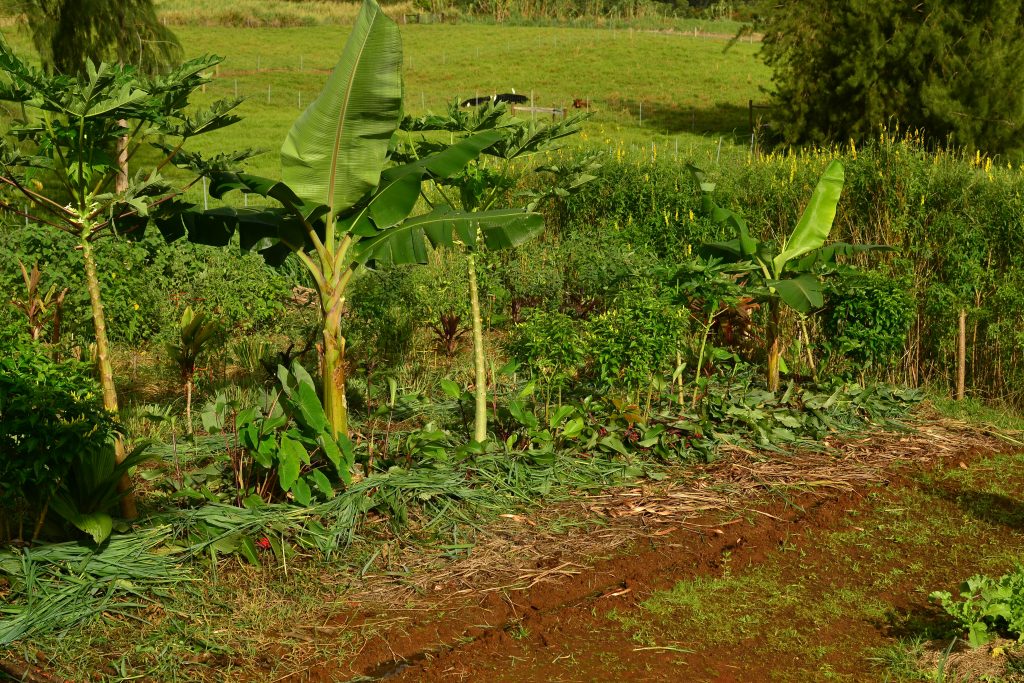
Canna with: tangerine, avocado, tangelo, dwarf maoli bananas, papaya, hawaiian hot peppers, bell peppers, lemba, kalo, lemongrass and ti.

Before pruning and mulching.

After pruning and mulching.

Happy Gardening!

Winter Squash (Cucurbita spp.)

Description

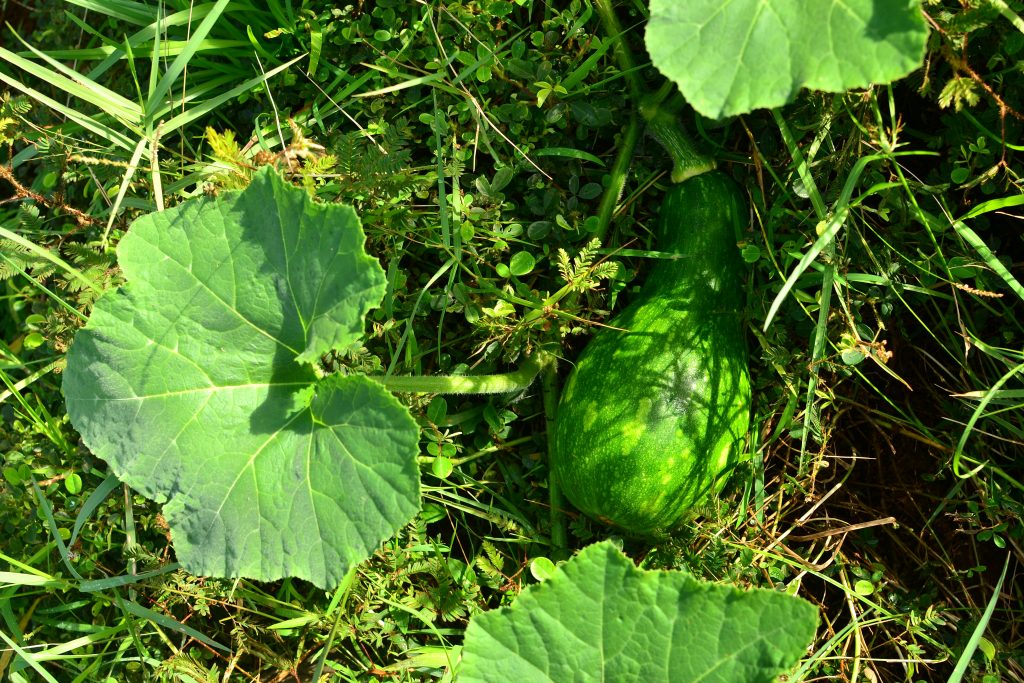
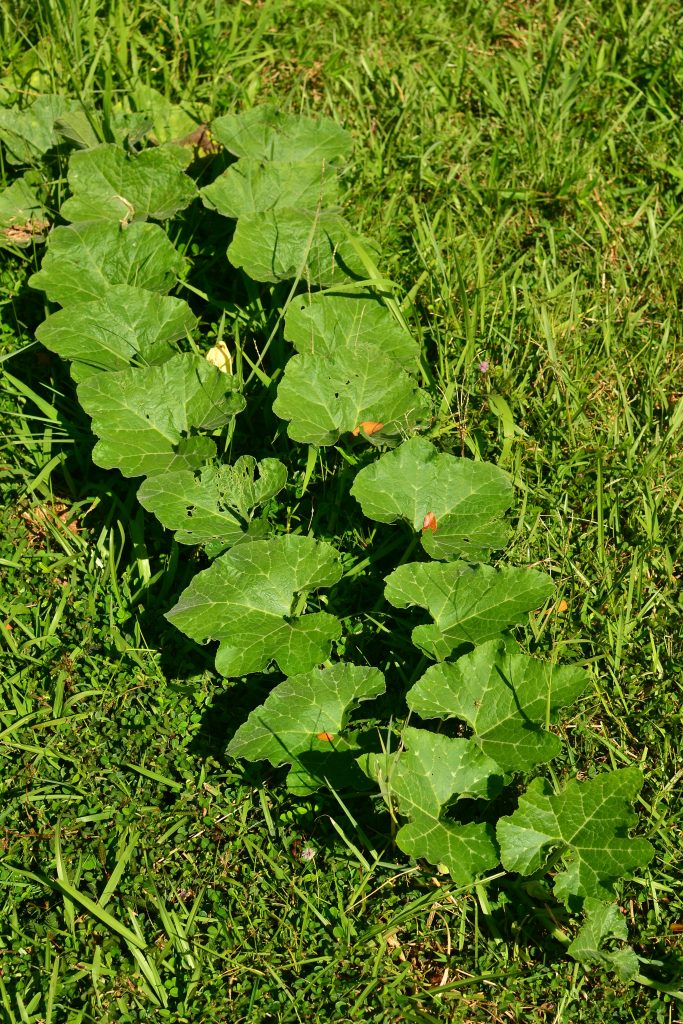
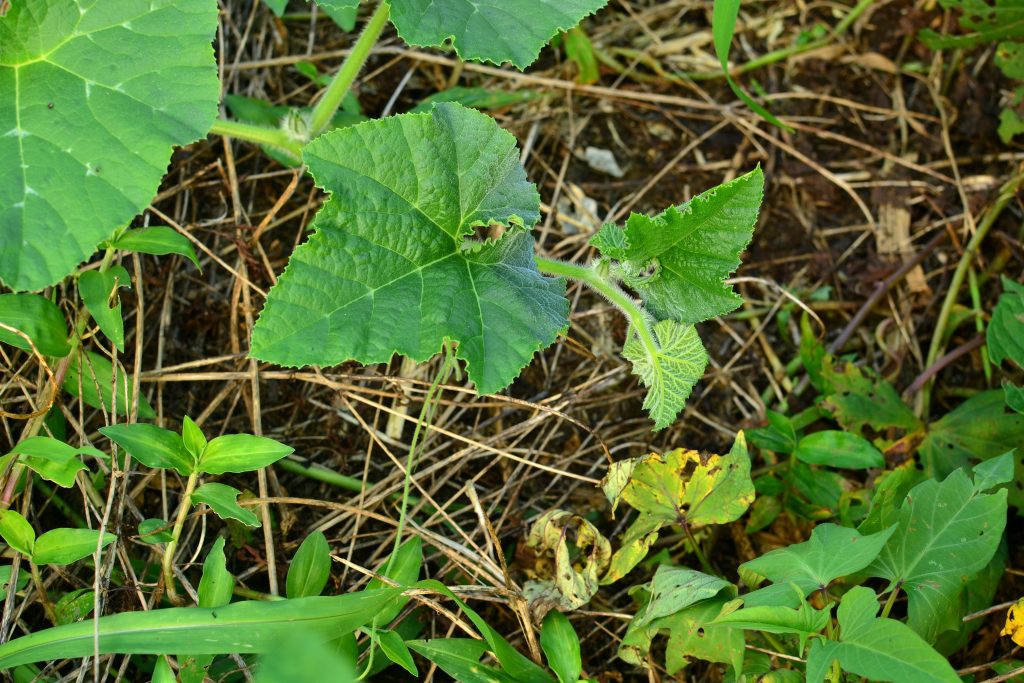
Winter squash is an amazing, long-lived, productive, nutrient dense food source. Winter squash is a broad-term descriptive regarding the hardness of the fruit skin, indicating that it may be stored for long periods of time. For a tropical climate, Cucurbita moschata and Cucurbita maxima are the preferred growing species due to their vigor and hardiness to pests. These squash are sprawlers; vines can grow over 30 feet long. Tendrils provide an ability to climb if allowed, and vines typically produce a good amount of biomass in the form of large, broad leaves to outcompete unwanted plants. There are many varieties, colors, shapes and sizes of fruits. I’ve grown fruits as small as a pound and as large as twelve pounds. The immature fruits, young tender growing tips, seeds and the flowers of the plant are also edible. Fully mature fruits will last a few months in storage. These plants are vigorous and tasty!

Propagation

Winter squash is typically grown from seed. Open a ripe fruit and put the seeds into the ground, preferably direct sown in the place where you want it to grow.

Cuttings with three nodes and a small leaf are sometimes also used for propagation.

Care

Heavily amend the site you wish to grow the squash. Add as much manure, compost, fertilizer and mulch as you can before planting seeds. Squash are very hungry. The more food you supply to them at the time of planting, the more vigorous they will be. (Most literature I’ve read says there is no need to feed them while growing, just at the time of planting). Squash vines are happiest in full sun or light shade. Allow a large space to sprawl, or manage weekly and aim into desired areas. I’ve even seen squash growing extremely well climbing to the top canopy of citrus trees and producing large squash dangling in the air!!!

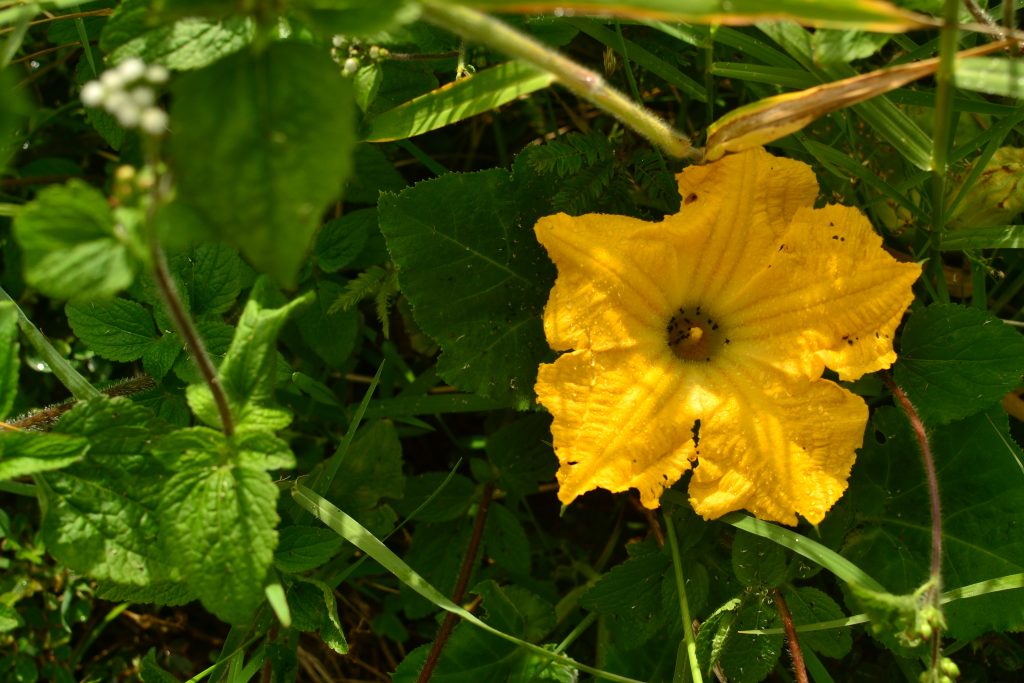
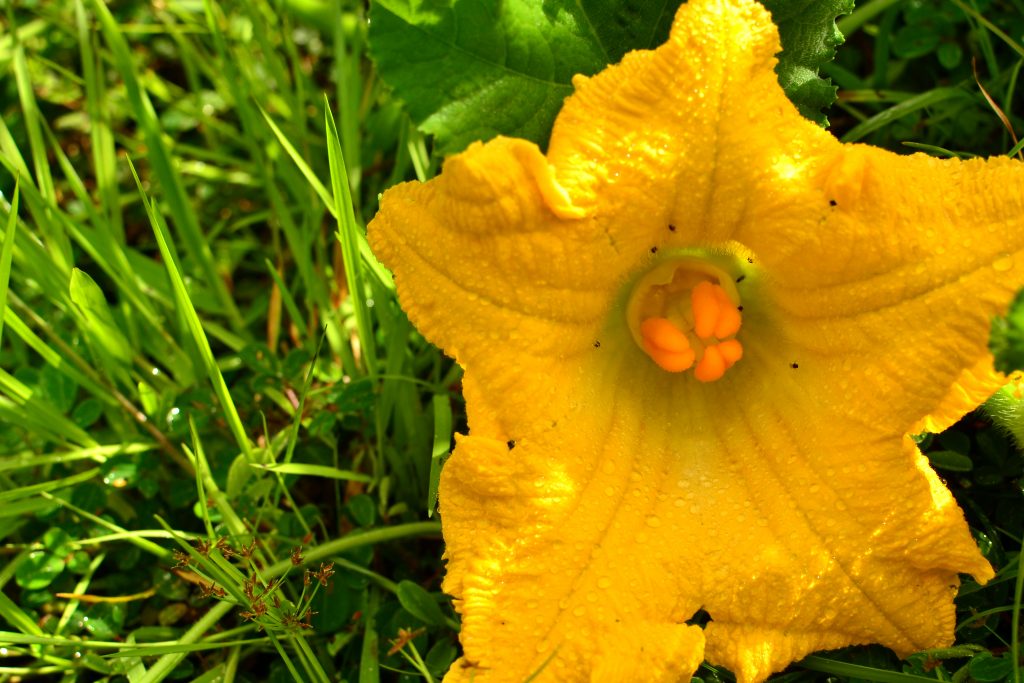
Male and female flowers are separate, but on the same plant (monoecious). Male flowers typically bloom alone for the first few weeks, and then female flowers emerge. A lot of the time, regular garden pollinators will pollinate the flowers; however, hand pollinating increases the chances of fruit set.

Usually vines tend to produce one squash at a time, unless they root at another node along their vine, which allows them to tap into more nutrients and sustain more fruits.

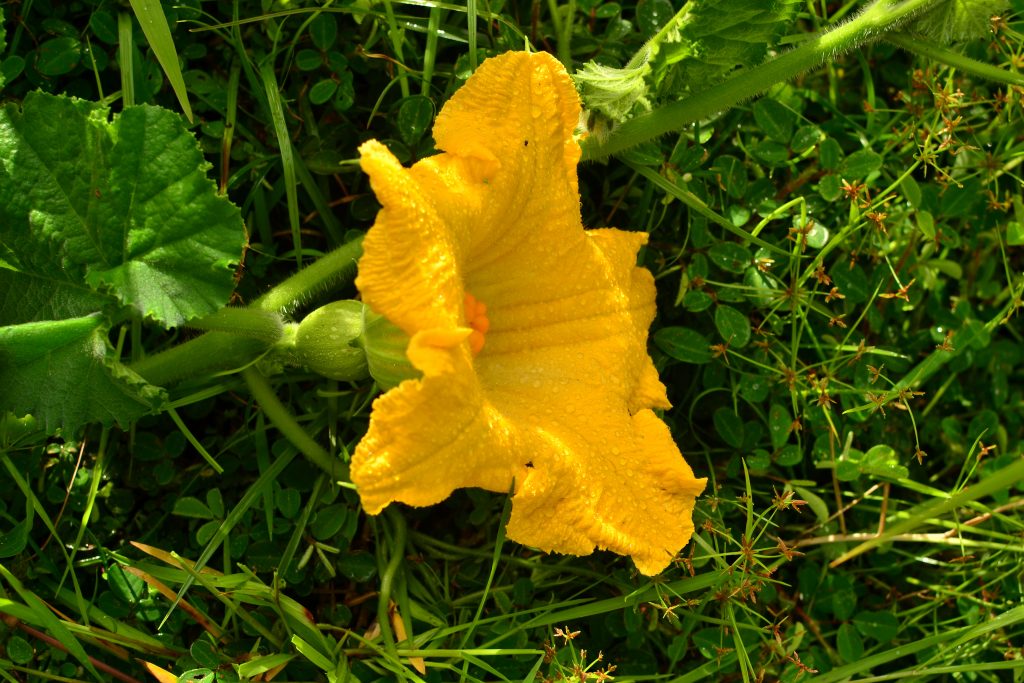
Male Flower

Female Flower

Female Flower. Notice the tiny unpollinated fruit attached to base of flower

Eating

Flowers and vine tips are edible; they should be picked early when very tender.

Immature fruit is best picked after the flower has fallen off.

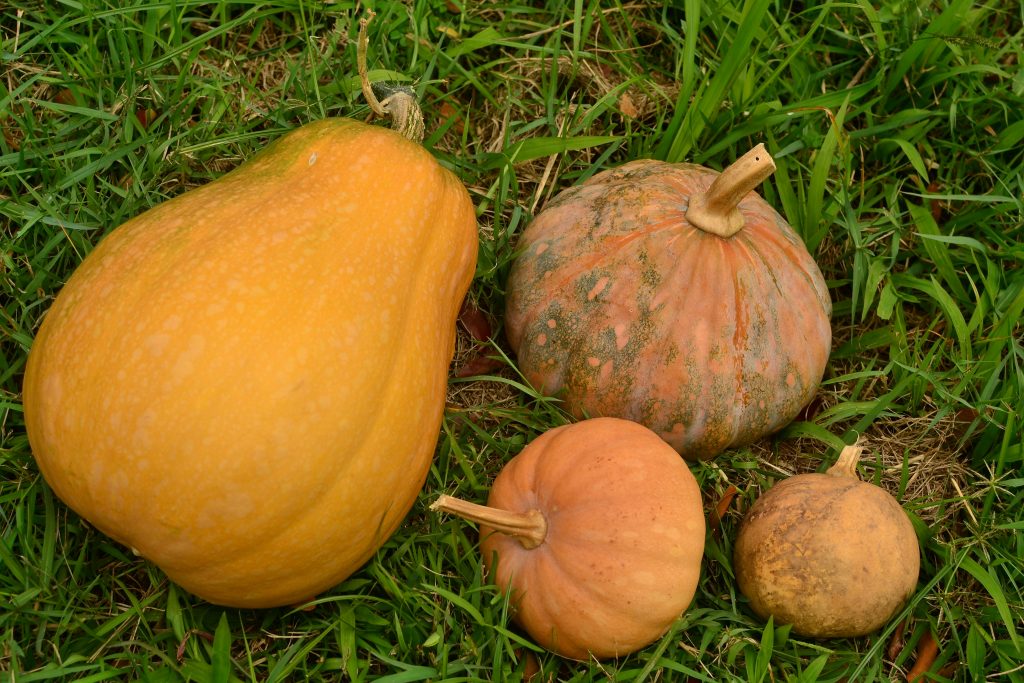
The tendril closest to a fruit will brown when the fruit is mature and ripe. Usually the squash will change color and turn from a greenish to a yellow-tan color. Ripe fruits may be eaten with or without skin, and cooked by baking, roasting, boiling, steamed, or sauté.

Seeds may be cooked, or made into an oil extraction.

Tender vine tips ready for eating

Where to obtain planting materials

For the best locally-adapted genetics, it is most appropriate to collect fruits for eating from the local farmers’ market. A lot of time, most squash the vendors sell is homegrown by that vendor; you should ask if that’s the case. Then go home, cut it up, save the seeds, eat the food. If it is delicious (usually most are!), then plant those seeds. You may never be able to identify the squash itself, unless the vendor tells you the variety, but you will have good genetics.

Alternately, buy a seed pack from a seed company. But understand, it will potentially be less productive and more susceptible to various tropical pests. Remember to stick to the preferred species.

My Garden

Besides these past few months, I’ve had pretty limited success with growing winter squash. The majority of my previous fruits came from volunteer vines from my compost piles; anywhere I intentionally planted seeds, the keiki never got vigorous. First, it was the slugs/snails eating all the new growth, then the caterpillars boring into the immature fruits before fruit set, then the lack of sunlight, and finally, the lack of pollinators. The simplest solution for all these issues is adding more fertilizer; the more vigorous the plant, the more likely it is to put off more flowers to be potentially pollinated. I now have squash growing in a few different areas, and as I do my rounds, I regularly see little fruits growing! This is an incredible food source that basically maintains itself once it is going strong. More winter squash is the answer to a self-sufficient lifestyle.

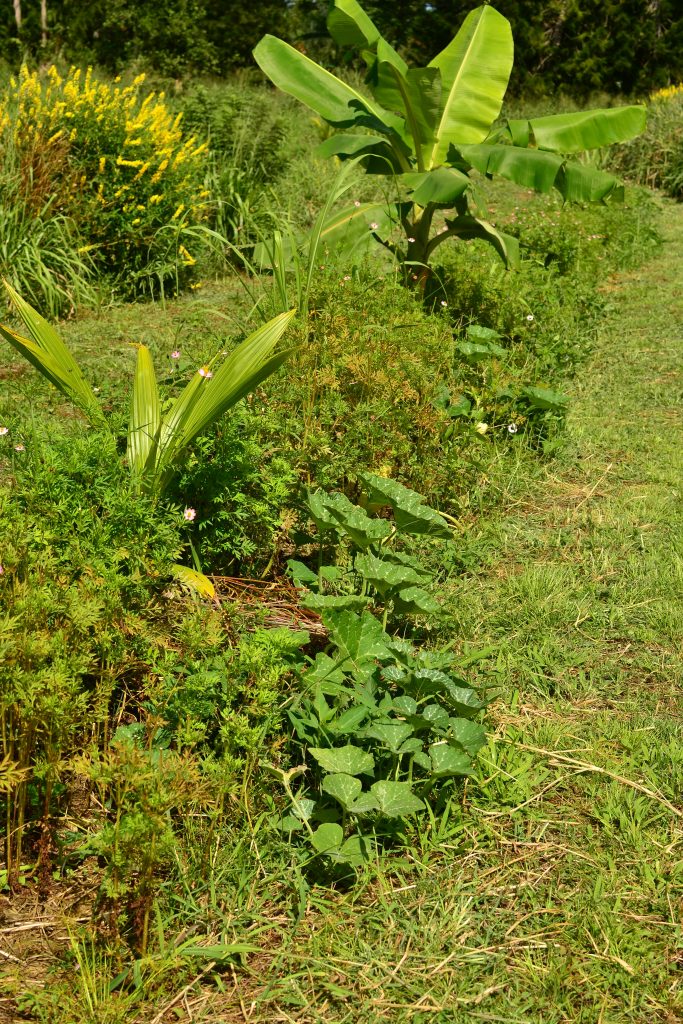
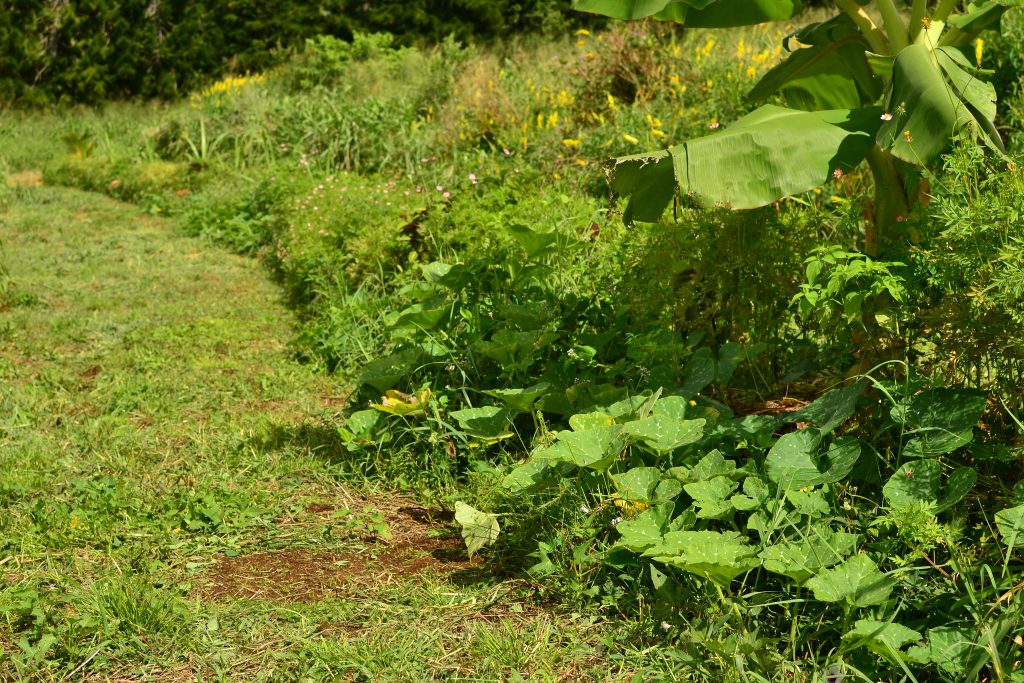
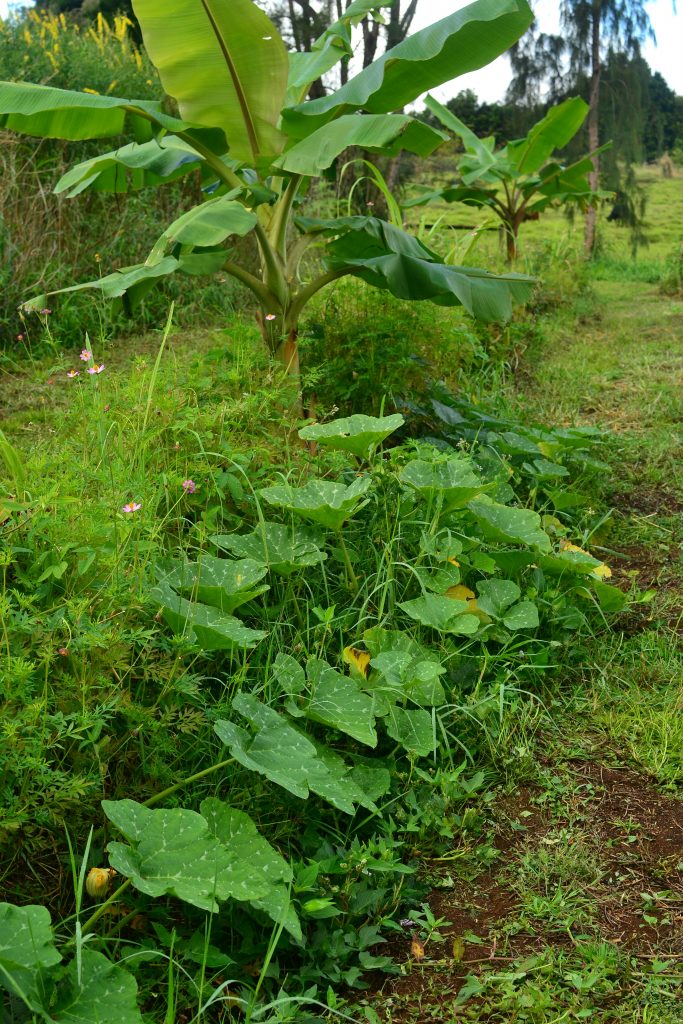
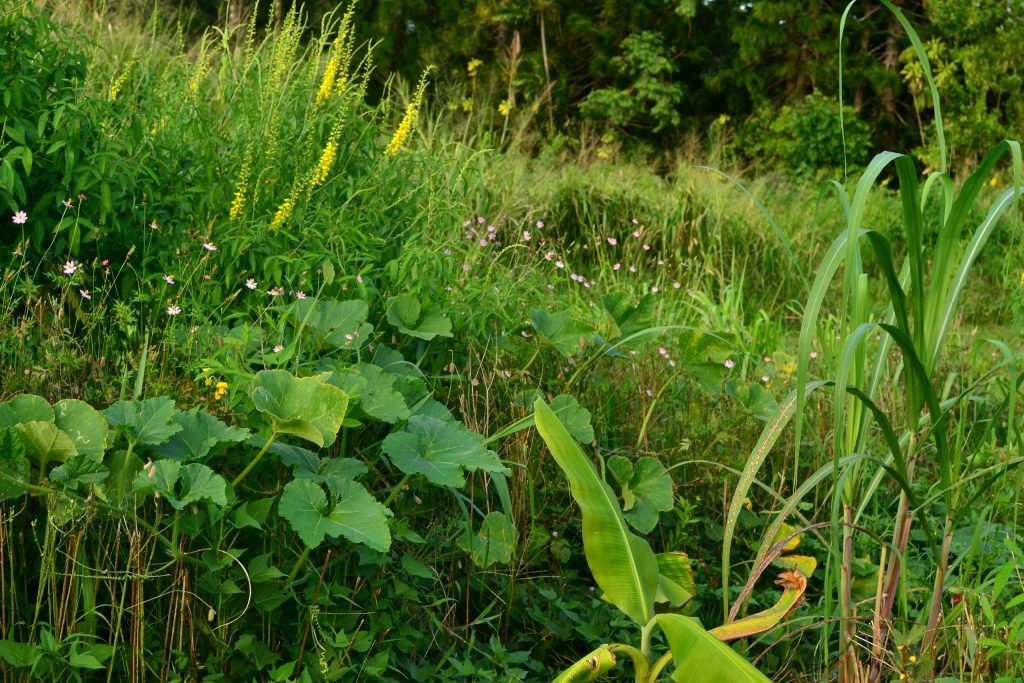
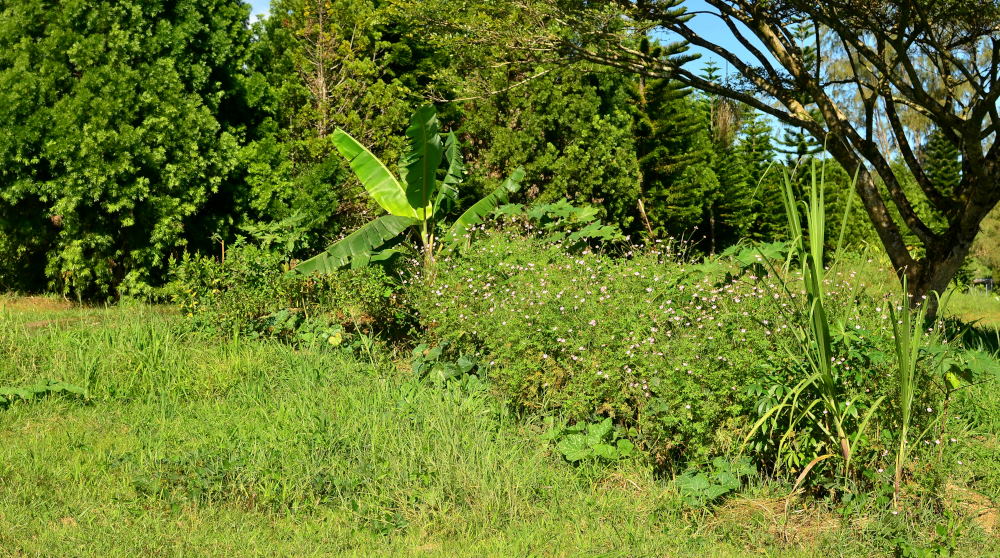
Squash grown with: coconut, banana, sugarcane, cosmos, blue basil, bush basil, edible hibiscus, Plectranthus barbatus, and coleus

Squash grown with: coconut, banana, sugarcane, cosmos, blue basil, bush basil, edible hibiscus, Plectranthus barbatus, and coleus

Squash grown with: coconut, banana, sugarcane, cosmos, blue basil, bush basil, edible hibiscus, Plectranthus barbatus, and coleus

Squash grown with: banana, sugarcane, hot peppers, chico sapodilla, papaya, sweet potato, crotalaria, and cosmos

Squash with: Thai Basil, Catnip, Amorphophallus konjac, Shallots, Tithonia rotundifolia, Ginger, Boesenbergia rotunda, Sesbania javanica, Pigeon Pea, ele ele banana, Broadleaf Papaya, Cosmos, Sugar Cane, Kava, Kalo, Jobs Tears, Cassava, Alternanthera dentata

Happy Gardening!